Takeoff steps
-7-
1.Open the mobile phone holder
on the remote control.
2.Install the mobile phone on the
mobile phone holder.
Introduction of mobile
phone installation
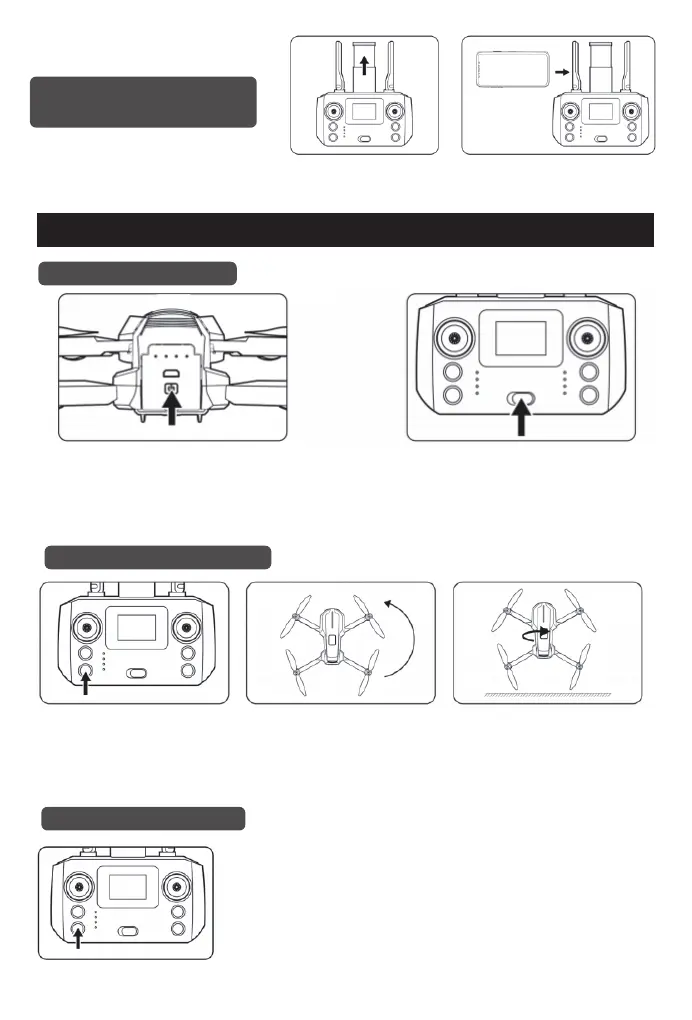
Step 1: Frequency pairing
Step 2: Geomagnetic calibration
Step 3: Gyroscope calibration
Load the batteries into the drone, and long
press the drone switch until the indicator light
of the drone is on and the self-test music is
playing, which means the drone is
successfully turned on.
Long press the "Geomagnetic
calibration" button, the remote control
will make a "di" sound, and the four
lights in front and rear of the drone
will flash quickly.
Short press the "Gyroscope calibration" button and the remote control will
make a "di" sound. The front light of the drone is always on, and the rear
light is flashing slowly, which means the gyroscope calibration is
successful.
Hold the drone horizontally and rotate
it clockwise three times until the
remote control makes a "di" sound.
Hold the drone vertically and rotate it
clockwise three times until the remote
control makes a "di" sound. The front
green light is always on, and the rear
red light is flashing, which means the
geomagnetic calibration is
successful.
Turn on the switch of the remote control, you
will hear a "di" sound, then the indicator light
of the remote control will be always on. The
front light of the drone will be on, and the rear
light will flash slowly. At this time, the
frequency pairing is successful.
 Loading...