User’s Manual
INSTALLATION INSTRUCTIONS
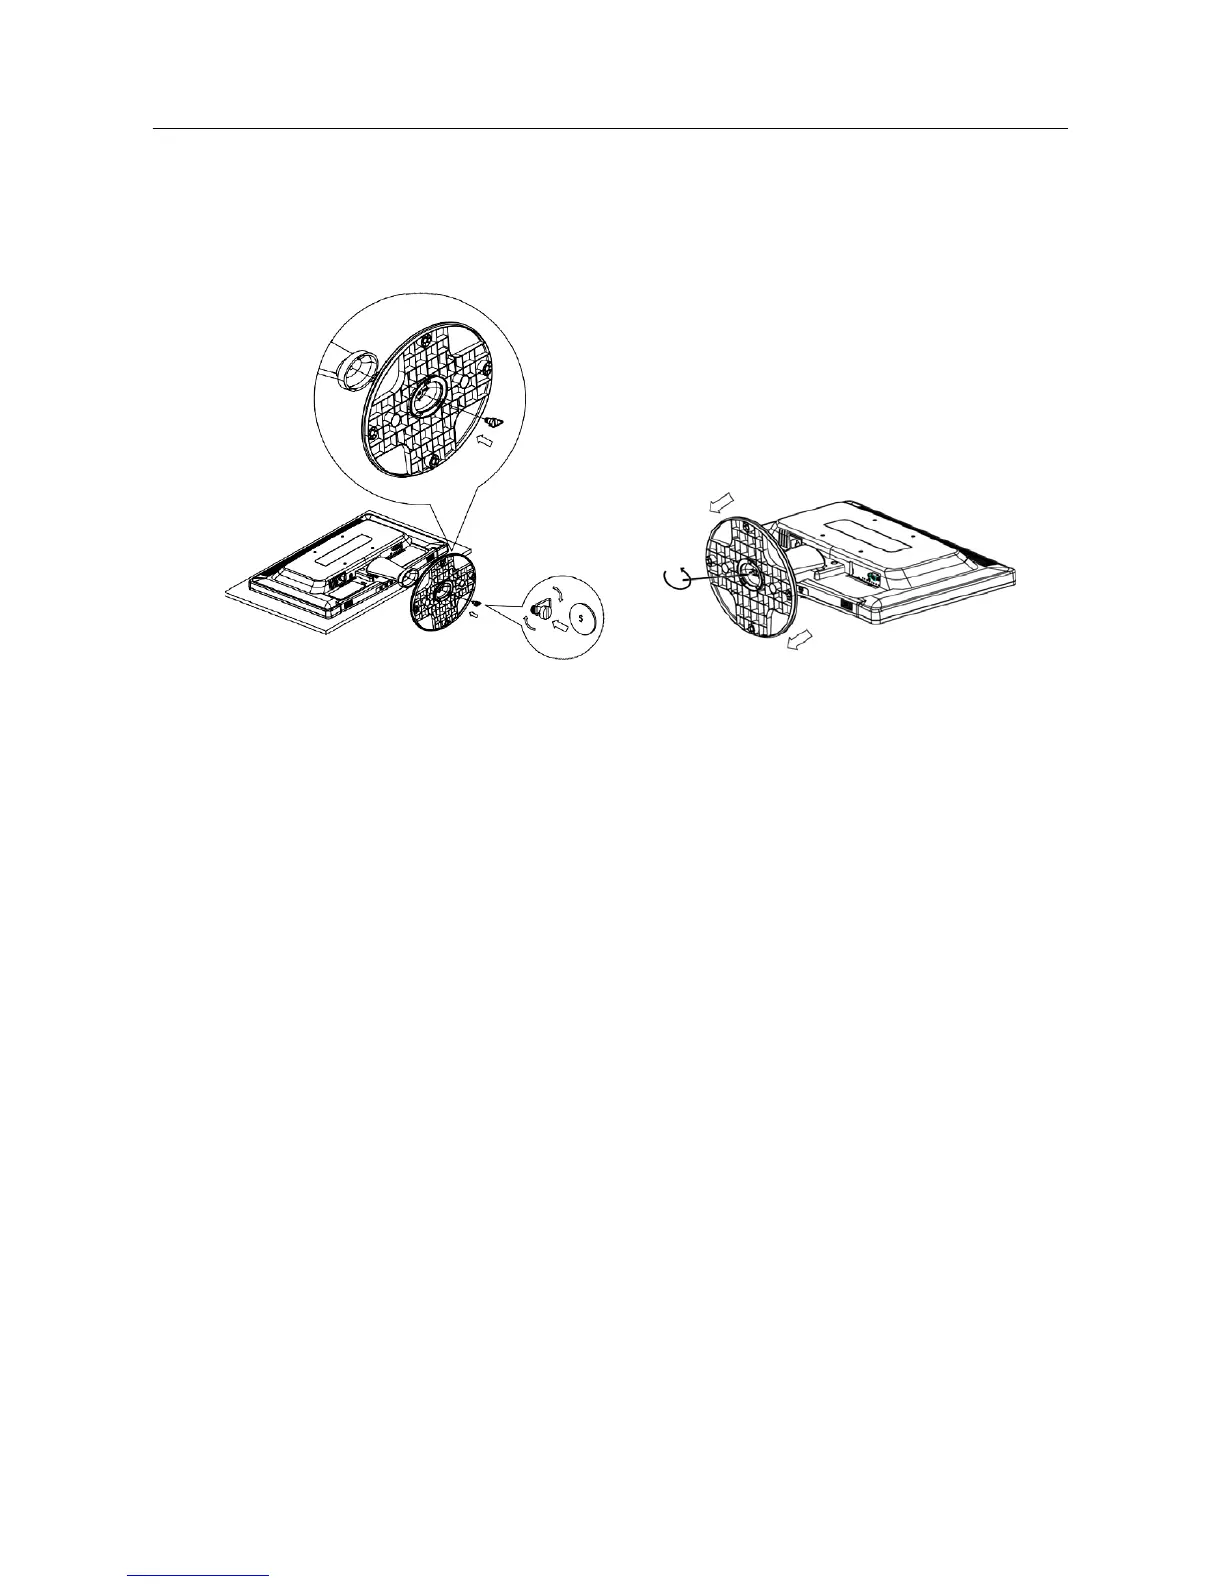
INSTALL REMOVE
Figure.1. Installing and Removing the Base
INSTALLATION:
1. Place the monitor face down on a flat leveled surface.
2. Align the monitor with the opening in the base.
3. Turn the screw clockwise to attach the base to the monitor. (The screw is attached on the base for
model iH253) (Find 2 screws in the accessory bag for model iH283.)
4.Please assure the monitor is attached to the base and the screw is fully tightened.
REMOVAL:
1. Place the monitor face down on a flat leveled surface.
2. Turn the screw counterclockwise to remove the screw that holding your monitor to the base.
POWER
POWER SOURCE:
1. Make sure that the power cord is the correct type required in your area.
2. This LCD monitor has an Internal universal power supply that allows operation in either
100/120V AC or 220/240V AC voltage area (No user adjustment is required.)
3. Connect the AC-power cord one end to your LCD monitor’s AC-input socket, the other end to
wall-outlet.
7
 Loading...