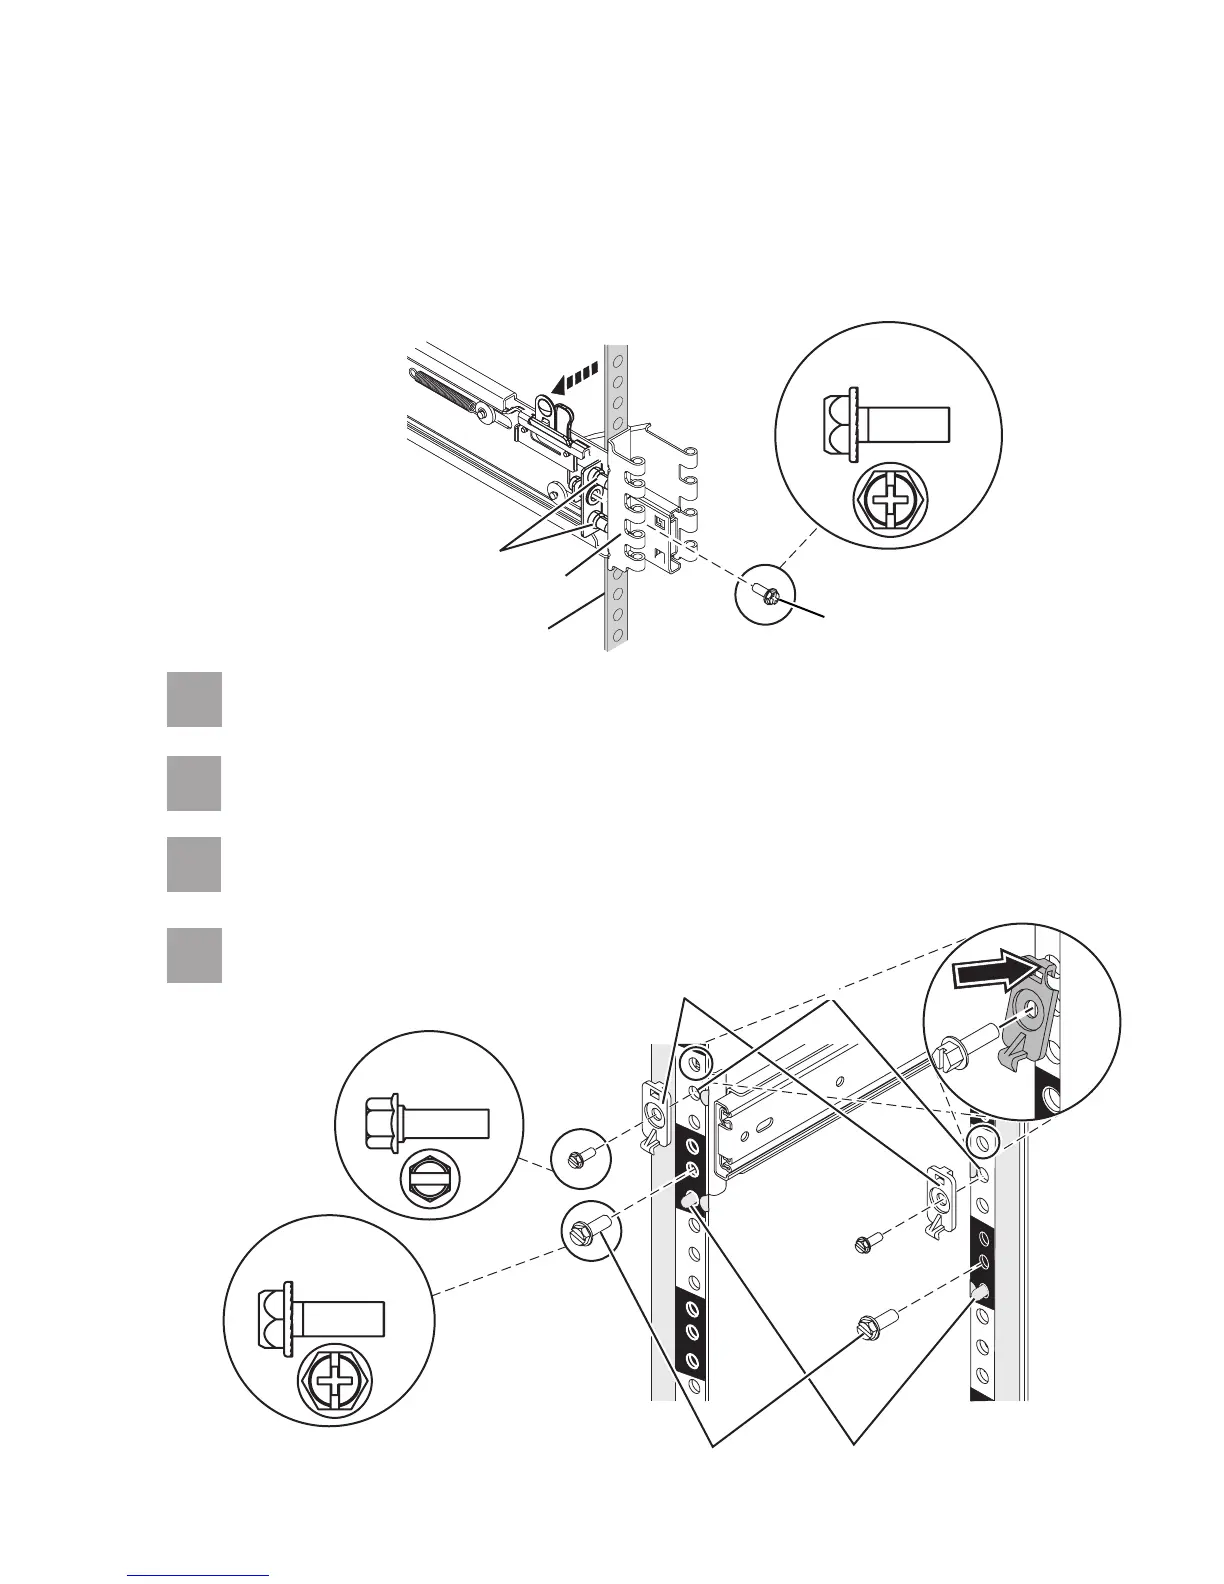
From the back, finger-tighten one of the rack-retaining screws in the hole that is
located between the two back alignment pins .
H
E
4.6
4.7
4.5
From the front, finger-tighten one of the rack-retaining screws in the first hole
above the front alignment pin .
I
J
From the front, attach the latch bracket by inserting the hook into the rack hole above
the hole where you will place the latch bracket screw. Finger-tighten the screw.
K
L
4.8
3.
Align the retracted back pins with the holes identified by the self-adhesive placement
dots. Place the rack flange between the slide-rail flange and the retracted alignment
pins .
Press the back latch-assembly-release tab to extend the back alignment pins into the
back of the rack.
E
FG
E
C
4.
Repeat steps 4.4 through 4.7 for
each slide rail assembly.
C
F
Actual size
part 12J5289
G
E
H
Actual size
part 26H7213
K
L
I
J
Actual size
part 12J5289
 Loading...