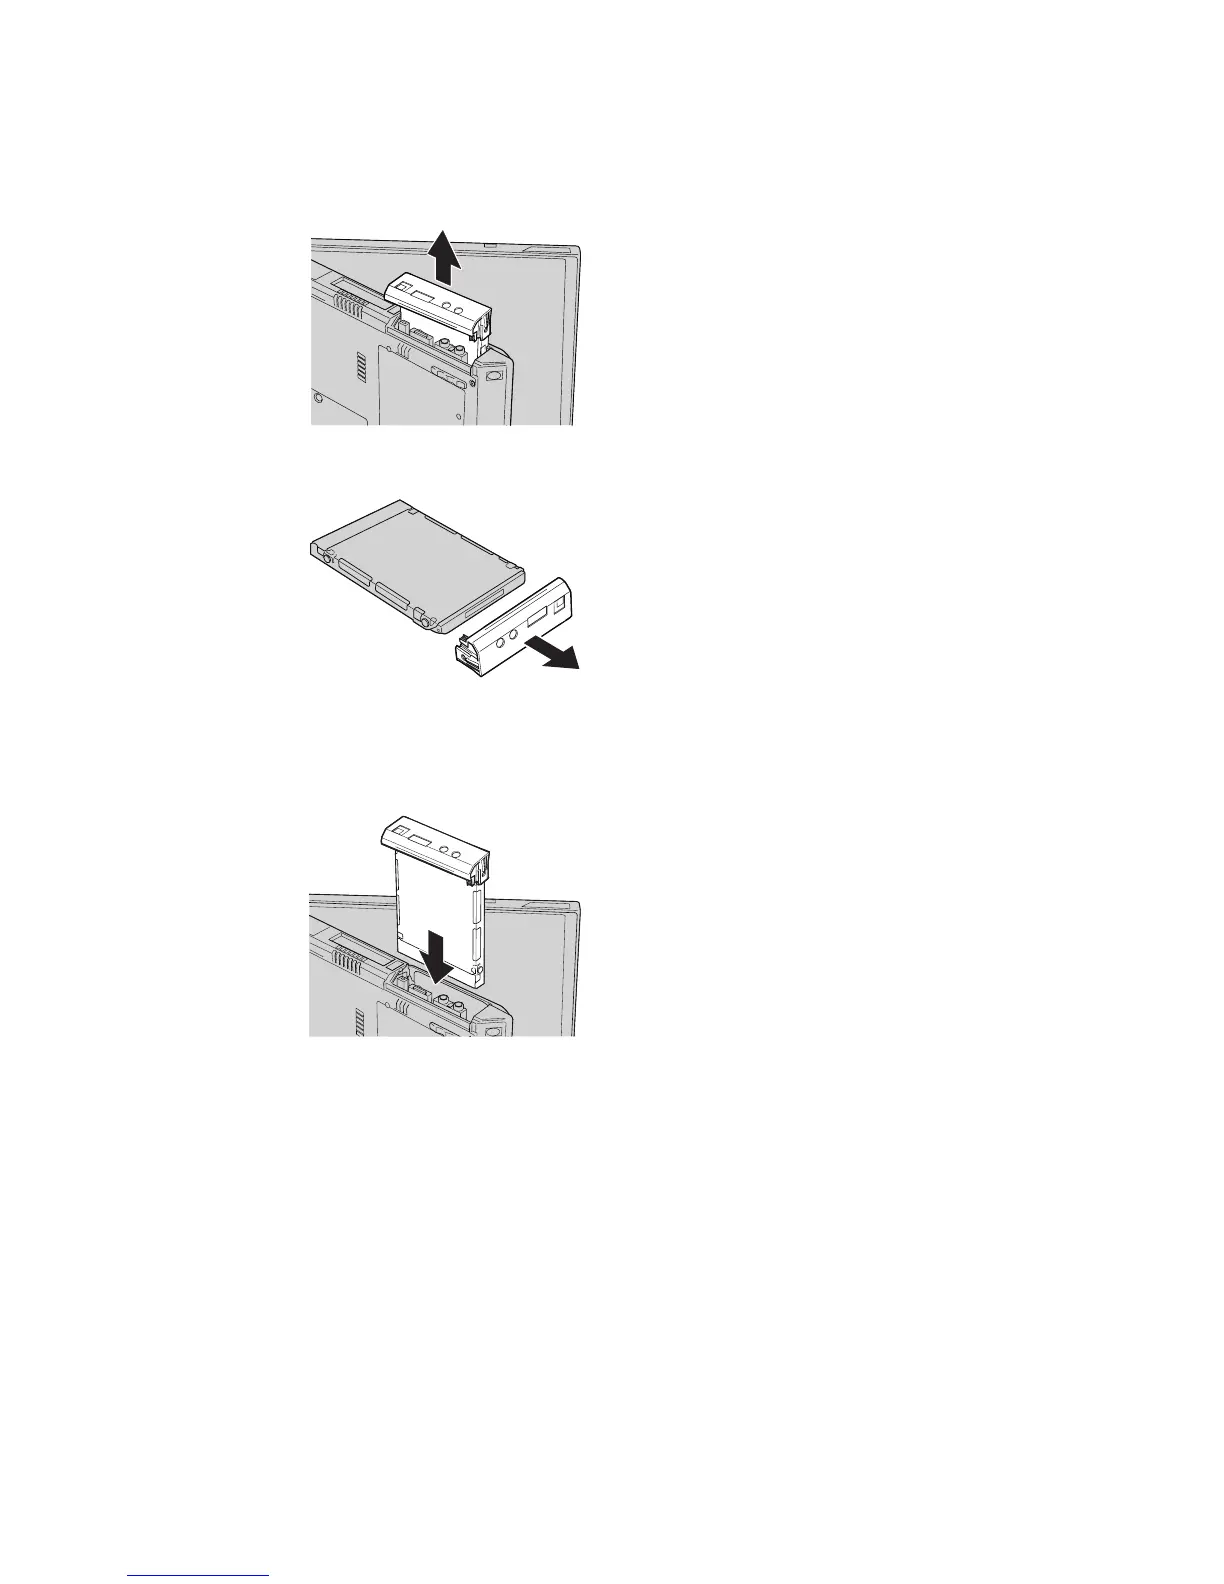
5. Open the computer display; then stand the computer on its side and
remove the hard disk drive by pulling the cover away from the
computer.
6. Detach the cover from the hard disk drive.
7. Attach the cover to a new hard disk drive.
8. Insert the hard disk drive and its cover into the hard disk drive bay; then
firmly install them.
9. Turn the computer over so that its bottom side is up. Reinstall the screw.
Note: You can replace the screw with a security screw to prevent the
hard disk drive from being removed easily. The security screw
may not be included in your ship group. You can, however,
purchase screw directly from NABS at www.nabsnet.com
10. Reinstall the battery.
11. Turn the computer over again. Connect the ac adapter and the cables to
the computer.
Upgrading the hard disk drive
36
ThinkPad
®
R40 Series Service and Troubleshooting Guide