This document is an instruction manual for the Q32P LCD color monitor from "idea display," a gaming monitor brand under Perfect Display Technology Co., Ltd. The manual provides detailed information on the product's installation, features, usage, and maintenance.
Function Description
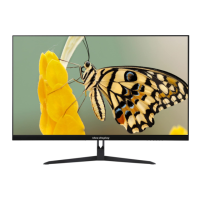
The Q32P is an LCD color monitor designed for continuous operation, particularly suited for closed-circuit TV systems and gaming. It features an active matrix, thin-film transistor (TFT), liquid crystal display (LCD) panel. The monitor is intended to provide a high-quality visual experience with a focus on durability and performance. It supports multiple input sources, including HDMI, DisplayPort (DP), and USB-C, making it versatile for various setups. The monitor also includes audio output and integrated speakers.
Important Technical Specifications
- Model: Q32P
- Resolution: 3840x2160
- Refresh Rate: 60Hz
- Brightness (MAX): 350cd/m²
- Contrast Ratio: 1000:1
- Response Time (Typical): OD 4ms
- Aspect Ratio: 16:9
- Viewing Angle: 178°(H)/178°(V)
- Display Color: 1.07 Billion colors, 100% sRGB
- Inputs:
- USB In: 2.0x1
- HDMI In: 2.0x1
- DP In: 1.2x1
- USB-C: 3.1x1
- USB-B: 3.0x1
- Outputs: Audio x1
- Speakers: 2x3W
- Color: Black
- VESA Mount: 100x100mm
- Power Consumption: Typical 100W
- Power Source: DC 24V 5A
- Cables Included: USB-C Cable x1, HDMI Cable x1
- Operating Temperature: 0~50°C
- Remote Control: x1
- OSD Languages: English, French, Spanish, German, Korean, Japanese, Chinese
Usage Features
The Q32P monitor offers a range of features designed to enhance user experience:
- General Features:
- Display area for optimal viewing.
- Wall mounting capability (bracket not included).
- Multiple connectivity options: one DP, one HDMI, one USB-C, one USB-B, and two USB-A ports.
- Wide inclination for comfortable viewing from various positions (seated, standing, or moving).
- Multilingual On-Screen Display (OSD) menu for easy setting and optimization.
- Control Panel: The monitor features a control panel with dedicated buttons:
- M (Menu): Opens the main OSD menu and selects submenus.
- Up/Increase: Navigates up in the OSD menu or increases the value of a selected item.
- Down/Decrease: Navigates down in the OSD menu or decreases the value of a selected item.
- E (Exit/Source Select): Selects the signal source or exits the OSD.
- Power: Turns the monitor ON or OFF.
- Initial Setup:
- Connect the monitor to a power outlet.
- Press the POWER button to turn it on (indicator will be blue).
- Connect the relevant cable to the corresponding input; the source will be automatically detected.
- To change inputs, press the "E" button to access the source menu and use the navigation buttons to select between USB-C, DP, and HDMI.
- OSD Menu Options: The OSD menu is comprehensive, divided into several sub-menus:
- Brightness: Adjusts brightness (0-100), contrast (0-100), black level (0-100), ECO mode (Standard, Text, Movie, Game, FPS, RTS), Dynamic Contrast Ratio (DCR) ON/OFF, and HDR Mode (OFF, AUTO, 2084).
- Image: Allows selection of aspect ratio (WIDE, 4:3) and enables/disables Flicker Free.
- Color Temp: Adjusts color temperature (Normal, Warm, Cool, User) and individual RGB elements (0-100). Also includes a Low Blue Light setting (0, 25, 50, 75, 100).
- OSD Setting: Configures OSD language (English, French, Turkish, Italian, Spanish, Portuguese, Chinese, Dutch, Japanese, German, Polish, Korean), OSD horizontal and vertical position (0-100), OSD timer (5-60 seconds), transparency (0-100), and LED effect ON/OFF.
- Reset: Returns the monitor to its factory default settings. Includes an option for USB Wake Up ON/OFF.
- Misc: Allows manual selection of signal source (HDMI, DP, USB-C), Mute ON/OFF, Volume adjustment (0-100), FreeSync ON/OFF, and Overdrive (OD) ON/OFF.
- Privacy and Copyright: The monitor is designed for gaming. Recording of images is subject to local laws, and recording copyrighted material is forbidden. Users are responsible for complying with all local rules and regulations regarding video signal monitoring and recording. The manufacturer is not liable for non-compliant use.
Maintenance Features
- Cleaning:
- Rub delicately with a dry cloth to remove dust and dirt.
- For stubborn dirt, use a cloth dipped in neutral detergent.
- Do not use volatile liquids (petrol, alcohol, solvents, etc.) or chemically treated cloths, as these can cause deformation, deterioration, or scratches to the paint finish.
- Safety Precautions:
- Keep the device away from rain and humidity to prevent fire and electrocution.
- Do not introduce solid or liquid materials inside the device. If this occurs, disconnect power and have it inspected by qualified personnel.
- Never open the device; contact qualified personnel or an authorized service center for repairs.
- Keep the device away from children to prevent accidental damage.
- Do not touch the device with wet hands.
- Do not use the device if it has fallen or if the external casing is damaged; contact the retailer or authorized installer.
- Disconnect the power wire if the monitor is not used for an extended period.
- Installation Precautions:
- Ensure proper airflow by arranging the device in a position that allows air to flow through the casing slots. Maintain at least 5 cm of free space when installing in a rack.
- Avoid installing near heat sources (radiators, hot air ducts) or in direct sunlight.
- Do not install in areas subject to excessive dust, mechanical vibrations, or shocks.
- Do not place the device on an unstable surface to prevent falls, which could cause injury or mechanical failures.
- Do not expose the device to humidity or water, and do not direct a jet of water onto it.
- If water or other material penetrates inside, stop using the device and contact the retailer or authorized installer.
- Ensure ventilation slots and openings are not blocked or covered.
- Do not place heavy or heat-generating objects on top of the device, as this can damage the casing or increase internal temperature.
- Do not cover the device with a cloth while it is running to prevent deformation and overheating.
- Keep magnets and magnetized objects away from the device.
- Do not use the device in the presence of smoke, vapor, humidity, dust, or intense vibrations.
- Allow the device to adapt to the ambient temperature and humidity for approximately three hours after transporting it from a cold to a warm place.
- The monitor is provided with a plastic base and rubber feet; ensure it is fastened firmly on a horizontal surface and not resting on unstable supports.