Do you have a question about the Ideal-Standard W3718 Series and is the answer not in the manual?
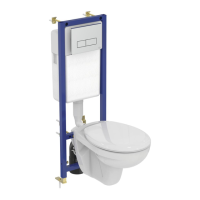
Checking the toilet bowl mounting configuration and alignment before proceeding with installation.
Adjusting the installation frame for specific toilet types, indicated by dimension A=230.
Adjusting the installation frame for specific toilet types, indicated by dimension A=180.
Connecting the waste pipe to the cistern unit using provided fittings.
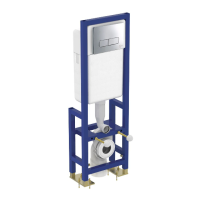
Securing the cistern unit to the installation frame using adjustable brackets.
Adjusting the height of the installation frame to the desired level for the toilet.
Final tightening of the frame securing mechanisms after height adjustment.
Connecting the flush pipe from the cistern to the toilet bowl.
Preparing the wall for fixing the installation frame using appropriate measurements.
Drilling holes in the wall for securing the installation frame, using a specific drill bit size.
| Brand | Ideal-Standard |
|---|---|
| Model | W3718 Series |
| Category | Plumbing Product |
| Language | English |