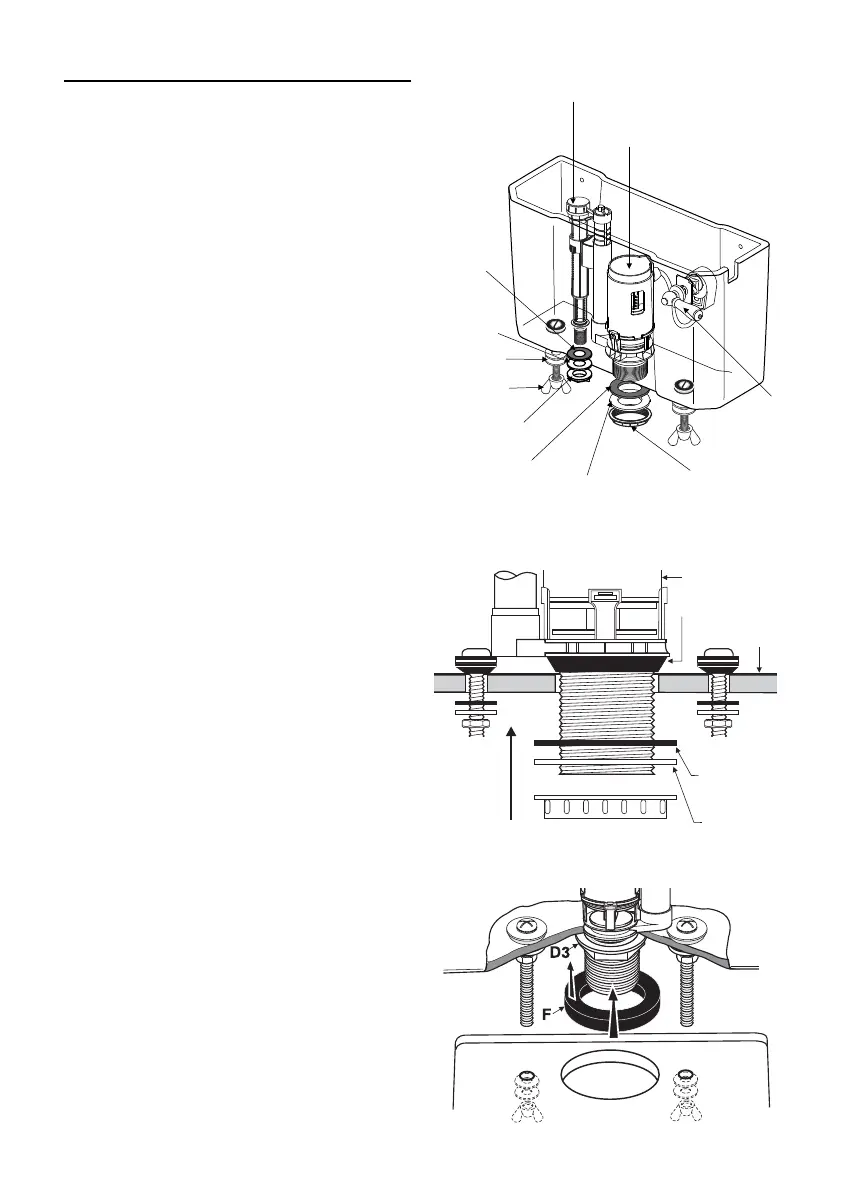
Cistern Assembly
1. Assemble and fit close coupling bolt set
(E) into the cistern base, see instructions
supplied with set.
2. Setup the inlet valve to the correct height
(see page 6 for settings).
3. Remove the backnut and washers (B1, B2
& B3) from the inlet valve (A). Insert the inlet
valve through the hole in the base of the
cistern, ensuring the washer (B) is in place to
seal and centralise the valve in the hole.
Secure the inlet valve in position with flat
washers & backnut, making sure the inlet
valve is not in contact with the cistern wall.
4. Check the flush valve is set to correct
settings (see page 5 for settings).
5. Remove the backnut and washers (D1,
D2 & D3) from the flush valve (C). Insert the
flush valve through the hole in the base of
the cistern, ensuring that the washer (D) is
in place. Fit the flat washers then secure
using backnut, making sure that the flush
valve is not in contact with the inlet
valve or cistern wall.
6. Check all joints to ensure they are watertight.
7. Select the appropriate close coupling
washer (F) and slide over outlet valve
backnut (D3) before placing the cistern
onto the pan. Locate bolts through the
WC. Secure cistern using wing nuts
and washers.
Do not overtighten.
outlet valve
Lever
inlet valve
Flat plastic
washer
Flat rubber
washer
flat rubber
washer
Back nut
washers
backnut
wing nut
flat plastic
washer
flush valve
tapered washer
cistern
backnut
flat plastic
washer
flat rubber
washer
 Loading...