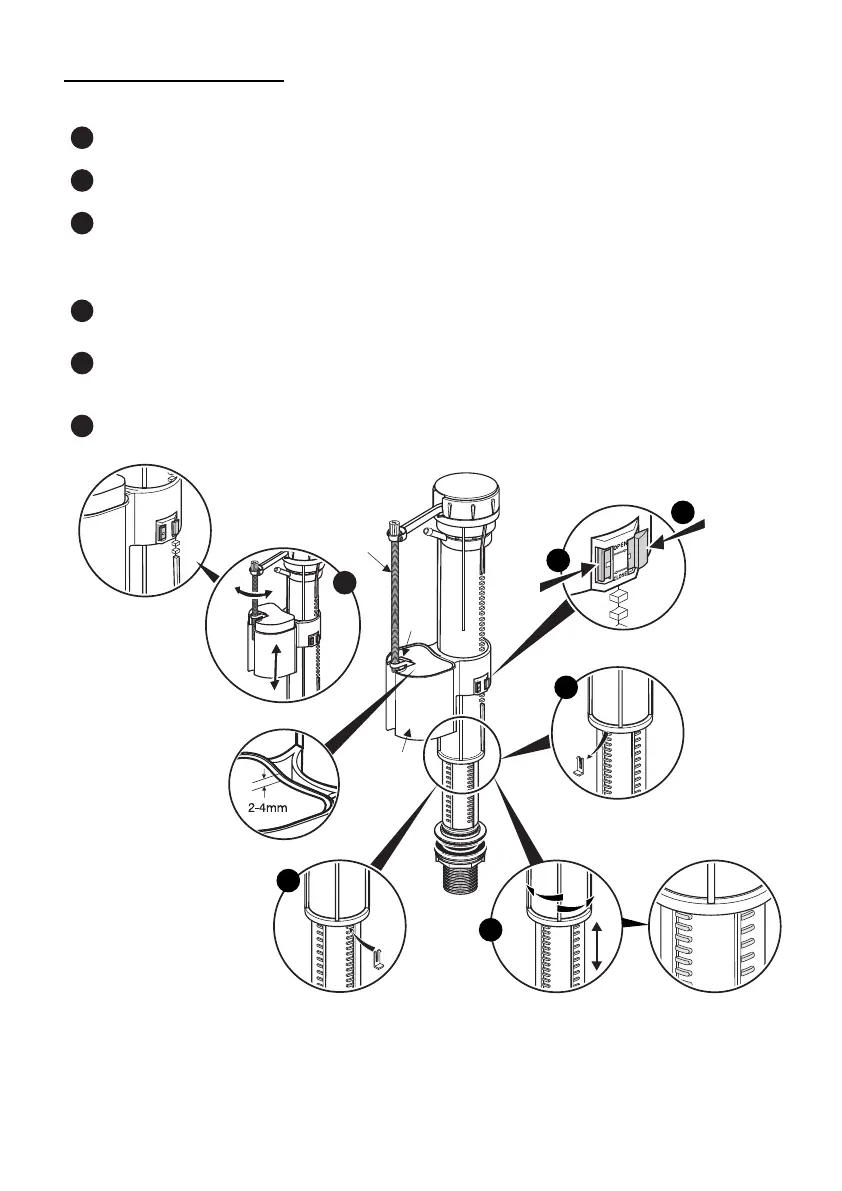
Inlet Valve
Major Height Adjustment
Remove locking clip by pushing downwards
Loosen valve body anticlockwise adjust to required height, and tighten clockwise
Re-fit locking clip
Minor Height Adjustment
Realise locking device in direction shown.
Adjust top of cup to approximately 7mm below the water line, and rotating oat screw
taking top surface of the oat to within 2-4mm below top edge of cup.
Engage the locking device in direction shown. Turn on water supply and check water level
position. Use oat screw for nal adjustment.
A
B
C
D
E
F
F
2
1
D
E
cup
float
screw
float
C
B
A
7
13
12
11
10
9
8
Connect the water supply to the inlet valve. Turn on the water supply and allow the
cistern to fill. Adjust the float on the inlet valve so that the valve stops the flow of water
when the water reaches the waterline marked in the cistern. Check for leaks.
 Loading...