GT3D Series
Timers
825
USA: 800-262-IDEC Canada: 888-317-IDEC
Switches & Pilot Lights Display Lights Relays & Sockets Timers Terminal Blocks
Circuit Breakers
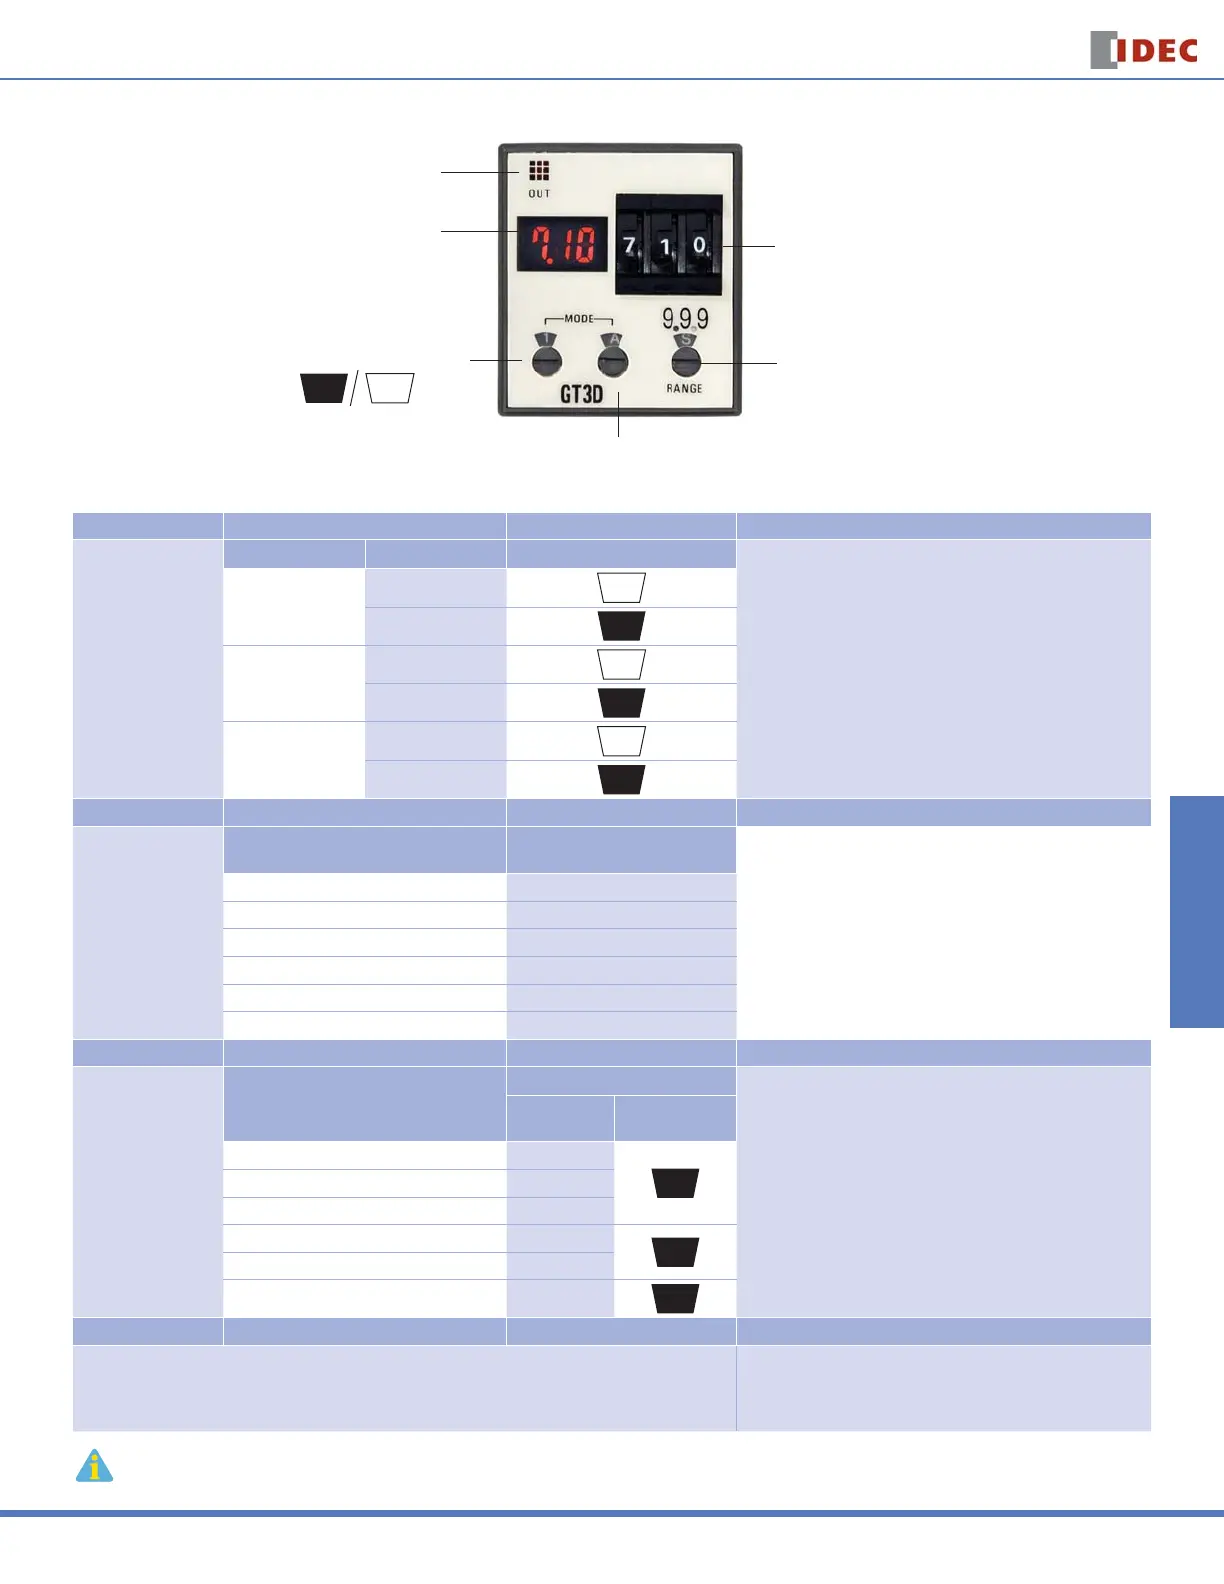
Instructions: Setting GT3D-8 Timers
j Indication Mode Selector
1
1
Timed OUT Indicator
m Time Setting
Digital Switch
k Operation Mode Selector
A, B, C, D, E, F
Digital Time Display
(LCD backlit with red LED)
l Time Range Selector
9.99S – 99.9H
Step 1 Desired Mode of Operation Selection Remarks
Select the
time display and
operation modes.
Operation Mode Time Display Mode
j Indicator Mode Selector
1. Use a fl at screwdriver to set the selectors. Since selectors do
not turn all the way around, both clockwise and counterclockwise
rotation is necessary.
2. The GT3D-8 j Indicator Mode Selector selects both whether the
Digital Time Display displays the time elapsed or time remaining
and also the mode of operation. Decide which display and mode is
desired. Then use this selector to set the operation mode.
ON-Delay One-Shot
Time elapsed
1
Time remaining
1
Cycle One-Shot
Time elapsed
2
Time remaining
2
ON-Delay One-Shot 2
Time elapsed
3
Time remaining
3
Step 2 Desired Mode of Operation Selection Remarks
Select the
single shot output
time.
Desired Single-Shot
Output Time
k Single-Shot Output
Time Selector
On the GT3D-8 timers, the desired single-shot output time can be
selected from the A, B, C, D, E, and F modes using the k One-Shot
Output Time Selector.
0.1 seconds A
0.5 seconds B
1 second C
5 seconds D
10 seconds E
50 seconds F
Step 3 Desired Operation Selection Remarks
Select a time range
that contains the
desired period of time.
Base Time Ranges
l Time Range Selector
1. The l Time Range Selector controls both the decimal point indi-
cator (9.99, 99.9, 999) and the time increment indicators S (seconds),
M (minutes), and H (hours).
2. Chose which base time range contains the targeted timer setting.
Then use the l Time Range Selector to set the decimal point indica-
tor and time increment indicator to its corresponding pair of settings.
3. Since these confi gurations offer a complete range of settings
from 0.01 seconds to 99.9 hours, the setting of 9.99 for minutes and
the 9.99 and 999 settings for hours are not listed and should not be
used.
Decimal Point
Indicator
Time Increment
Indicator
0.01 seconds to 9.99 seconds 9.99
S
0.1 seconds to 99.9 seconds 99.9
1 second to 999 seconds 999
0.1 minutes to 99.9 minutes 99.9
M
1 minute to 999 minutes 999
0.1 hours to 99.9 hours 99.9
H
Step 4 Desired Operation Selection Remarks
Set the precise period of time desired by using the m Time Setting Digital Switch.
Use the m Time Setting Digital Switch to set the desired period of
time. It is important to remember that the setting of the l Time
Range Selector determines the units of time measurement as well
as the implied decimal point location.
It is important to remember that the l Time Range Selector not only selects the time range but also infl uences the interpretation of the Digital Time Display.
Changing the l Time Range Selector setting changes the units of time measurement (seconds, minutes, hours) as well as the decimal point location.
For information, call 800-221-0487 Switches Unlimited Fax 718-672-6370 www.switchesunlimited.com
tech@switchesunlimited.com sales@switchesunlimited.com
 Loading...