4
• The Switch will blink blue indicating it is ready to be set up on the
network.
• An accessory (e.g. lamp, fan, etc.) can be plugged in at any time.
• Clicking the button on the side of the unit will turn the Switch on or
off.
iDevices
®
Connected App
• Ensure your iOS device’s Wi-Fi
®
is turned on and is connected to
your home Wi-Fi
®
Network.
• 2.4 Ghz b/g/n networks are compatible.
• 5 Ghz networks are not compatible.
• Download the free iDevices Connected app from the App Store.
Connecting Your Switch
• Available devices will be shown at the top of the app.
• If you don’t see your device, check if the blue setup indicator
on the Switch is blinking fast or slow. If blinking slow, hold
button down for 3 seconds, release, and conrm fast blink.
• In the app, nd the Switch you’d like to connect to and tap the add
icon.
• Conrm your home network.
• The Switch will turn solid blue to indicate it has successfully joined
your home network.
• If this is your rst HomeKit
™
product, the app will walk you through
creating a home and a room. If you already have a home set up, the
app will skip this step.
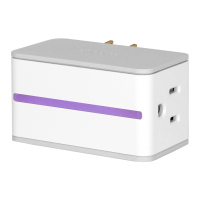
• To ensure the app is adding the correct product, the app will ask
you to conrm its identity. The LED on the Switch will blink purple to
indicate it is the new product being added.
• When prompted, enter the 8 digit pin previously noted on the Quick
Start Guide or back of the Switch. On iOS 9, you can scan the pin
 Loading...