Do you have a question about the IKEA Sundvik and is the answer not in the manual?
Serious or fatal crushing injuries can occur from furniture tip-over. Permanently fix furniture to the wall.
List and count all included hardware and furniture components before starting assembly.
Begin assembling the main frame using specified hardware.
Details on hardware and drawer slide installation.
Attach the frame pieces using the indicated fasteners.
Install the left set of drawer slides using specific hardware.
Install the right set of drawer slides using specific hardware.
Assemble the side panels for the drawer.
Fasten the base panel of the drawer.
Secure mounting hardware for the drawer.
Position the top changing surface onto the main unit.
Adjust the drawer slides for smooth operation.
Secure the anti-tip bracket to the unit for safety.
Fasten the changing surface securely to the unit.
| Product Name | Sundvik |
|---|---|
| Category | Indoor Furnishing |
| Converts to | Toddler Bed |
| Material | Solid pine, Stain, Clear acrylic lacquer |
| Color | White |
| Max Load | 50 kg |
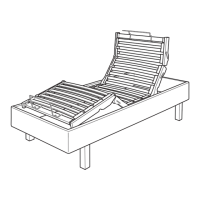
| Adjustable Bed Base | Yes |
| Safety Standards | EN 716 |