10
14
48
48
10
84
28
10
28
48
48
53
53
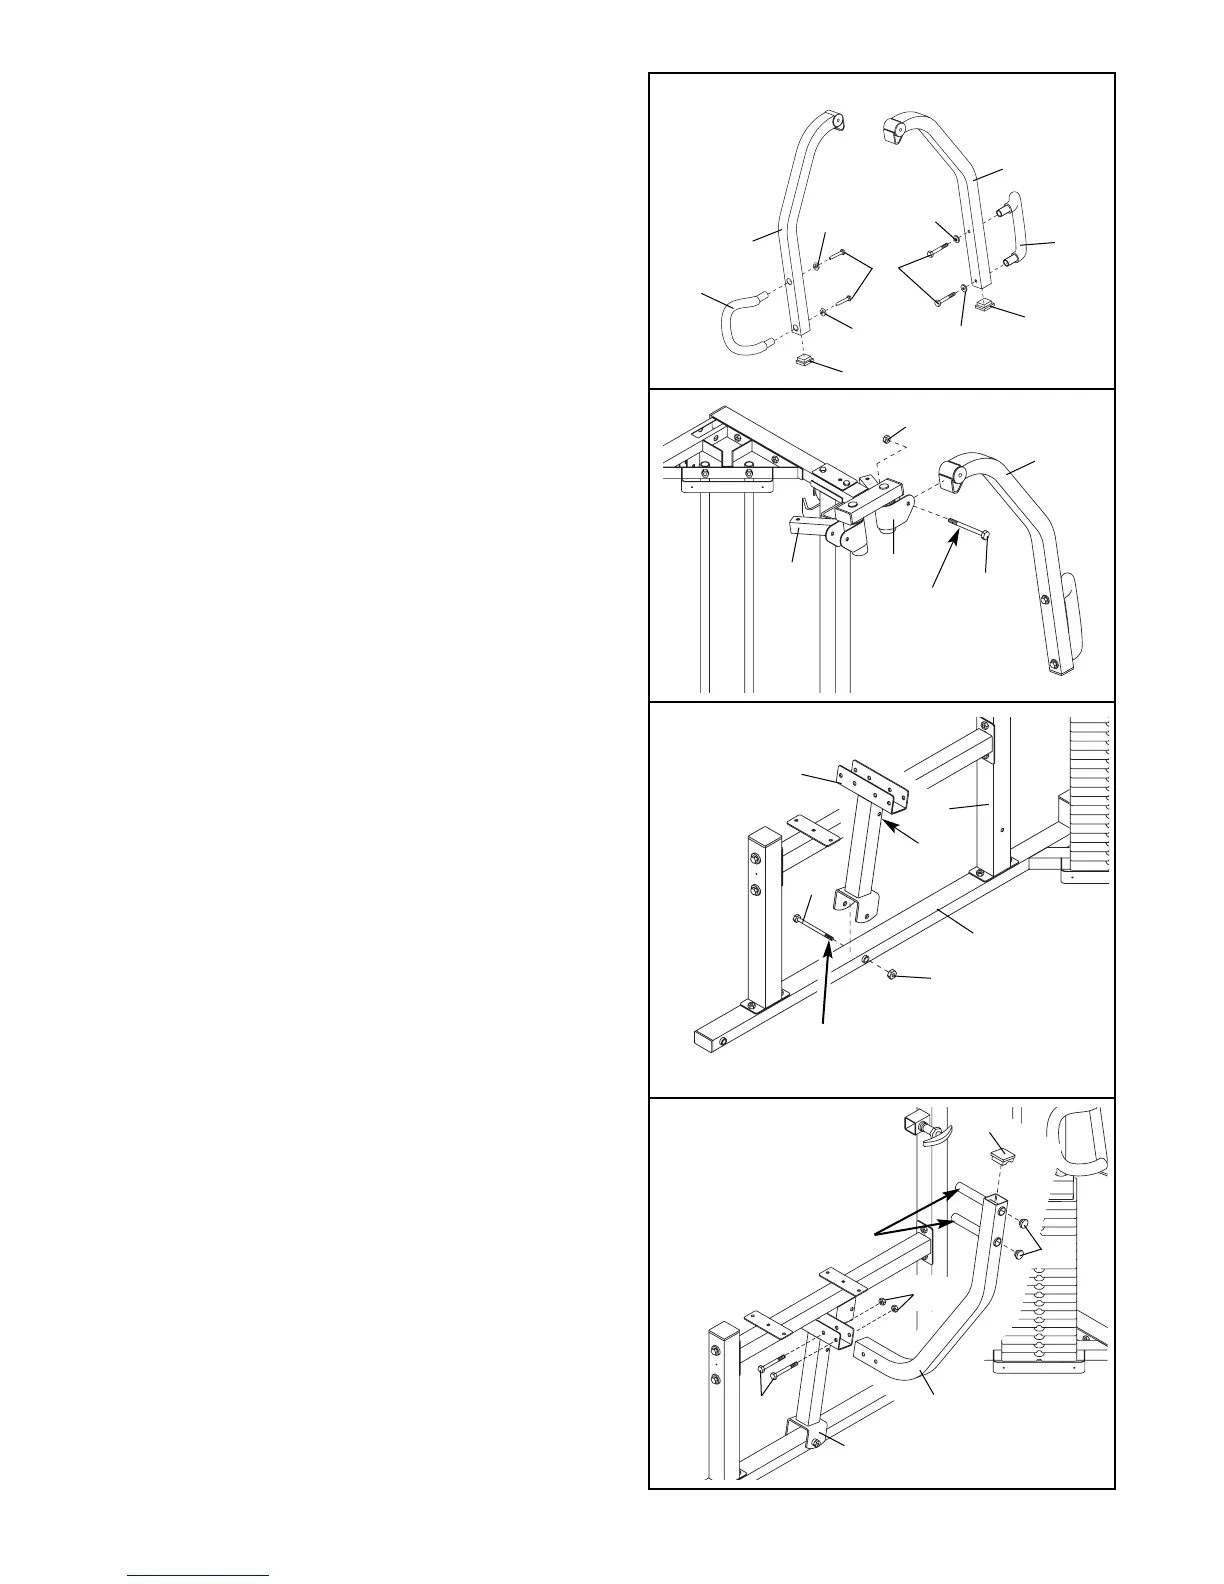
14. Insert a 2” Square Inner Cap (28) into the end of a
Butterfly Arm (10).
Attach a Butterfly Handle (53) to the Butterfly Arm
(10) with two 3/8” x 1” Bolts (84) and two 3/8” Flat
Washers (48).
Repeat this step with the other Butterfly Arm (10).
15. Lubricate a 3/8” x 3 1/4” Bolt (62). Attach the left
Butterfly Arm (10) to the Left Pivot Arm (71) with
the Bolt and a 3/8” Nylon Locknut (50).
Repeat this step with the right Butterfly Arm (not
shown) and the Right Pivot Arm (85).
17. Insert a 2” Square Inner Cap (28) into the top of a
Press Arm (77). Press two 1” Round Inner Caps
(86) into the outside ends of the handles.
Attach the Press Arm (77) to the Press Frame (8)
with two 5/16” x 2 3/4” Bolts (96) and two 5/16”
Nylon Locknuts (64).
Repeat this step with the other Press Arm (77).
15
50
10
71
85
62
Lubricate
17
77
64
96
8
28
86
Handles
16. Lubricate a 1/2” x 4” Bolt (68). Attach the Press
Frame (8) to the Press Base (6) with the Bolt and a
1/2” Nylon Jamnut (36). Note: Be sure the Press
Frame is oriented with the indicated hole closer
to the Press Upright (2). Do not over tighten the
1/2” Nylon Jamnut; the Press Frame must be
able to pivot easily.
16
8
36
6
2
68
Lubricate
Hole