MAINTENANCE
22
Visually inspect the spark plug. Discard it if the
insulator is cracked or chipped. Please use a
spark plug gauge to check the spark plug gap, it
should be 0.6-0.7mm (0.024-0.028inch).
Check that the spark plug sealing washer is in
good condition, and thread the spark plug in by
hand to prevent cross threading.
After the spark plug is seated, tighten with a
spark plug wrench to compress the washer. If
installing a new spark plug, tighten 1/2 turn after
the spark plug seats to compress the washer. If
reinstalling a used spark plug, tighten 1/8 - 1/4
turn after the spark plug seats to compress the
washer.
Reinstall the spark plug cap on the spark plug
securely.
Reinstall the spark plug access panel.
WARNING Spark plug must be
assembled firmly, or it will become hot
and may damage generator.
A loose spark plug can overheat and damage
the engine.
NOTE: Be careful not to cross-thread the spark
plug. Cross-threading will damage the product.
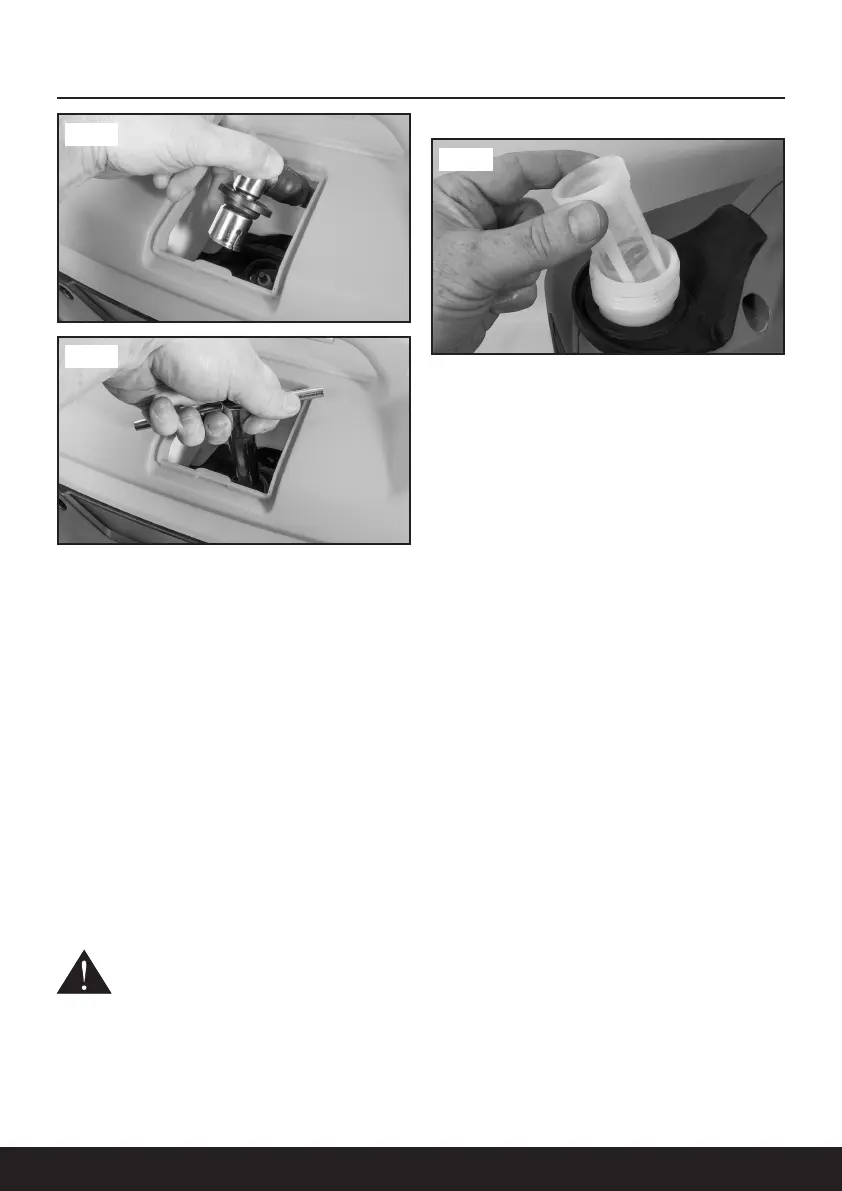
FUEL TANK FILTER (FIG 24)
After every 100 hours of running or every 6
months the fuel tank filter should be removed
and cleaned.
Remove the fuel tank filler cap and the filter,
clean the filter thoroughly using an
environmentally friendly water based degreasing
agent and re-fit.
DRAINING FUEL TANK/CARBURETOR
To help prevent gum deposits in the fuel system,
drain the fuel from the tank and carburetor
before storing.
DRAINING THE FUEL TANK:
NOTE: Remove all oil from the unit before
draining the fuel tank. Failure to do so could
cause damage to the unit.
Remove the fuel cap.
Tilt the generator and allow fuel to drain from
the fuel tank into an approved container.
When the fuel has drained from the tank,
replace the fuel cap and immediately wipe off
any spilled fuel with a clean, dry soft cloth as
petrol can deteriorate painted surfaces and
plastic parts.
DRAINING THE CARBURETOR:
Loosen the two screws at the top of the access
panel. Remove cover and set aside.
Place the choke lever in the ON position.
Locate the tube attached to the carburetor and
place the end of the tube into a suitable
container.
Loosen the drain screw, Fig.25.
Fig 22
Fig 23
Fig 24
 Loading...