April, 2019 IMPCO Technologies PPI-68 REV. E
3030 South Susan St. Page 11 of 15
Santa Ana, CA 92704
www.impcotechnologies.com
3030 S Susan Street, Santa Ana, CA 92704
Ph: +1 714 656 1200 Fax: +1 714 656 1400
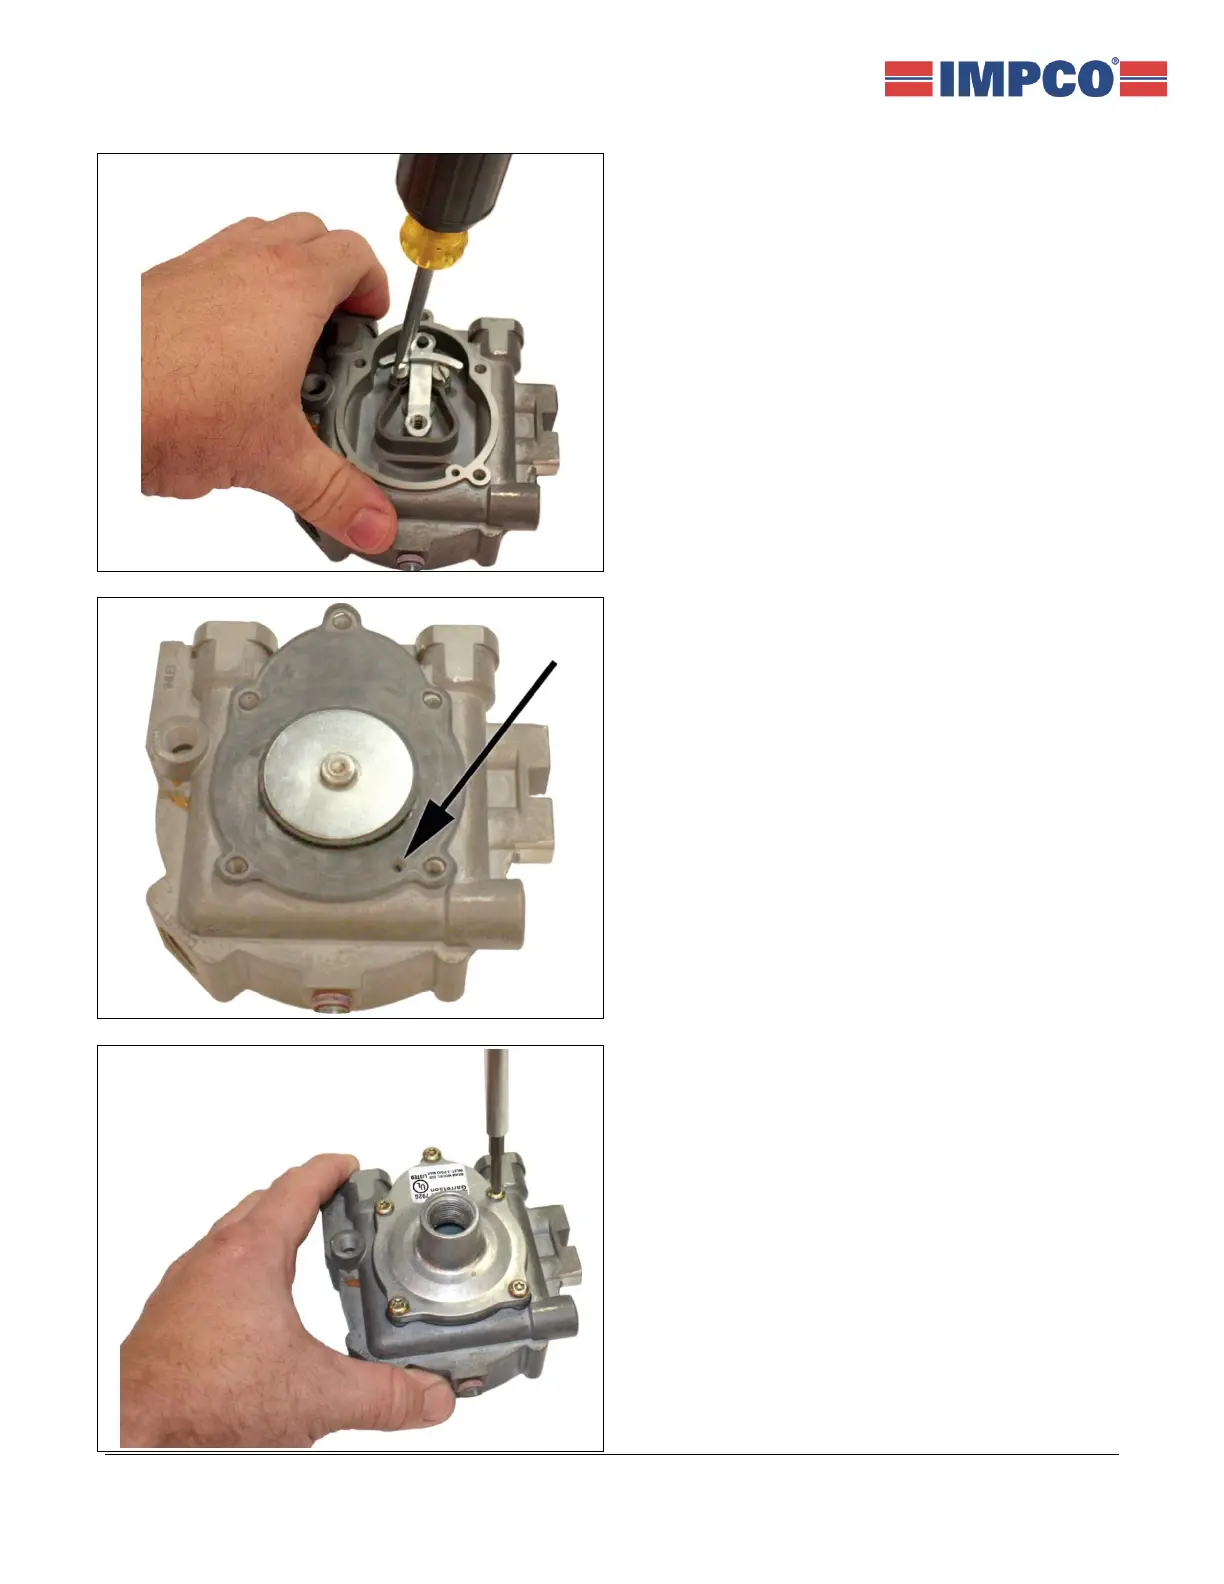
12. Place a small amount (thin film) of petroleum jelly
(Vaseline) on the surfaces of the primary seat.
Install the lever pin (12), primary lever (9) and the
primary bridge (11) with two screws (10). Tighten
screws evenly to 25 in. lbs. ±5 in. lbs. (2.82 N•m ±
0.56 N•m). pin
13. Place the primary diaphragm (3) on top of the
regulator body (2), then spin the diaphragm 90
degrees and insert the primary diaphragm pin into
the oval hole in the primary lever (9). Once
inserted, rotate the diaphragm back so it aligns to
the body and screw holes. Note that the breather
hole must line up with the breather passage in the
regulator body (2), as shown in the photo.
14. Place the gasket (33) on top of diaphragm (3) and
install primary cover (4) and five screws (13).
Torque evenly to 30 in. lbs. ±5 in. lbs. (3.39 N•m
±0.565 N•m).
 Loading...