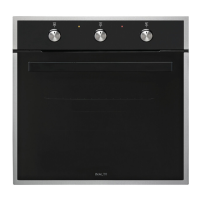
PAGE 08
Installation Instructions
It’s important to carefully read the following installation instructions before beginning the installation of your oven.
IMPORTANT! The connection of this oven must be carried out by a suitably qualified and licensed person, in accordance with
the current versions of the following:
► AS/NZS 3000 Wiring Rules
► Electricity Safety Regulations 2010
► The installation instructions within this user manual
Note: Ensure there is a grounded socket nearby (behind the unit). A dedicated power circuit is recommended for the unit but not
required. Additional electrical appliances on the same circuit may exceed the current (amperage) rating for that circuit. If after the
installation of your unit the circuit breaker trips or the fuse fails on a repeated basis then a dedicated circuit will likely be required.
POSITIONING
The adjacent cabinetry and wall materials must be able to
withstand a minimum temperature rise of 85°C above the
ambient temperature of the room.
► The kitchen area should be dry and equipped with
sufficient ventilation. When installing the oven, easy
access to all control elements should be ensured.
► This is a built-in oven and has been designed to be
housed within an oven cabinet. Coating or veneer used
on cabinetry must be applied with a heat resistant
adhesive (rated to 120°c). This prevents surface
deformation or detachment of the coating. In the case
of vinyl wrap kitchens, it is strongly recommended to
have heat deflectors installed on either side of the oven
cabinet.
► Your oven cabinet should be made to suit the following
dimensions and can be either a tall or underbench
cabinet to suit your kitchen design.
► Make sure that the electrical circuit is disconnected or
fuse removed, then connect the oven into the mains
supply. Important! The installation/connection
should only be completed by a licensed electrician.
► Insert the oven completely into the oven cabinet and
use the four screws supplied to fix the oven into place
(refer to the diagram below).

 Loading...