• The following other factors can interfere with the baby monitor's transmission or shorten its
range: furniture, walls, houses, trees, environmental factors (such as fog, rain).
Note
On the Hubble homepage (http://www.hubbleconnected.com), you can activate the
recording function at an additional charge. When the recording function is activated, events
triggered by movements are automatically recorded and saved onto the Hubble server so
that they can be viewed later.
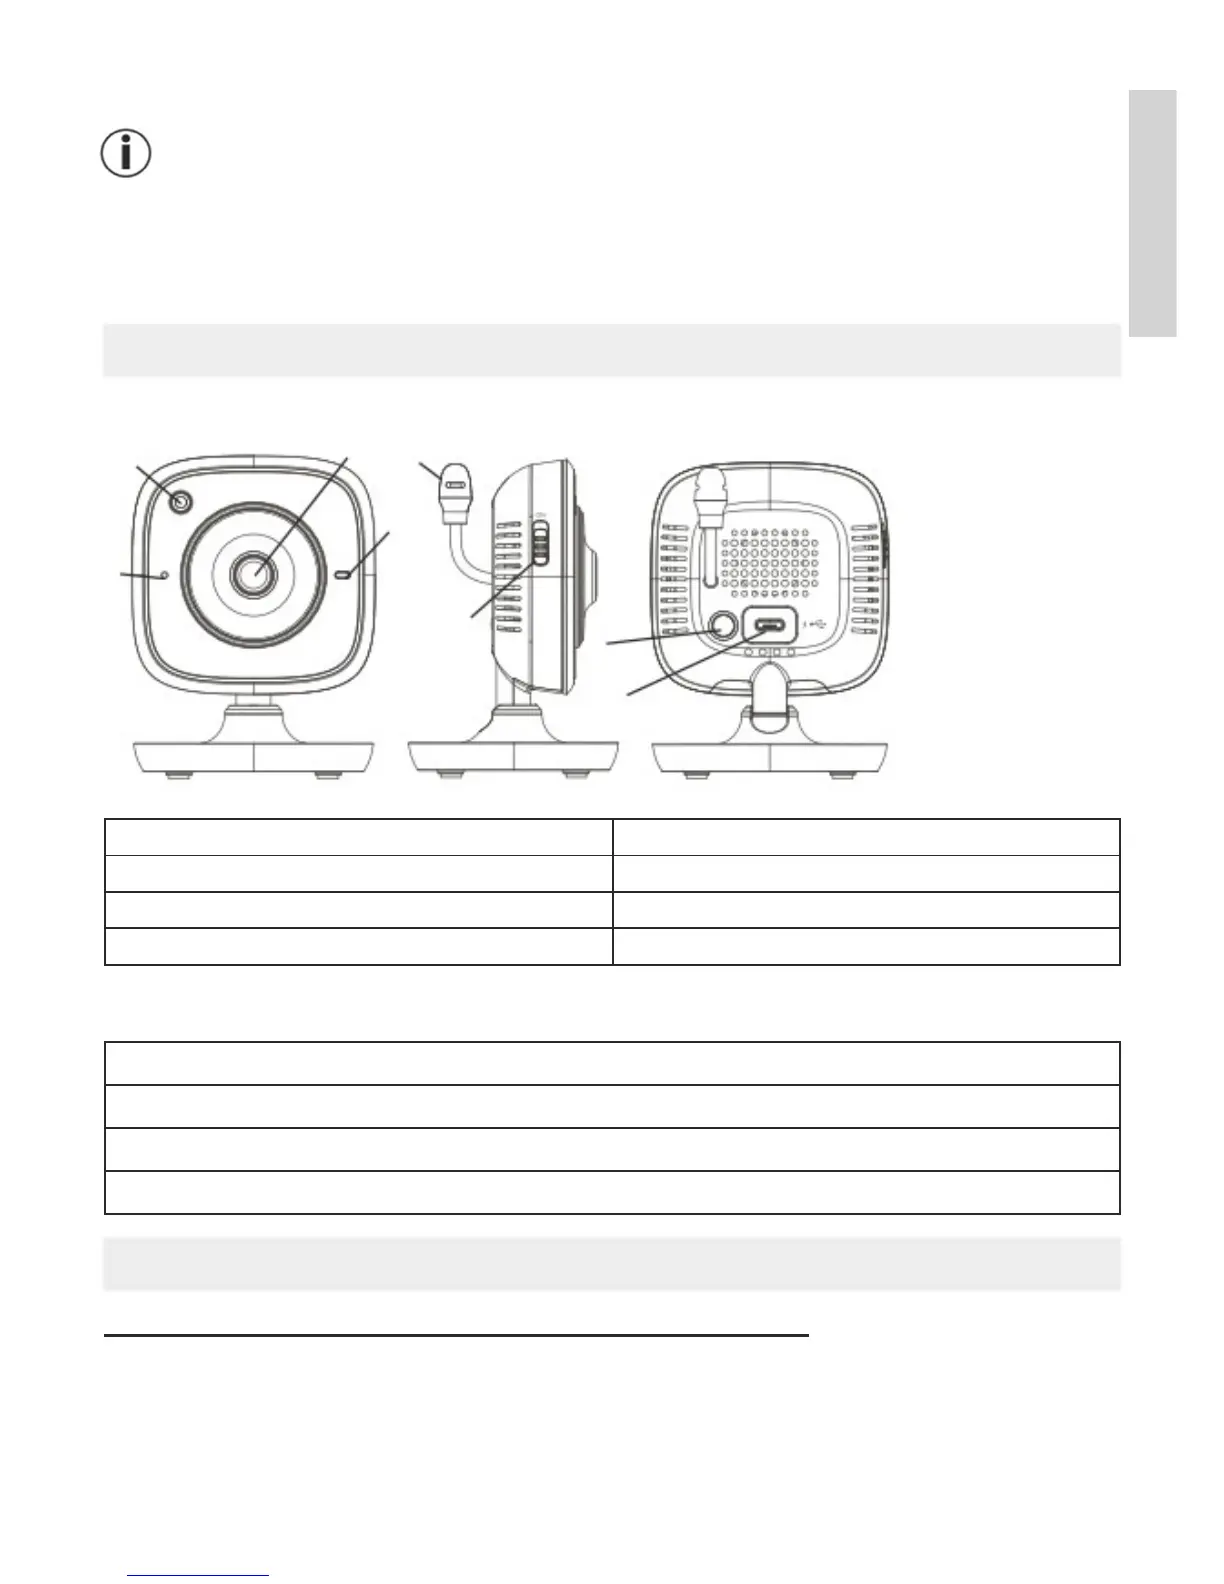
6. Unit description
HD camera (720p for a high resolution image quality)
2
1
3
5
4
PAIR
6
7
8
1 Microphone
5 Temperature sensor
2 Brightness sensor (night vision function) 6 ON/OFF Switch
3 Camera lens
7 Pair button
4 Function light* 8 Connection for USB mains part plug
*Function light status
Function light lights up blue
=
Camera warm-up phase ~ 1 minute
Function light flashes red
=
Camera is not connected
Function light flashes red and blue
=
Camera is ready to connect
Function light flashes blue
=
Camera is connected
7. First steps
7.1 Setting up the camera using an Android device
1.
Open the Google Play Store on your Android device.
2. Search for the “iNanny Monitor
” app and download it.
3.
Start the app and create a user account.
5
English