EasyManua.ls Logo

Incra IBOX - User Manual

Incra IBOX
12 pages
Print Icon
To Next Page IconTo Next Page
Loading...
Manufactured by Taylor Design Group, Inc. P.O. Box 810262 Dallas, TX 75381 ©2020 by Taylor Design Group, Inc. All rights reserved.
TM
TMTM
O’ M
www.incra.com
Important safety instructions for using the INCRA IBOX
SAFETY
Before using the INCRA IBOX,
read and follow all of the
instructions and safety infor-
mation in this owner’s manual.
by
From delicate 1/8ngers to bold 3/4” joints to exciting new
box joint variations, your New INCRA IBOX is designed to
provide the perfect resource for your next joinery task. The
dual-pitch lead screw driven positioning engine controls both
pin width and spacing with a single adjustment knob while
INCRAs GlideLOCKadjustable miter bar provides smooth
tracking at either your table saw or router table. Before using
your New IBOX, please take the time to read this manual and
be sure to watch the included DVD for some exciting new box
joint techniques, tips and tricks.
CONTENTS
Safety ................................................................ 1
Preliminary Setup ............................................ 2
Setting up at the Table Saw ............................ 3
Setting up at the Router Table ....................... 4
Stock Ledges, Blade Guards & Backing Board .... 5
Operations – Cutting a Box Joint .................... 7
Tips and Techniques ......................................... 12
°
Before using the INCRA IBOX, read and follow all instructions
and safety information in this manual.
°
When using the INCRA IBOX in conjunction with any other tool,
first read and follow all instructions and safety information in that
tool’s owner’s manual.
°
Always turn off the power and make sure that the bit or blade is
fully stationary before moving any part of the INCRA IBOX to
any new setting.
°
Always use a wooden handscrew clamp to secure your workpiece
to the INCRA IBOX before making any cut.
°
Before making a cut, always make sure that the blade guards are in
place and that the fasteners that secure the stock ledges and blade
guards are securely tightened.
°
Wear safety glasses, hearing protection and follow all normal shop
safety practices.
°
When using the INCRA IBOX with other tools, make sure that all
safety guards and other safety equipment supplied by the manufac-
turer of that tool are securely in place and functional. Never let the
INCRA IBOX interfere with another tool’s safety equipment.
°
Keep hands safely clear of the bit or blade.
°
DO NOT alter or modify the INCRA IBOX
°
Do not attempt to use the INCRA IBOX with a “wobble” dado blade.
°
Do not attempt to use the INCRA IBOX with any cutter smaller
than 1/8”.
°
If using with a SawStop table saw, put the SawStop in the Bypass
Mode before calibrating, adjusting, or checking blade clearances.
Return it to normal operation before making a cut.
°
To avoid contacting the metal IBox Fence body with your blade,
DO NOT use depth of cut settings greater than 7/8”.
Question and Answer IconNeed help?

Do you have a question about the Incra IBOX and is the answer not in the manual?

Summary

Safety and Important Instructions

Preliminary Setup

Setting the Home Position and Pin Plates

Set the home position for the micro-adjust knob and bring pin plates together using lock knob adjustments.

Setup at the Table Saw

Install Blade

Install your preferred box joint blade or stack dado set, choosing appropriate blade types.

Adjust Miter Bar Assembly

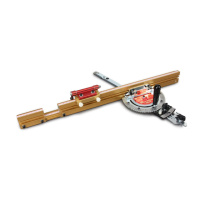
Adjust the GlideLOCK™™ expansion discs for a smooth fit in the table saw's miter slot.

Attach IBOX to Miter Bar

Attach the IBOX fence to the GlideLOCK™™ Miter Bar Assembly, aligning with the blade and pin plates.

Setup at the Router Table

Adjust Router Table Miter Bar

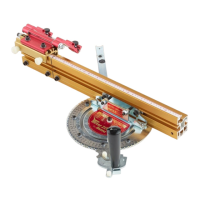
Adjust the GlideLOCK™™ expansion discs for a smooth fit in the router table's miter slot.

Attach IBOX to Router Bar

Attach the IBOX fence to the GlideLOCK™™ Miter Bar, centering the notch on the router's collet.

Operations: Cutting a Box Joint

Kiss Calibrate the IBOX

Calibrate the IBOX by touching the pin plates to the blade for precise zeroing.

Set Depth of Cut

Set the cutter depth to slightly protrude through stock thickness, avoiding exceeding 7/8".

Adjust Pin Plates to Fit Test Cut

Adjust pin plates to fit the test cut, then re-tighten all fasteners.

Overview

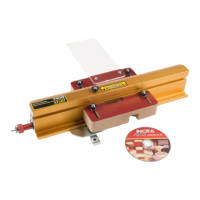
The INCRA IBOX is a specialized woodworking jig designed to simplify and enhance the creation of box joints on both table saws and router tables. Its primary function is to provide precise control over the cutting process, allowing users to produce a wide range of box joint styles, from delicate 1/8-inch fingers to robust 3/4-inch joints, as well as various custom variations. The device aims to make complex joinery tasks more accessible and accurate for woodworkers.

Function Description:

The core functionality of the INCRA IBOX revolves around its dual-pitch lead screw driven positioning engine. This engine allows for precise control over both pin width and spacing through a single adjustment knob. This mechanism ensures that cuts are consistently accurate, which is crucial for tight-fitting box joints. The jig integrates with existing workshop tools, specifically table saws and router tables, by utilizing their miter slots. It features a GlideLOCK™ adjustable miter bar, which provides smooth and consistent tracking within the miter slot, ensuring stable movement during cutting operations. The IBOX is designed to accommodate various cutting tools, including standard stack dado sets, 2-piece reversible blade box joint sets (from manufacturers like Forrest, Ridge Carbide, and Freud), and standard 1/8-inch kerf table saw blades with flat ground raker teeth or special box joint grinds. For router table use, it works effectively with a 2-flute standard straight bit. The device also includes components like stock ledges, blade guards, and a backing board, all designed to support the workpiece, enhance safety, and prevent tear-out during the cutting process.

Usage Features:

The INCRA IBOX is designed with several features that facilitate its use and enhance the user experience:

  • Versatile Tool Compatibility: It can be seamlessly integrated with both table saws and router tables, offering flexibility in how users approach their joinery projects.
  • Precision Adjustment: The dual-pitch lead screw and single adjustment knob allow for fine-tuned control over pin width and spacing, enabling users to achieve desired joint dimensions with high accuracy. The silver micro-adjust knob, in conjunction with the red knob, provides a mechanism for precise adjustments, with each mark on the scale representing 0.001 inches of movement.
  • GlideLOCK™ Miter Bar: This adjustable miter bar ensures smooth and consistent movement within the miter slot, which is critical for maintaining accuracy during cuts. The expansion discs on the miter bar can be adjusted to fit various miter slot widths, ensuring a snug yet smooth glide.
  • "Kiss" Calibration: A unique "kiss" calibration step zeros the IBOX to the edge of the cutter, establishing a precise starting point for all subsequent adjustments and cuts. This ensures that the pin plates are accurately positioned relative to the blade or bit.
  • Workpiece Securing: The design emphasizes the importance of securing the workpiece. Users are instructed to always use a wooden handscrew clamp to firmly attach the workpiece to the IBOX before making any cut, enhancing safety and cut quality.
  • Stock Ledges and Backing Board: These components provide essential support for the workpiece, helping to prevent tear-out and ensure clean cuts. The backing board can be flipped over to provide a fresh cutting surface when needed, extending its lifespan.
  • Blade Guards: Integrated blade guards are a key safety feature, designed to be in place and securely tightened before any cut. They also function as a vertical stock support, helping to hold the workpiece firmly against the fence.
  • Clearance and Setup: The manual provides detailed steps for setting up the IBOX, including positioning stock ledges and blade guards to ensure proper clearance around the cutter. This systematic approach helps users avoid common errors and achieve optimal results.
  • Test Cuts: The process emphasizes making test cuts to fine-tune the fit of the joint before committing to the final workpiece. This allows for adjustments to the pin plates to achieve the desired friction in the joint.
  • Marked Edges: The instruction to mark one edge of all box boards with a pencil or Sharpie helps users maintain orientation and consistency throughout the cutting process, especially when assembling the final box.
  • DVD Support: The product includes an instructional DVD, which is highlighted as a valuable resource for visual learners, offering demonstrations of techniques, tips, and tricks, including creative approaches to centered joinery and decorative techniques.
  • Safety Warnings: Prominent cautions are provided regarding the use of specific blades (e.g., no "wobble" dado blades or thin kerf 3/32" saw blades) and depth of cut settings (not greater than 7/8" to avoid contacting the metal fence body), ensuring user safety. For SawStop table saw users, specific instructions are given to engage Bypass Mode during calibration and adjustment.

Maintenance Features:

While the manual does not explicitly detail a separate "maintenance" section, several aspects of the device's design and instructions implicitly contribute to its longevity and proper functioning:

  • Component Identification: The manual aids in identifying various components, which is crucial for correct assembly and understanding how each part contributes to the overall function. This knowledge helps users troubleshoot minor issues and ensure parts are correctly reassembled after adjustments.
  • Adjustable Fit: The GlideLOCK™ miter bar's adjustable expansion discs allow users to maintain a smooth glide over time, compensating for minor wear or variations in miter slots.
  • Replaceable Backing Board: The backing board is designed with alternate holes, allowing it to be flipped over for a fresh cutting surface. Dimensions are provided for users to make their own replacement backing boards, ensuring continuous optimal performance without needing to purchase specific replacement parts frequently.
  • Secure Fasteners: Instructions consistently emphasize tightening fasteners securely after adjustments. This prevents components from shifting during operation, which could lead to inaccurate cuts or damage to the device.
  • Cleaning (Implied): Although not explicitly stated, the nature of woodworking tools implies that regular cleaning to remove sawdust and debris would be necessary to maintain smooth operation of moving parts, such as the lead screw and miter bar.
  • No Alterations: A direct instruction "DO NOT alter or modify the INCRA IBOX" serves as a maintenance guideline, preventing users from making changes that could compromise the device's integrity, safety, or performance.

Incra IBOX Specifications

General IconGeneral
TypeBox Joint Jig
MaterialAluminum
AdjustmentMicro-Adjustable
Dovetail CapabilityNo
CompatibilityTable Saws
Maximum Box Joint Width1 inch
Featureseasy setup

Related product manuals