33 inniton.es
English
Installation
Gas connection
This appliance must be installed and connected in accordance with the specic regulations of the
country where it is to be installed.
1. Remove the cooking grate, burner cover and ame spreader, and place the product upside down on
a padded mat.
2. Make sure that the ignition equipment and ame control equipment are not affected in this opera-
tion.
3. Stick the sponge on the edge around the bottom perimeter of the product. Do not leave gaps that
have not been sealed with the sponge along the entire perimeter.
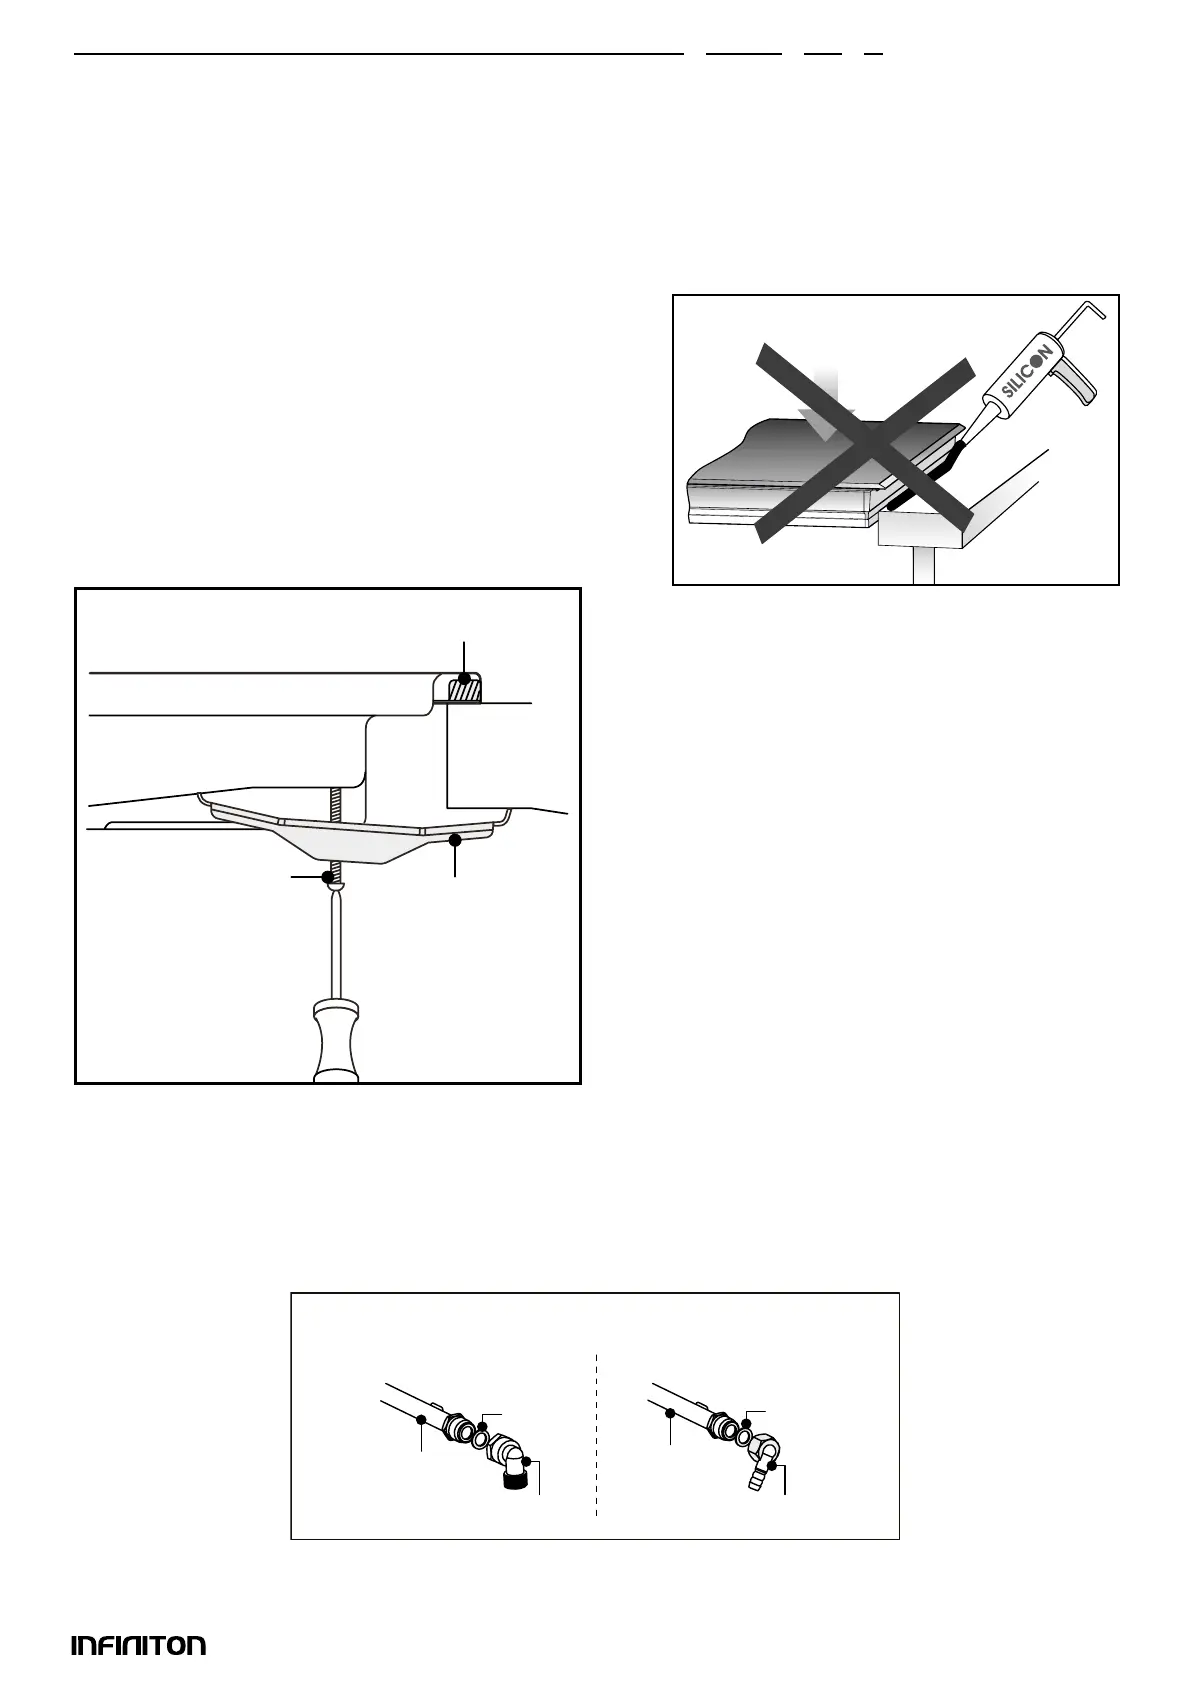
1. Position the bracket (B) by aligning it over the
screw holes. There is a set of screw holes for
each corner of the plate (H). Slightly tighten the
screw (C) towards the bracket (B), so that the
bracket locks onto the hob and you can adjust
the position.
2. Carefully rotate the hotplate and then gently
insert it into the recess you have cut out.
3. On the underside of the hob, adjust the brac-
kets to the appropriate position on the hob.
Then tighten the screws (C) to ensure that it is
secured in position.
Never seal the plate to the recess with silicone.
Sealing the hob with silicone is not recommended, as if the
hob has to be removed, it will be very difcult to remove it
from the worktop and may even break the glass.
Inniton is not responsible for any damage caused by
applying silicone, which would void the warranty.
(A) SEALING STRAP
(C) SCREW
(B) SUPPORT
Seal
G1/2"Female coupler
Gas rail
Ø11.5 Female coupler
LPG > NG
NG > LPG
Gas rail
Seal
Gas supply and installation guidelines