To switch on the dipped-beam head lights:
•
Switch the ignition switch to the ON position, or
startthe engine.
•
Turn the light switch to
m
.The green
m
indi-
cator light in the combination meter lights up.
Side lights
NOTE
Alwayspark your vehicle safely and sufficiently lit ac-
cording to legal standards. To reducethe chanceofa
flat vehicle battery, avoid the continuoususe of the
m
sidelights or parking lights for several hours.
To switch on: turn the light switch to
m
.The
green
m
indicator light in the combination
meter lights up.
Parking lights
Switching on the parking lights ensures that the
corresponding side ofthe vehicleis illuminated.
To switch on the parking lights:
•
The keyisnot in the ignition switch or the switch is
in the OFF position.
•
Turn the light switch to
m
(left-hand side of the
vehicle) or
m
(right-hand side of the vehicle).
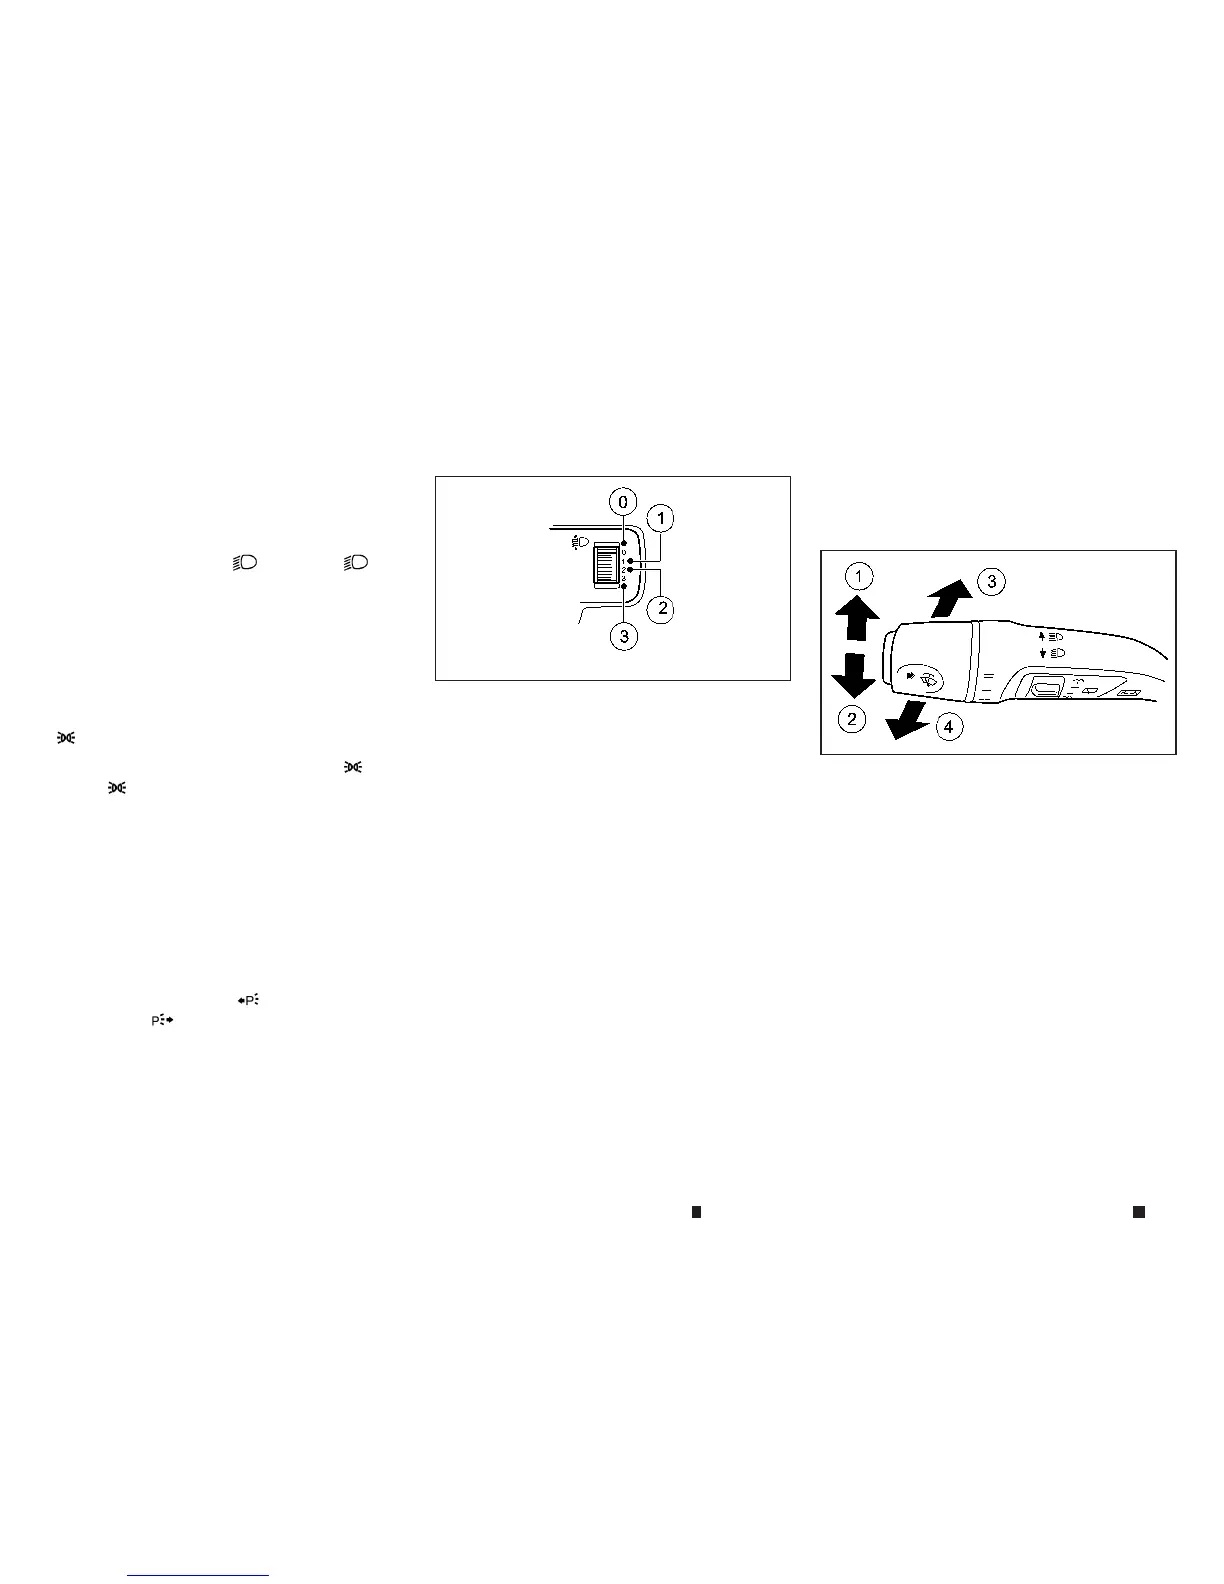
Adjustingthe headlight range
(halogen headlights)
j
0
Driver’s seat andfront-passenger seat
occupied.
j
1
Driver’s seat, front passenger seat and rear
seatsoccupied.
j
2
Driver’s seat,front passenger seat and rear
seats occupied,luggagecompartment
laden.
j
3
Driver’s seat only occupied and maximum
permissiblerear axle load utilised. (Except
for2.2L Diesel models, whichshould use
j
2inthiscondition.)
The headlight rangecontrol allowsyoutoadjust
thecone of light from the headlights to suit the
vehicle load.
•
Startthe engine.
•
Turn the headlight rangecontrol to the position
whichcorresponds to the load in your vehicle.
COMBINATION SWITCH
j
1Turn signal, right
j
2
Turn signal, left
j
3
High-beamheadlights
j
4
Headlight flasher
Turn signals
To indicate briefly: pressthe combination
switch briefly to the pressure point in the direc-
tion of arrow
j
1or
j
2.The corresponding turn
signal flashes three times.
To indicate: pressthe combination switch be-
yond the pressure point inthe direction ofarrow
j
1or
j
2.
NIC2698
NIC2618
2-58 Instrumentsand controls
 Loading...