HOW TO ATTACH THE DIRECT-IT IN (UAA1) Continued
Step 4. Repeat Step 3.
Step 5. We recommend placing the Direct-It IN in the center of the
run to be dried. The hosecuffed ends of the supplied hoses may now
be installed on the Direct-It IN.
INSTALLATION OF DIRECT-IT IN
It is recommended that the drying device be set up at the center of the drying run.
Install in a safe manner. Keep aisles clear and always reduce any unnecessary trip
hazards. Set up warnings if trip hazard exists.
The Direct-It IN comes with the following parts:
01 - UAA1 (bungee cords attached)
03 -
1 ¼ inch Hoses (3 sections of 1 1/4 inch x 50 feet hose)
17 - 5/8 Wall Penetrators (WP2) (bagged)
17 - 1-1/4 Hose Cuffs
01 - CB1 Carry Bag
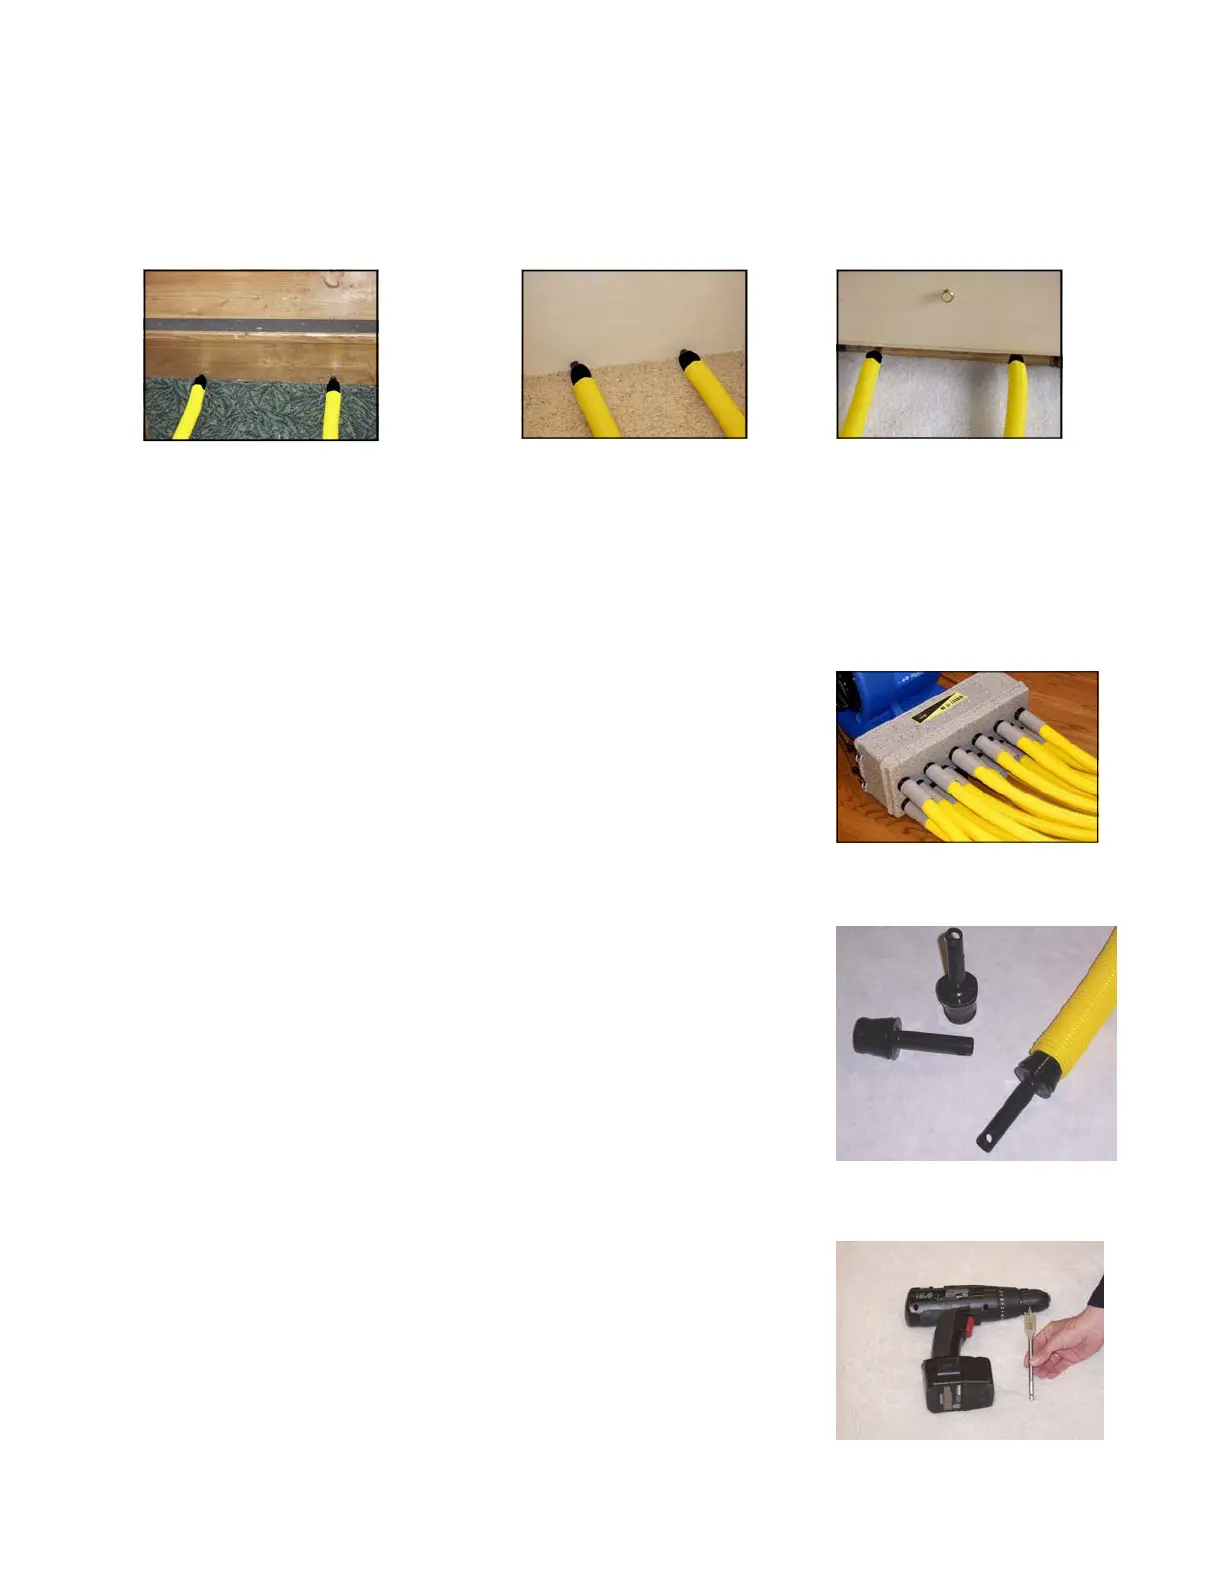
5/8” WALL PENETRATOR *Redesigned*
This part is black in color. It will slide into the end of the 1
1/4” hose or into a 1 1/4” Hose Cuff. The business end of the
Penetrator is 5/8”.
DRILLING HOLES
We HIGHLY RECOMMEND using an adjustable drill stop.
The depth of drill penetration will be based upon the
thickness of material being drilled. The drill should be
stopped from penetrating hidden wall components such as
electrical wires or plumbing pipes.
Page 2 of 4
Stair Drying Wall Drying Cabinet Drying