Do you have a question about the Innova 3011 and is the answer not in the manual?
Essential safety guidelines for operating the code reader and vehicle, covering hazards and protective measures.
Explains the function of buttons (ERASE, DTC) and LEDs (Green, Yellow) on the device.
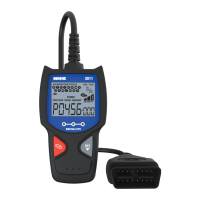
Details the LCD screen elements, icons (RED LED, I/M Status, Link, Vehicle, MIL, History, Freeze Frame, Pending, Permanent), and cable.
Step-by-step guide for connecting the reader, retrieving DTCs, and interpreting results.
Procedure to check the current firmware version of the Code Reader device.
How to erase DTCs, freeze frame data, and the impact on vehicle monitors.
Explains the terms, conditions, and limitations of the manufacturer's warranty.
Information on how to obtain technical support and service for the product.
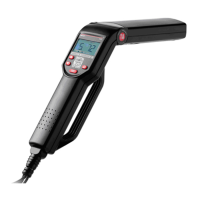
The CarScan Code Reader is a diagnostic tool designed to retrieve and display Diagnostic Trouble Codes (DTCs) from a vehicle's on-board computer, providing insights into potential engine system problems. It is intended for use by experienced service technicians and vehicle owners who wish to perform basic diagnostic checks.
The primary function of the CarScan Code Reader is to communicate with a vehicle's Data Link Connector (DLC) to access and display DTCs, which are fault codes generated by the vehicle's computer when a problem is detected. It also provides information on the I/M Monitor Status, indicating whether the vehicle's emission monitors have completed their diagnostic testing.
The device features an LCD display that shows test results, Code Reader functions, and Monitor status information. It includes several indicator lights (LEDs) to provide a quick visual assessment of the vehicle's engine system conditions:
The Code Reader also displays "Freeze Frame" data, which is a snapshot of engine conditions at the time a DTC was set, and allows for the erasure of DTCs from the vehicle's computer memory.
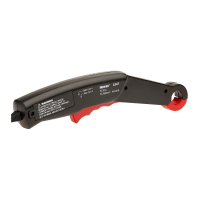
To use the CarScan Code Reader, the user first ensures the vehicle's ignition is off, then locates and connects the Code Reader's cable connector to the vehicle's 16-pin DLC. The connector is keyed to fit only one way. If connection issues arise, the user is advised to rotate the connector 180 degrees or consult the vehicle's service manual. Once connected, the vehicle icon on the Code Reader's display should become visible, confirming a proper power connection.
After connecting, the user turns the ignition on (without starting the engine). The Code Reader automatically links to the vehicle's computer. If the LCD display remains blank, it suggests a lack of power at the vehicle's DLC, prompting the user to check and replace any burned-out fuses in the vehicle's fuse panel or consult the repair manual for the proper computer (PCM) fuse/circuit.
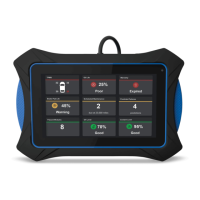
Within 4-5 seconds of linking, the Code Reader retrieves and displays any DTCs stored in the vehicle's computer memory. The LCD display will show the DTC number, a code number sequence (e.g., "01" for the highest priority code), and a code enumerator indicating the total number of codes retrieved. If multiple codes are present, the DTC button can be pressed to scroll through them.
The display also features various icons:
The I/M Monitor Status field shows icons for various monitors (e.g., Misfire, Fuel System, Comprehensive Component, O2 Sensor, EVAP System, etc.). A solid green icon means the monitor has completed its diagnostic testing, while a flashing red icon indicates the monitor is supported by the vehicle but has not yet run its diagnostic testing.
The ERASE button is used to clear DTCs, "Freeze Frame" data, and manufacturer-specific enhanced data from the vehicle's computer. Before erasing, the display will prompt "SuRE?" for confirmation. Pressing the ERASE button again confirms the action, while pressing the DTC button cancels it. It's important to note that erasing codes does not fix the underlying problem; proper repairs must be made to prevent codes from reappearing. After erasing, the I/M Readiness Monitor Status program resets all monitors to a "not run" (flashing) condition, requiring an OBD2 Drive Cycle to set them to "DONE" status.
The firmware version of the Code Reader can be checked by pressing and holding the DTC button while connecting the Code Reader to the vehicle's DLC. The screen will display the tool's current firmware version. Pressing the DTC button again exits this screen and initiates the code retrieval process.
The manual emphasizes the importance of safety precautions during use, including operating the vehicle in a well-ventilated area to avoid carbon monoxide poisoning, wearing approved safety eye protection, being aware of moving engine parts, avoiding contact with hot engine parts, engaging the parking brake, and ensuring the transmission is in park or neutral. It also advises turning the ignition OFF before connecting or disconnecting the Code Reader to prevent damage to the test equipment and vehicle's electronic components.
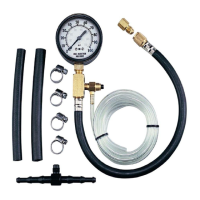
For vehicle electrical measurements, the use of a digital multimeter with at least 10 megOhms of impedance is recommended to prevent damage to the on-board computer. Users are also warned about the highly flammable hydrogen gas produced by vehicle batteries and advised to keep sparks, heated items, and open flames away. Loose clothing and jewelry should be avoided when working on an engine.
The manual strongly advises against replacing parts based solely on DTC definitions, stressing that each DTC has specific testing procedures, instructions, and flow charts in the vehicle's service manual that must be followed to confirm the problem's location.
For service, warranty claims, technical support, or information on updates and optional accessories, users are directed to contact their local store, distributor, or the Service Center. The product comes with a limited one-year warranty covering defects in materials and workmanship under normal use. Service requests should be sent prepaid to the manufacturer, with a typical turnaround time of 3-4 weeks. The warranty does not cover damage from improper use, accidents, abuse, improper voltage, fire, flood, lightning, or alterations/repairs by unauthorized parties.
| Connectivity | USB |
|---|---|
| Reads ABS Codes | Yes |
| Reads SRS Codes | Yes |
| Live Data | Yes |
| Display | LCD |
| Supported Protocols | CAN |
| Compatibility | OBD2 compliant vehicles |
| Functions | Read Codes |