www.inovelli.com/lzw31-sn/setup contact@inovelli.com page 8
Locate an area to install your switch within the recommended distance (Pages 2-3) from your HUB/Gateway.
Walls, furniture, and other obstructions may degrade the communication between the Switch and your HUB/Gateway, so please
keep this in mind when selecting a location.
Follow the, “Wiring Insert” for the remainder of the install -- REMEMBER: TURN OFF ELECTRICITY BEFORE INSTALLATION!
Steps 1: Gather Your Materials, Find an Appropriate Location, and Install Your Switch
Materials Needed: Gangbox with Neutral, Line & Load Wires, Cell Phone/Tablet/Computer, and a Z-Wave enabled HUB/Gateway.
Log into your IDE Account (https://graph.api.smartthings.com/) -- it’s the same login/password as your mobile app
Click on, “My Locations” and then select your location
Next, click on, “My Device Handlers” and press the, “Create New Device Handler” button
Now, open a new tab in your browser and go to: github.com/InovelliUSA/SmartThingsInovelli/tree/master/devicetypes/inovelliusa
and find the device handler for, “Inovelli Dimmer Red Series LZW31-SN” (or something along those lines) and once you see the
option for, “Raw”, click on that button and copy the code*
N
Next, go back to IDE and click on the, “From Code” tab and paste the code from GitHub
Next, click, “Create”, then, “Publish” and finally, “For Me” to finish the installation
Finally, to activate the handler on your switch, go to, “My Devices” in IDE and find your Inovelli switch
Click on the switch, scroll to the bottom and click, “Edit” -- then find, “Type” and then select the new device handler from the
drop down and then click, “Update”
Now, when you open up the switch menu in the app, you should see the Inovelli logo and a ton of cool config options
Device Handler Installation (Abbreviated):
Below is a shortened way to install the device handler. For more in depth instructions, please visit the URL in the footer.
Open up your SmartThings Classic app and click on the, “My Home” tab followed by the, “Things” tab
Scroll to the bottom and click on, “Add a Thing” or click on the (+) at the top right of the screen
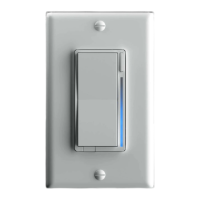
Press the config button (A) 3x and the LED bar should flash blue (if it doesn’t, try pressing the buttons faster or slower)
indicating the switch is in inclusion mode. If successful, the switch LED Bar (B) will turn Green. If unsuccessful, the LED Bar will
turn RED.
You should now see that your device is detected (it should say, “Z-Wave Switch” or something similar)
A
After your device is detected, press, “Save” (or if you’d like to rename your device, please do so and click, “Save”)
Once you click, “Save” a pop-up will appear asking you to, “Confirm Paired Devices” -- Click, “OK”
Now, you should be back at the, “My Home” screen and you should be able to see your switch!
Z-Wave Range Check: Easily check whether or not your switch is within range by holding the Config Button (A) for 5-10
seconds. The LED bar will indicate: RED = Not in Range, or GREEN = Within Range (Good Signal).
GREEN
RED
Step 2: Adding (Including) to the Network & Finishing the Setup Process (Using the SmartThings Classic App)
Now that the switch is physically installed, and you’ve completed the, “Wiring Insert” instructions, let’s start the inclusion (pairing)
process. Please make sure you are using the, “SmartThings Classic” app. If you’d like to use the Smarthings (New) App, please
check the WWST URL to see if Inovelli is listed: https://www.smartthings.com/products. If it’s not, you will have to use the Classic
app with a Device Handler.
IMPORTANT: If you are having issues pairing/including your device, please ensure your switch is within range of your HUB (pages
2-3) or by checking the Z-Wave signal by holding down the Config Button (A) for five (5) seconds (more info below in the, “Z-Wave
Range Check” section). If you’re within range and the LED Bar (B) is GREEN when you check the range, then you will have to run
an Exclusion. For Exclusion mode, click, “Menu”, then “Hub is Online”, then, “Z-Wave Utilities”, and finally, “General Device
Exclusion”. Then press the Config Button (A) 3x until your HUB says the device is excluded. You may then add (include) the switch.
Including (Pairing) Your Switch: SmartThings Instructions
Below are the general instructions on how to include (pair) the switch for Samsung SmartThings users.
PLE
PLEASE READ: As of the date this manual was written (May 27th, 2019), the switch has not been WWST (Works With
SmartThings Certified). However, by the launch date of our product, we do anticipate it will be WWST Certified. The reason we’re
stating this is because if you receive this product prior to the certification, you will need to use the SmartThings Classic App and
also install a Device Handler for you to experience all the bells and whistles. If you use the new SmartThings App or do not install a
Device Handler with the SmartThings Classic App, the remote functionality will only be on/off and dim. You’ll still be able to
co
configure the switch as shown on Pages 9-10, but there will be no scene control, notifications or power monitoring).
LZW31-SN | Dimming Switch
Red Si
 Loading...