www.inovelli.com/lzw31-sn/setup contact@inovelli.com page 9
LZW31-SN | Dimming Switch
Red Si
Specific Example
Using the logic above, let’s change the, “Minimum Dim Level” to 12% (switch never dims below 12%).
Hold the Config Button (A) for 10 seconds to enter config mode (LED Bar will light up YELLOW and by
default it will blink 1x since it starts out on Parameter 1)
Looking at Figure 1.2, you’ll notice that to edit, “Minimum Dim Level”, you need to tap the config button 2x
After tapping the Config Button (A) 2x, the LED Bar (B) will blink YELLOW twice (See NOTE) to confirm
Figure 1.3 (Page 10) shows that the Minimum Dim Level has a range of 1-45%. Each tap of the switch = 1
unit of measurement (in this case %), so you’d tap UP 12x on the paddle to reach 12%.
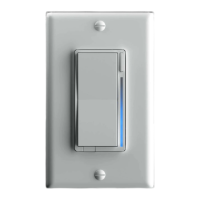
A
As you are moving up to reach your desired %, the LED bar will give you feedback by blinking PURPLE
(same logic as above with the YELLOW -- See NOTE below).
Now, we’ll save this configuration by holding down on the Config Button (A) for 10-15 seconds and the
LED Bar (B) will turn GREEN and then YELLOW -- release the button at YELLOW and it will turn CYAN to
confirm the Parameter has been saved.
NOTE: To easily understand what parameter you’re editing, the LED Bar will slow blink (ie: if you release
your finger from the paddle and you’re on parameter 6, the switch will blink 6x to show you).
Sl
Slow blinks = multiples of 10 / Fast blinks = single digits (Example: 34 = 3 slow blinks followed by 4 fast)
To enter configuration mode, hold down the config button (A) for 10-15 seconds and the LED Bar (B) will light up YELLOW
From here, refer to Figure 1.2 to see what parameter you’d like to change and tap the config button that many times (look at the,
“About” column to find the parameter you’d like to change and then go one column to the left -- highlighted in red -- to see how
many times you need to press the Config Button (A). For example: If you want to change the Maximum Dim Level, press the
config button (A) 3x or if you want to change the, “Power On State”, press the Config Button (A) 7x and so on).
Once
Once your parameter has been selected, the LED Bar (B) will blink YELLOW (it will correspond to the parameter you select) --
now press up or down on the paddle to adjust the parameter settings (Figure 1.3 - highlighted in red) to your liking.
Finally, once you’ve settled on a customization you like, it’s time to save your configuration settings. To do this, hold the config
button (A) again for 10 seconds and the LED Bar (B) will then blink to confirm.
Configuration Logic
Once you master the logic behind how the configuration works, any of the parameters in Figure 1.2 can be changed.
NOTE: Below is the logic behind how to configure the above parameters (Figure 1.2) from the switch itself. Due to space
constraints of this manual, we’ll show you how to configure some of the more popular parameters. For more details, please visit
our website which will have written and video tutorials for each parameter listed in Figure 1.2.
Figure 1.2 - Parameters that can be changed from the switch
Switch Configuration Settings
There are a couple of ways to configure your switch. The first is via the switch itself, while the second is via your HUB or
Gateway. On this page, we’ll show you which parameters can be changed via the switch and how to change them while on Page
10, we’ll define all of the parameters and list the Z-Wave command classes for reference. Let’s begin!
 Loading...