EasyManua.ls Logo

Insignia NS-50D510NA19 - User Manual

Insignia NS-50D510NA19
2 pages
Print Icon
To Next Page IconTo Next Page
Loading...
QUICK SETUP GUIDE
50" 1080p
60 Hz LED TV
WHICH CABLES DO YOU HAVE?
HDMI
(BEST)
Best video quality
AV (GOOD)
COAXIAL (GOOD)
Note: Images do not necessarily represent the exact design of your television.
Multi-purpose jacks: You can plug any device that uses HDMI into any HDMI jack. However, certain
devices must be connected to the HDMI 1 (ARC) jack. See the instructions that came with
your ARC device for more information.
AUDIO/VIDEO OUT
G
A
M
E
A
S
P
E
C
T
C
C
A
C
C
AAA
+
AAA
+
VIDEO
M4 screws (18 mm length)
2
MAKING CONNECTIONS
How do I watch TV (cable, satellite, or antenna) or connect a device, such as a DVD or Blu-ray disc player,
game console, or tablet?
FEATURES
1
START HERE
How do I attach the stands to my TV? (not for wall mounting)
You’ll need: Soft surface and Phillips screwdriver
Place your TV face-down on a cushioned, clean surface.
Align the screw holes on the TV stands with the holes on the bottom of your TV, then secure each stand
to your TV with the provided screws.
WALL MOUNT
How do I prepare my TV for wall mounting?
(not for use with a TV stand)
You’ll need: Soft surface and Phillips screwdriver
!
Before using your new product, please read these instructions to prevent any damage.
B
OR
Before you mount your TV, make sure that:
You remove the stand legs
The bracket supports the weight of your TV.
A Carefully place your TV face-down on a cushioned, clean surface.
B See the instructions that came with your wall mount for more information
about how to correctly mount your TV.
INCLUDED ACCESSORIES
Remote control and two AAA batteries
TV stands
M4 screws (18 mm length) (4 pcs.)
Your TV has four VESA mounting holes on
the back. If you attach a wall-mount
bracket to the back of your TV, the bracket
must be securely attached, using all
four holes. If you do not use all four
mounting holes, your TV may fall and
cause property damage or personal injury.
See the documentation that came with
your wall-mount for complete mounting
instructions.
FIND YOUR USER GUIDE ONLINE!
1 Go to www.insigniaproducts.com.
2 Use the search bar to nd NS-50D510NA19.
3 Select Support & Downloads.
4 Next to User Guide, select the language you want.
STOP
Do not plug your power cord in until all
other devices have been connected.
VESA Mounting Pattern
VESA mount (mm): 200 × 200 – M6 type screws,
minimum 10mm
A
NS50D510NA19
Power indicator
Remote control sensor
Power button
NS-50D510NA19_17-0911_QSG_V1_EN_Final.ai 1 1/24/2018 9:56:31 AM
Question and Answer IconNeed help?

Do you have a question about the Insignia NS-50D510NA19 and is the answer not in the manual?

Summary

START HERE

Attaching TV Stands

Instructions for securing TV stands to the television base using provided screws.

Preparing for Wall Mounting

Steps for preparing the TV for wall mounting, including stand removal.

FEATURES

Power Button and Indicator

Locates the physical power button and identifies the power indicator LED on the TV.

MAKING CONNECTIONS

Connecting External Devices

Guide on connecting devices like cable boxes or game consoles via HDMI or AV inputs.

CONNECTING AUDIO DEVICES

Connecting External Speakers

Instructions for connecting the TV to external audio systems using digital optical or analog outputs.

USING YOUR REMOTE CONTROL

Remote Control Functions

Explains the purpose and operation of various buttons on the Insignia remote.

TURNING ON MY TV

Powering On the TV

Details on when and how to safely plug in the power cord and turn on the TV.

UNIVERSAL REMOTE CONTROL CODES

Universal Remote Codes

Provides a list of codes for programming universal remotes to control the TV.

Overview

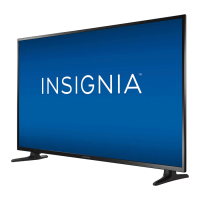
This document provides a comprehensive guide for setting up, connecting, and operating your new Insignia 50" 1080p 60 Hz LED TV (NS-50D510NA19). It covers everything from initial physical setup to connecting various audio and video devices, and understanding the remote control functions.

Initial Setup and Physical Installation:

The guide offers two primary methods for physically setting up your TV: attaching the stands for tabletop use or preparing it for wall mounting.

Attaching the Stands (for tabletop use):

To attach the stands, you will need a soft, cushioned, clean surface and a Phillips screwdriver. First, place your TV face-down on the cushioned surface to protect the screen. Align the screw holes on the TV stands with the corresponding holes on the bottom of your TV. Once aligned, secure each stand firmly to the TV using the four provided M4 screws (18 mm length). This ensures stability for tabletop placement.

Preparing for Wall Mounting:

If you plan to wall mount your TV, you will also need a soft, cushioned, clean surface and a Phillips screwdriver. Before mounting, ensure that the stand legs are removed from the TV. It's crucial to verify that your chosen wall-mount bracket can support the weight of your TV. Place your TV face-down on a cushioned surface. The TV has four VESA mounting holes on the back, with a VESA mounting pattern of 200 x 200 mm, requiring M6 type screws with a minimum length of 10mm. When attaching a wall-mount bracket, it is imperative to use all four mounting holes for secure attachment. Failure to use all four holes could result in the TV falling, leading to property damage or personal injury. Always refer to the documentation that came with your specific wall mount for complete and correct mounting instructions.

Making Connections:

The TV offers various connection options for different audio and video devices, categorized by video quality: HDMI (BEST), AV (GOOD), and COAXIAL (GOOD).

HDMI Connections (BEST video quality):

The TV is equipped with three HDMI ports: HDMI 1 (ARC), HDMI 2, and HDMI 3. HDMI offers the best video quality. You can plug any device that uses HDMI into any of these HDMI jacks. However, certain devices, particularly those supporting Audio Return Channel (ARC) functionality, must be connected to the HDMI 1 (ARC) jack to utilize ARC features. Refer to the instructions that came with your ARC-compatible device for more information on its specific connection requirements.

AV Connections (GOOD video quality):

For devices that use AV (composite) cables, the TV provides an AV IN port. This connection typically offers good video quality. To connect an AV device, plug the yellow video cable into the VIDEO jack and the red and white audio cables into the L-AUDIO-R jacks respectively.

Coaxial Connections (GOOD video quality):

The TV includes an ANT/CABLE coaxial input for connecting an antenna or cable TV service. This connection provides good signal quality for broadcast or cable television.

Audio Output Connections:

To connect external audio devices like soundbars or home theater systems, the TV offers both digital and analog audio output options.

Digital Audio Output:

The TV has a DIGITAL OPTICAL OUTPUT port. To connect a digital audio device, use an optical audio cable. Ensure that on your TV's Audio menu, you select "Audio Format" and set the "Audio Format" option to PCM. This ensures compatibility with most digital audio receivers.

Analog Audio Output:

The TV also provides an AUDIO OUT (L-AUDIO-R) port for analog audio connections. Use standard red and white RCA audio cables to connect to an external speaker system or soundbar.

Remote Control Functions:

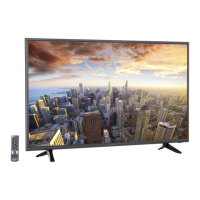
The included remote control (NS-RC4NA-18) provides comprehensive control over your TV's functions.

  • Power: Turns the TV on or off.
  • INPUT: Opens the INPUT SOURCE list, allowing you to switch between HDMI 1, HDMI 2, HDMI 3, AV, USB (Photos), and TV inputs.
  • Numbers (0-9): Used to enter channel numbers or the parental controls password. Also used to enter digital sub-channel numbers (e.g., 4.1).
  • MENU: Opens the TV menu for settings and adjustments.
  • Arrows (Up, Down, Left, Right): Navigates through on-screen menus.
  • ENTER: Confirms selections or changes within menus.
  • EXIT: Closes the TV menu.
  • ACC (Accessibility): Opens the Accessibility menu.
  • INFO*: Opens a TV status banner, displaying information about the current channel or input.
  • CC (Closed Captioning): Turns closed captioning on or off.
  • VOL (+/-): Adjusts the volume.
  • MUTE: Mutes the sound.
  • CH (+/-): Changes TV channels.
  • ASPECT: Changes how the picture is displayed on the screen (e.g., normal, wide, zoom).
  • SLEEP: Sets the sleep timer.
  • GAME: Adjusts the picture for the ultimate gaming experience, optimizing settings for gaming.
  • PICTURE: Selects the video mode (e.g., standard, movie, vivid).
  • AUDIO: Selects the audio mode (e.g., standard, music, movie).
  • Media controls (Play, Pause, Stop, Fast Forward, Rewind): Controls HDMI-CEC devices connected to your TV (INlink) and manages photo slideshows from a USB device.
  • Recall: Returns to the previous channel.
  • FAVORITE: Opens the Favorite Channel List.

Turning On Your TV:

Once all physical connections are made and the TV is in its desired location, plug the power cord into a power outlet. Then, insert two AAA batteries into the remote control, ensuring correct polarity. Press the power button on the remote control to turn on the TV. Follow the on-screen instructions for initial setup, including selecting your menu language.

Universal Remote Control Compatibility:

If you already own a universal remote control and wish to program it to operate your Insignia TV, the guide provides a list of common codes for various cable providers and universal remote brands, including AT&T U-verse, Cablevision, Charter, Comcast, Cox, DirecTV, Dish Network, RCA, Rogers, Time Warner, and Verizon. For an up-to-date list of codes, you can visit www.insigniaproducts.com/remotecodes.

Maintenance and Support:

  • User Guide: An online user guide is available at www.insigniaproducts.com. Search for "NS-50D510NA19," select "Support & Downloads," and choose your preferred language for the user guide.
  • Power Cord: Do not plug in the power cord until all other devices have been connected to prevent potential damage.
  • Warranty: The product comes with a one-year limited warranty. Visit www.insigniaproducts.com for details.
  • Additional Help: For further assistance, check the Support Community at http://community.insigniaproducts.com/ for helpful information from other Insignia TV owners.
  • Customer Service: For customer service, you can contact Insignia at 877-467-4289 (U.S./Canada).

This guide is designed to help you quickly and efficiently set up and enjoy your new Insignia TV, ensuring a smooth and trouble-free experience. Always read the instructions carefully before using your new product to prevent any damage.

Insignia NS-50D510NA19 Specifications

General IconGeneral
Screen Size50 inches
Display TypeLED
Refresh Rate60Hz
HDMI Ports3
USB Ports1
Smart TVYes
Built-in Wi-FiYes
Resolution1080p (1920 x 1080)
Audio Output20W
Operating SystemFire TV

Related product manuals