EasyManua.ls Logo

InSinkErator Badger 15ss - User Manual

InSinkErator Badger 15ss
16 pages
Print Icon
To Next Page IconTo Next Page
Loading...
Badger
®
The Emerson logo is a trademark and service mark of Emerson Electric Co. Printed in U.S.A. © 2017 InSinkErator, InSinkErator® is a division of Emerson Electric Co. All Rights Reserved.
El logotipo de Emerson es una marca registrada y una marca de servicio de Emerson Electric Co.
Impreso en los EE.UU. © 2017 InSinkErator, InSinkErator es una división de Emerson Electric Co. Todos los derechos reservados.
Le logo Emerson est une marque de commerce et une marque de service de Emerson Electric Co. Imprimé aux É.-U. © 2017 InSinkErator, InSinkErator® est une division de Emerson Electric Co. Tous droits réservés.
1
78997-ISE Rev B
DANGER
indicates a hazardous
situation which, if not avoided, will result in
death or serious injury.
WARNING
indicates a hazardous
situation which, if not avoided, could result
in death or serious injury.
CAUTION
indicates a hazardous
situation which, if not avoided, could result
in minor or moderate injury.
NOTICE
is used to address practices
not related to personal injury.
(or equivalent) signs
indicate specific safety-
related instructions or procedures.
PELIGRO
indica una situación
peligrosa que, si no se evita, provocará
lesiones graves o incluso la muerte.
ADVERTENCIA
indica una situación
riesgosa, la cual, si no se evita, puede
ocasionar lesiones graves o incluso
la muerte.
PRECAUCIÓN
indica una situación
riesgosa, la cual, si no se evita, puede
provocar heridas leves o moderadas.
AVISO
hace referencia a
prácticas que no presentan riesgos de
generar lesiones personales.
(o equivalentes) son
señales que designan
instrucciones o
procedimientos específicos de seguridad.
DANGER
indique une situation
dangereuse qui, si elle nest pas évitée,
entraînera la mort ou une blessure grave.
AVERTISSEMENT
indique une
situation dangereuse qui, si elle n’est pas
évitée, pourrait entraîner la mort ou une
blessure grave.
MISE EN GARDE
indique une
situation dangereuse qui, si elle n’est pas
évitée, pourrait entraîner une blessure
mineure ou modérée.
AVIS
est utilisé pour décrire
des pratiques qui ne sont pas liées à des
blessures.
(ou l’équivalent) ces
DIRECTIVES DE
SÉCURITÉ
panneaux indiquent des
directives ou des procédures concernant
spécifiquement la sécurité.
SAFETY
INSTRUCTIONS
INSTRUCCIONES
PARA SU
SEGURIDAD
®
www.insinkerator.com
Badger
®
1, Badger
®
1XL, Badger
®
100,
Badger
®
5, Badger
®
5XL, Badger
®
500,
Badger 5XP
®
, Badger
®
15ss, Badger 333
®
,
Badger 444
®
,Badger
®
900, Contractor 333
®
,
Badger
®
1HP, Contractor 1000
1-800-558-5700
®Registered trademark/TM Trademark of Insinkerator
© 2019 All rights reserved.
®Marca registrada/TM Marca comercial de Insinkerator,
© 2019 Todos los derechos reservados.
®Marque déposée/TM Marque de commerce de Insinkerator,
©2019. Tous droits réservés.

Other manuals for InSinkErator Badger 15ss

Question and Answer IconNeed help?

Do you have a question about the InSinkErator Badger 15ss and is the answer not in the manual?

Summary

General Safety Warnings and Icons

DANGER

Indicates a hazardous situation resulting in death or serious injury.

WARNING

Indicates a hazardous situation resulting in death or serious injury.

CAUTION

Indicates a hazardous situation resulting in minor or moderate injury.

NOTICE

Addresses practices not related to personal injury.

SAFETY INSTRUCTIONS

Signifies specific safety-related instructions or procedures.

Product Components Identification

Disposer Components

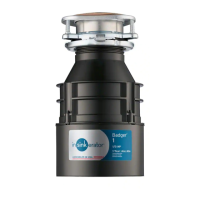
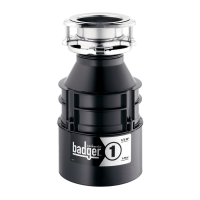
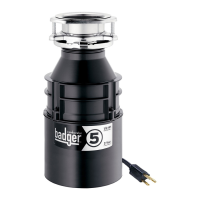
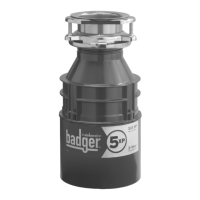
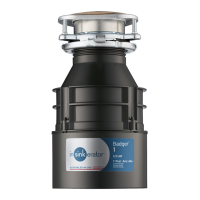
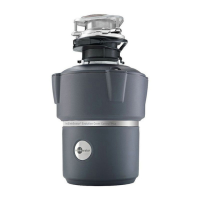
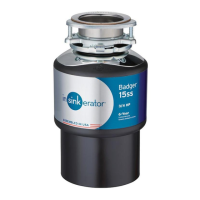
Lists all parts A through M of the disposer.

Tools and Materials

Lists necessary tools and materials not included with the product.

Model Specifications and Pre-Installation Notes

Model Dimensions

Provides dimensions (A, B) for different Badger models.

Before You Begin

Key considerations before starting installation.

Dishwasher Drain Plug

Note on removing the drain plug for dishwasher connection.

Removing the Old Disposer - Steps 1-5

Electrical Safety

Turn off power to prevent electrical shock hazard.

Disconnect Existing Connections

Detach drain trap and dishwasher connections.

Loosen and Remove Disposer

Support unit, loosen mounting, and disconnect disposer.

Removing the Old Disposer - Steps 6-10

Mounting Compatibility Check

Verify if new mounting is same as old.

Disassemble Mounting Assembly

Loosen screws and remove snap ring.

Sink Flange Removal and Preparation

Remove old flange, clean sink, and apply new putty.

Property Damage Warning

Risk of water leakage if not assembled properly.

Installing the Sink Flange and Mounting Assembly

Install Sink Flange

Insert flange into sink drain and secure.

Assemble Upper Mounting Components

Install gaskets, flanges, rings, and tighten screws.

Connecting the Disposer to Electrical Supply - Part 1

Dishwasher Drain Plug

Remove plug if connecting a dishwasher to prevent overflow.

Turn Disposer and Remove Plug

Access the drain plug by turning the disposer.

Note on Dishwasher Overflow

Warning if drain plug is not removed for dishwasher connection.

Skip Dishwasher Connection

Instructions to continue to step 17 if not connecting a dishwasher.

Connecting the Disposer to Electrical Supply - Part 2

Prepare for Wiring

Remove electrical cover plate and pull out wires.

Insert Cable Connector

Secure electrical cable to the disposer.

Electrical Requirements and Grounding

Disposer requires a switch and proper grounding for safety.

Wire Connections

Connect disposer wires to power source (neutral, hot, ground).

Grounding Hazard Warning

Improper grounding can result in electric shock hazard.

Connecting the Disposer to Mounting Assembly - Part 1

Push Wires and Replace Cover

Secure internal wiring and replace the cover plate.

Trim Discharge Tube

Adjust discharge tube length for a proper fit.

Attach Discharge Tube Assembly

Connect discharge tube, gasket, and flange to disposer.

Mount Disposer Unit

Hang disposer on mounting ring and lock securely.

Falling Hazard Warning

Do not position head or body under disposer during installation/removal.

Connecting the Disposer to Mounting Assembly - Part 2

Lock Mounting Ring

Turn mounting ring until tabs lock over ridges.

Detach Spec Label

Detach removable portion of spec label and place visibly.

Reconnect Plumbing and Test

Reconnect plumbing, test for leaks, and reconnect power.

Caution on Leaks;Falling Hazard

Ensure tabs are locked to avoid leaks or falling hazard.

Important Safety Instructions and Grounding

Personal Injury Warning

Do not position head or body under disposer during removal or installation.

Grounding Requirements

Proper grounding is essential for safe operation and preventing shock.

General Precautions

Basic precautions for safe use of electric appliances.

Operation Dos and Donts

Guidance on proper usage and things to avoid for operation.

Flushing Notice

Consequence of not flushing the disposer properly.

User Maintenance Instructions

Cleaning the Disposer

How to clean the grind chamber and baffle to remove odors.

Releasing a Jammed Disposer

Steps to free a jammed motor using the Jam-Buster wrench.

InSinkErator Badger 15ss Specifications

General IconGeneral
Grind Chamber Capacity26 oz
Sound InsulationNo
Voltage120 V
Average Electrical Usage3-4 KWh per Year
Dishwasher Drain ConnectionYes
Motor Speed1725 RPM
Grind Components MaterialStainless Steel
Sound LevelStandard
Anti-JammingNo
Motor TypeDura-Drive Induction Motor
Average Water Usage1 gallon per day
TypeContinuous Feed
Warranty2-Year Limited Warranty

Related product manuals