3 4
9. “Imp.” button:
in measurement mode. It also use as the up direction button.
Press the button to setup the impact direction
Clock
Material Code
Conversion Averaged Value
Conversion Scale
Conversion Value
HLD Averaged Value
HLD Value
Impact Direction
Imp act Times
Specification:
3
Display range: 0 999HLD~
Accuracy: ±6HLD(when HLD= 800)
Resolution: HV, HB, HRB, HRC, HV, HS, MPa
repeatability: 6HLD±
Impact direction: 0 °, °, 180°, °, °±90 ±45 ±135
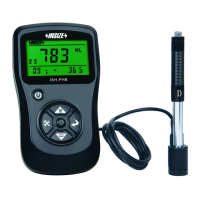
Key function:
4
2
1
9
8
7
6
5
4
3
1.On/Off button: Turn it on/off by pressing and holding the
button.
2. Backlight button: Press the button to turn on/off the
backlight.
3. “Back/Print” button:
① In measurement mode, press and hold the button to erase
measured data, at the same time, if the mini-printer is linked
with the mian unit, it will print out those data then erase
measured data.
②In other mode, press “Back/Print” button to complete setup
and save the parameters that you set and return to the
measurement mode.
4. “Browse” button: Browse the memory data.
5. “Date/Time” button: Adjust the clock and calendar.
6. “Del.” button: Press and hold the button to delete current
data in measurement mode or browse mode. It also use as the
left direction button.
7. “Convert” button: Press the button to setup the conversion
scale in measurement mode. It also use as the down direction
button.
8. “Mat’l” button: In measurement mode, press the button to
select the material that you will impact. It also use as the right
direction button.
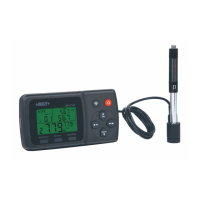
LCD display:
5
Calibration
Please do calibration when use the device first time or interval for a
long time.
Press and hold the “Back/Print” button to erase measured data.
Then select number 01 material and set impact direction is down.
Measure 5 times on the surface of standard block(you should
delete the value which deviation is large).
1
Press “Back/ Print” button back to the measurement interface.
3
Press and hold the “Date/Time” button about 2 seconds to enter
the calibration interface. Use the left and right direction buttons to
move the flicker. Use the up and down direction buttons to adjust
until the display value is same to the standard value of the block.
2
Note: The distance between any two impact position should be ≥3mm.
the distance between impact position and the edge of the sample
should be ≥3mm.
Measurement
Preparation before measuring:
1
Select the material:
Press the “Mat’l” button to select the material code according
to the back label.