Do you have a question about the Inspire BL1 Inspire and is the answer not in the manual?
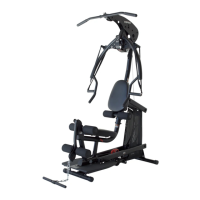
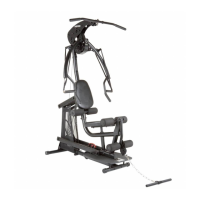
Warning against using the press arm for body weight, as it is not designed for it.
Instruction to prevent children from using the equipment unsupervised.
Advice to cease exercise and consult a doctor for adverse physical symptoms.
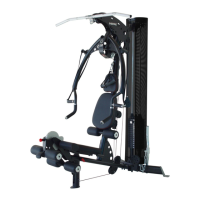
Connect the front and rear foot assemblies to the base frame using specified bolts.
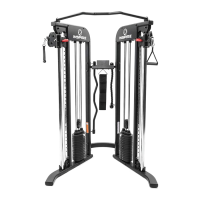
Attach slider assembly, pulleys, and spacers to the weight selector tube.
Connect the weight selector tube assembly to the base frame using a specific bolt.
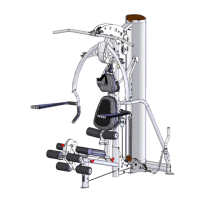
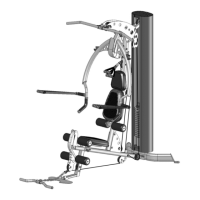
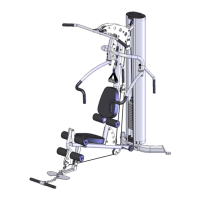
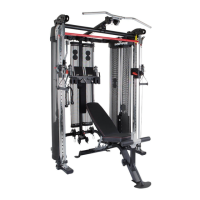
Secure the lower and upper arms to the base frame with M16x230 Hex Bolts.
Attach the lower main frame assembly to the foot plate using M10x60 Hex Bolts.
Attach the lower main frame to the lower arms using an M16x230 Hex Bolt.
Connect the upper main frame to the lower main frame and upper arms.
Mount top beam plates and lat bar holders to the upper main frame, finger tighten only.
Secure press arm mount to top beam plates and install pop-pin shaft.
Connect the press arm to the press arm mount using an M12x160 Hex Bolt.
Install leg extension assembly and press arm mount cover plate.
Mount the back pad tilt frame with rollers, screws, and nuts to the upper main frame.
Secure seat pad to seat stem and back pad to backpad tilt frame.
Install foam rollers onto leg extension assembly and seat stem using roller tubes.
Route cables sequentially through pulleys and secure both ends with hardware.
Slip on and secure the left and right shrouds to the upper shroud mount and frame.
Connect lat bar and revolving curl bar to the cable system via chain and spring clips.
Fine-tune the weight selector mechanism for smooth operation.
Adjust cable tension via pulley or press arm stop to remove slack.