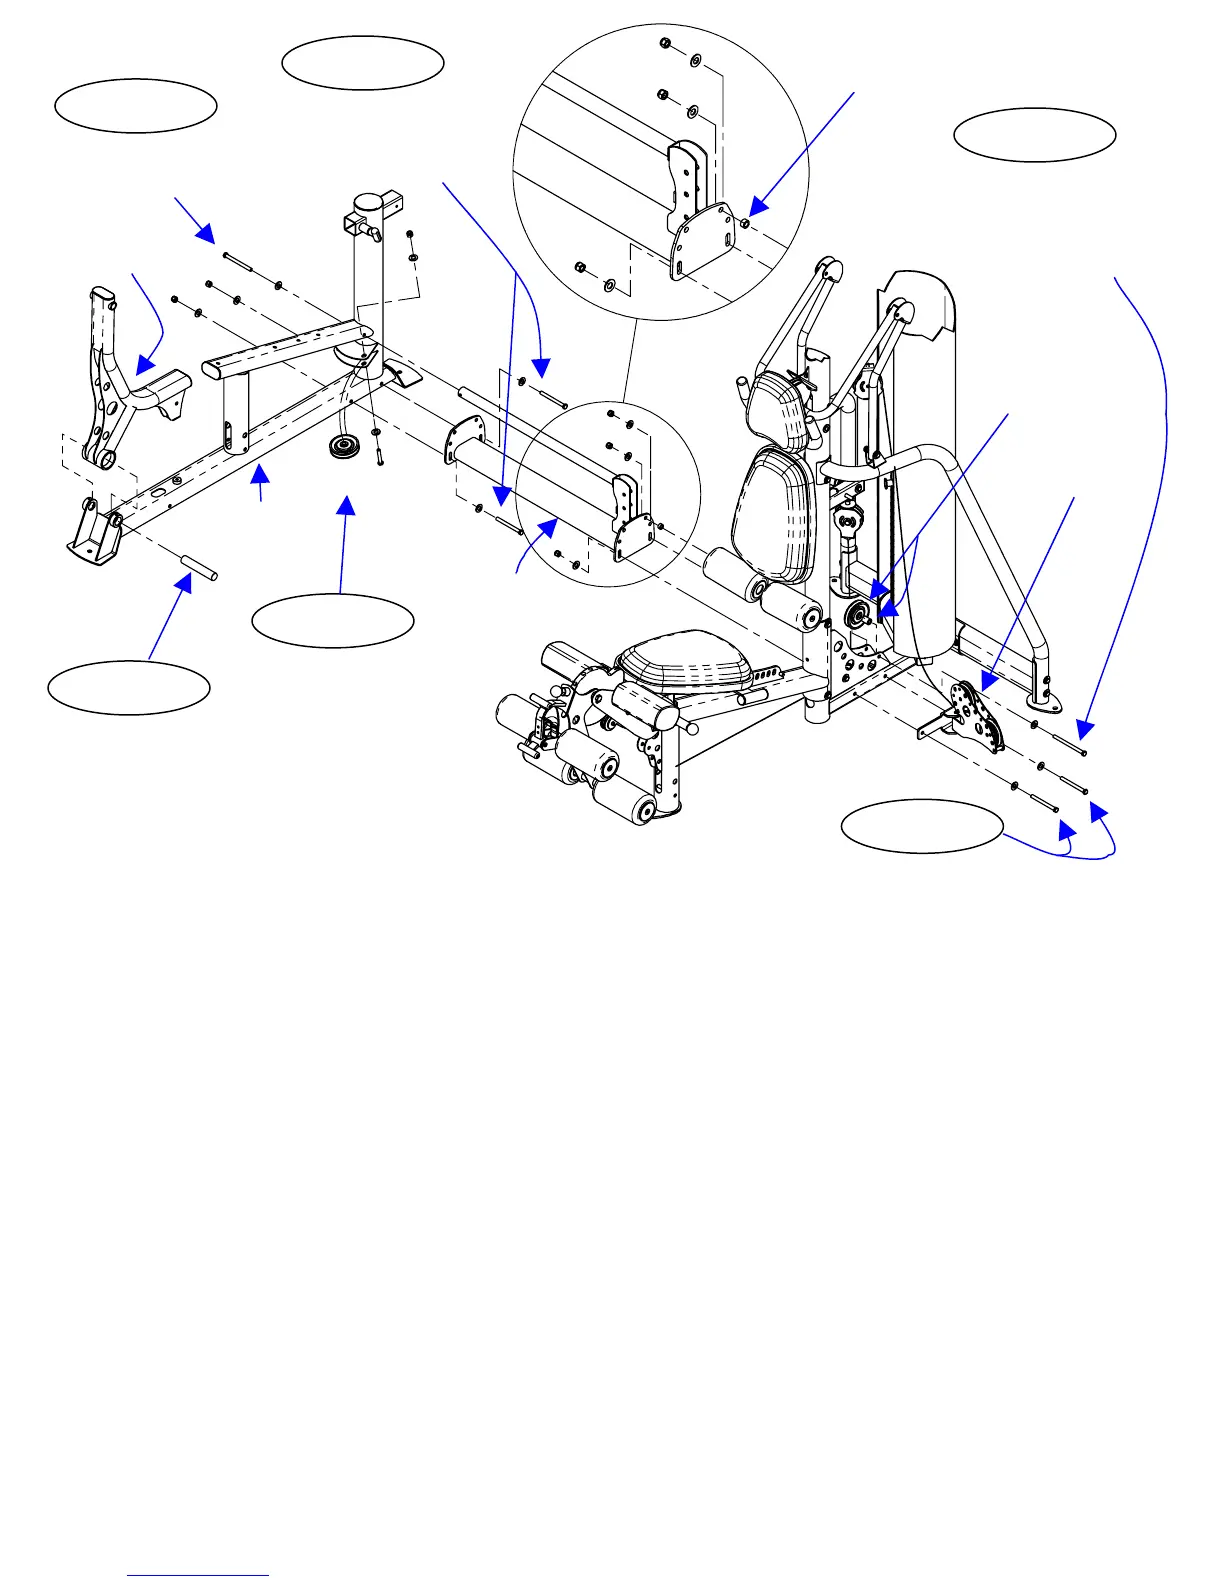
STEP 5
STEP 6
Pulley 1 &
1” Barrel Spacer
Swivel Pulley
Pulley 2 Bracket
Attachment Arm
1 – 3 ½” Pulley
1 – 2” Hex Bolt
2 – 3/8” Flat Washers
1 – 3/8” Lock Nut
Step 4: Attach Pulley 2 to Leg Press Base using:
Two (3/8” Flat Washers) One (3 ½” Pulley)
One (3/8” Lock Nut) One (2” Hex Bolt)
(Wrench Tighten)
Step 5: Secure Attachment Arm & Swivel Pulley Bracket to Main Upright using:
Two (4 ¼” Hex Bolts) Two (3/8” Lock Nuts)
Four (3/8” Flat Washers)
(Finger Tighten Only)
Step 6: Secure attachment arm to main upright using:
One (3 ½” Pulley) One (5/16” Barrel Spacer) One (1” Barrel Spacer)
One (3 ¾” Hex Bolt) Two (3/8” Flat Washers) One (3/8” Lock Nut)
Note: Re-install Pulley 1 and 1” Barrel Spacer in original location
(Finger Tighten Only)
Step 7: Secure Attachment Arm to Leg Press Base using: Two (5” Hex Bolts)
(Finger Tighten Only) Four (3/8” Flat Washers)
Two (3/8” Lock Nuts)
Step 8: Secure tubular portion of Attachment Arm to Leg Press Base Using:
(Wrench Tighten Bolts in Steps 5-8 Now) One (4 ¼” Hex Bolt)
One (3/8” Flat Washer)
Step 9: Attach Press Arm to Leg Press Base using: One (Pivot Shaft)
(Tighten Allen Screws using 4mm Allen Wrench Included)
Page 12
STEP 4
STEP 7
STEP 9
STEP 8
5/16” Barrel Spacer
Press Arm
1 – 4 ¼” Hex Bolt
1 – 3/8” Flat Washer
2 – 5” Hex Bolts
2 – 3/8” Lock Nuts
4
3/8” Flat Washers
Leg Press Base
1 – Pivot Shaft
2 – 4 ¼”Hex Bolts
4 – 3/8” Flat Washers
2 – 3/8” Lock Nuts
1 – 3 ¾” Hex Bolt
1 – 5/16” Barrel Spacer
1 – 3/8” Lock Nut
2
3/8” Flat Washers
 Loading...