NOTE: If you plan to use Novell(R) Client(TM) for Windows, it should be installed prior to installation of the
Intel PROSet/Wireless software. If Intel PROSet/Wireless is already installed, you should remove it prior to
installation of Novell Client for Windows.
To install the software:
1. Insert the Installation CD in your CD drive.
2. Click Install Software on the Intel PROSet/Wireless Installer screen.
3. Read the license agreement.
4. Select I accept the terms in the license agreement.
5. Click Next.
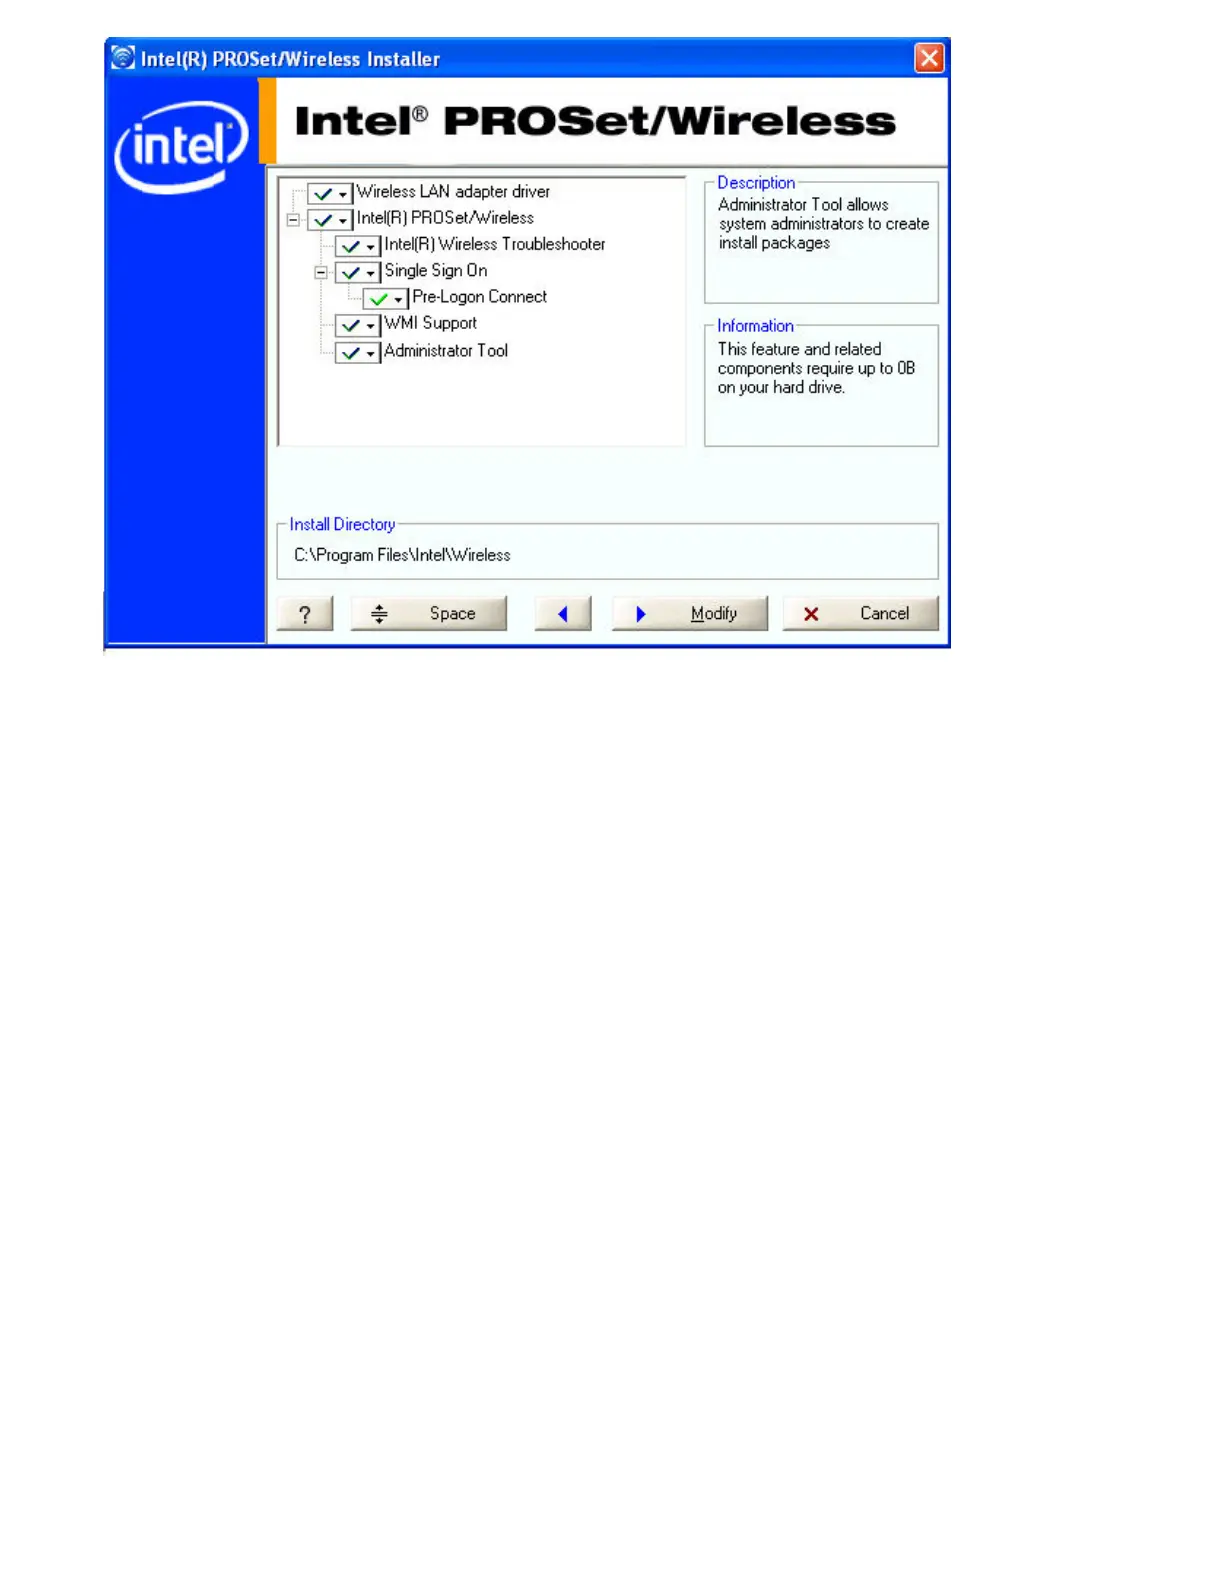
6. Click Custom.
7. Select from the list of features to install:
WMI Support: Windows Management Instrumentation functionality allows administrators who do not have
Intel PROSet/Wireless installed to manage remotely clients that do have Intel PROSet/Wireless installed.
● Install: Click WMI Support. Select Install this feature and all subfeatures. Proceed to step 8.
● Not install: Click This feature will not be available. A red X displays indicates that it is not
installed.
Administrator Tool: Installs the Administrator Tool to the Tools menu. This tool is used to configure
common (shared) profiles. The Administrator Tool is also used by an Information Technology department to
enable or disable features within the Intel PROSet/Wireless software.
● Install: Click Administrator Tool. Select Install this feature and all subfeatures. Click Next
and proceed to step 8.
● Not Install: Select This feature will not be available. A red X next to the option indicates that it
is not installed.
Single Sign On: Installs the Single Sign On Pre-Login Connect feature. This tool is used to configure
common (shared) profiles with the Administrator Tool.
The Fast User Switching and the Windows XP Welcome Screen are disabled when Single Sign On support is
installed.
 Loading...