13
NUC13RNGi9, NUC13RNGi7, NUC13RNGi5, NUC13SBBi9, NUC13SBBi7, NUC13SBBi5.
User Guide – July 2023
3.0 System Memory
Intel® NUC 13 Extreme Kit NUC13RNGi9, NUC13RNGi7, NUC13RNGi5 and Intel® NUC
13 Extreme Compute Element NUC13SBBi9, NUC13SBBi7, NUC13SBBi5 have two
262-pin DDR5 SO-DIMM sockets. Be sure to select memory modules that meet these
requirements:
• 1.1V and 2.1V (with XMP) low voltage JEDEC memory only
• 4000 MHz, 4400 MHz, 4800 MHz, 5200 MHz, and 5600 MHz SO-DIMMs
• Max capacity - 64GB
• Non-ECC
• Intel® XMP 3.0 support
Find compatible memory modules in the Intel Product Compatibility Tool
• NUC13RNGi9
• NUC13RNGi7
• NUC13RNGi5
• NUC13SBBi9
• NUC13SBBi7
• NUC13SBBi5
If you plan to install only one memory module, install it in the lower
memory socket.
To install memory, follow these steps:
1. Observe the precautions in "Before You Begin" on page 5.
2. Turn off all peripheral devices connected to the computer. Turn off the
computer and disconnect the power cord.
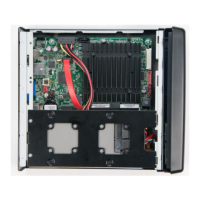
3. Remove the computer’s side and top chassis covers as per the instructions in
section 2.0, Open the chassis.
4. Align the small space (key) at the bottom edge of the memory module with
the key in the socket.
5. Insert the bottom edge of the module vertically into the socket (A)
6. When the module is inserted, push up the retaining clips until they snap into
place (B). Make sure the clips are firmly in place.
 Loading...