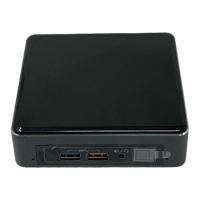
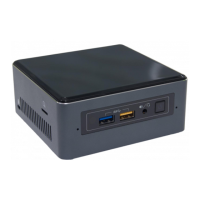
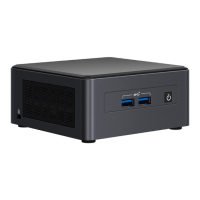
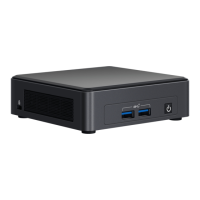
This document serves as a user guide for the Intel NUC Kit models NUC7i7BNH, NUC7i5BNH, and NUC7i3BNH. It provides comprehensive instructions for setting up, installing components, and maintaining these compact computing devices. The Intel NUC (Next Unit of Computing) is a small form factor PC designed for a variety of uses, from home entertainment to business applications, offering a balance of performance and space-saving design.
Function Description
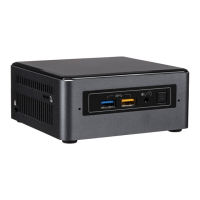
The Intel NUC Kits NUC7i7BNH, NUC7i5BNH, and NUC7i3BNH are barebones mini-PCs, meaning they come without pre-installed memory, storage, or an operating system. Users are expected to install these components themselves, allowing for customization based on their specific needs and budget. These kits are designed to be versatile, capable of handling tasks ranging from everyday computing to more demanding applications, depending on the installed components. The NUC7i7BNH, NUC7i5BNH, and NUC7i3BNH models indicate different processor configurations, with the 'i7', 'i5', and 'i3' denoting the Intel Core processor series, offering varying levels of performance. The 'BNH' suffix typically refers to a specific chassis design that includes a bay for a 2.5-inch drive, in addition to an M.2 slot for solid-state drives.
Usage Features
The user guide details several key usage features and installation procedures that enable the functionality of the Intel NUC.
- Component Installation: The guide provides step-by-step instructions for installing essential internal components. This includes:
- M.2 SSD Installation: Both 80mm and 42mm M.2 Solid State Drives are supported, offering high-speed storage options. The process involves removing a small silver screw from a metal standoff, aligning the M.2 card with the connector, inserting it, and then securing it with the screw. This allows users to choose between different M.2 form factors based on their preference or availability.
- Memory Installation: The NUC Kits NUC7i3BNH and NUC7i5BNH support two DDR4 SO-DIMM sockets. The guide specifies requirements for 1.2V memory, 1866 MHz or 2133 MHz SO-DIMMs, and non-ECC memory. The installation process involves aligning the SO-DIMM notch with the socket key, inserting the module, and pushing down until the retaining clips snap into place. For single SO-DIMM installations, the lower memory socket is recommended.
- 2.5" SSD or Hard Drive Installation: For models with a 2.5" drive bay, the guide explains how to slide a Solid State Drive (SSD) or Hard Disk Drive (HDD) into the bay, ensuring the SATA connectors are fully seated into the SATA daughter card. The drive is then secured with two small silver screws, and the drive bay bracket is set down inside the chassis. This feature provides flexibility for users who prefer larger capacity traditional hard drives or more cost-effective 2.5-inch SSDs.
- Chassis Management: Instructions are provided for opening and closing the Intel NUC chassis. To open, users unscrew the four corner screws on the bottom cover and lift it. To close, after all components are installed, Intel recommends hand-tightening the screws with a screwdriver to prevent over-tightening and potential damage.
- VESA Mount Bracket (Optional): The guide includes instructions for attaching and using an optional VESA mount bracket. This allows the Intel NUC to be mounted to the back of a monitor or TV, saving desk space and creating a clean, integrated setup. The process involves attaching the bracket to the display using four small black screws and then sliding the Intel NUC onto the bracket.
- Power Connection: Country-specific power plug attachments are included with the Intel NUC Kit. The guide illustrates how to choose the correct attachment for a region and slide it onto the power plug, locking it into place, before connecting the AC power.
- Operating System Installation: Users are directed to external resources for installing an operating system. The Intel NUC supports Intel-validated Windows* operating systems and various Linux distributions reported as compatible by NUC owners. This flexibility allows users to choose their preferred OS environment.
- Device Driver and Software Installation: To ensure optimal performance and compatibility, users are advised to install the latest device drivers and software. Options include using the Intel® Driver & Support Assistant (Intel® DSA) for automatic detection or manually downloading drivers, BIOS, and software from the Intel Download Center. A comprehensive list of available drivers and software is provided, including those for Chipset Device, HD Graphics, Management Engine, Wireless, Bluetooth, Gigabit Ethernet, Thunderbolt™ Bus (for NUC7i5BNH and NUC7i7BNH only), Realtek High Definition Audio, Realtek Card Reader, ITE Tech* Consumer Infrared, Intel® Rapid Storage Technology, Intel® Software Guard Extensions, Thunderbolt™ 3 Controller Firmware, and HDMI Firmware.
Maintenance Features
The user guide emphasizes several precautions and guidelines that contribute to the safe and effective maintenance of the Intel NUC.
- Safety Precautions: Before beginning any procedures, users are strongly advised to disconnect the computer from its power source and any telecommunications or network links. Failure to do so can result in personal injury or equipment damage, as some circuitry may remain active even when the front panel power button is off.
- ESD Protection: Electrostatic discharge (ESD) is a significant concern when handling electronic components. The guide recommends performing procedures at an ESD workstation using an antistatic wrist strap and a conductive foam pad. If a dedicated workstation is unavailable, wearing an antistatic wrist strap and attaching it to a metal part of the computer chassis can provide some protection.
- Handling Components: Users are cautioned to be careful of sharp pins on connectors and circuit boards, rough edges and sharp corners on the chassis, and hot components such as SSDs, processors, voltage regulators, and heat sinks. These warnings are crucial for preventing physical injury and damage to the device.
- Order of Operations: The guide stresses the importance of following the steps in each procedure in the correct order to ensure proper installation and avoid issues.
- Logging Information: Users are encouraged to set up a log to record information about their computer, including model, serial numbers, installed options, and configuration details. This practice aids in troubleshooting and future maintenance.
- Qualified Personnel: For complex issues or if users are unsure about a procedure, the guide advises referring computer servicing to qualified technical personnel. This ensures that the device is handled by experts, minimizing the risk of further damage.
- Regulatory Compliance: Adhering to the instructions in the guide helps ensure compliance with regional safety and regulatory requirements, reducing safety risks.
- Memory Removal: When removing SO-DIMMs, the process involves gently spreading the retaining clips at each end of the socket, lifting the module by its edges, and storing it in an anti-static package. This careful handling prevents damage to the memory modules and the motherboard.
In summary, the Intel NUC Kit user guide provides essential information for assembling, configuring, and maintaining the NUC7i7BNH, NUC7i5BNH, and NUC7i3BNH models. It covers everything from installing internal components like SSDs and memory to connecting power and installing software, all while emphasizing safety and best practices for handling electronic equipment.