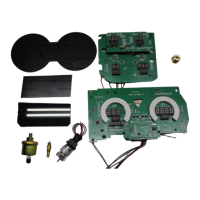
3 – DP6004 Intellitronix rev.04/10/20) www.intellitronix.com
WIRING INSTRUCTIONS
Note: Automotive circuit connectors are the preferred method of connecting wires.
However, you may solder if you prefer.
Note: LS Engines or any other Computer based engine systems most use provides sensors and
install new wires to new sensors
Note: If doing a LS engine swap, pick up the tach signal wire from the ECM/ECU and
then set the tach switch to 4-cylinders. You may also need to order the Intellitronix LS
Engine Swap Adapter Kit for Series 1, 2 and 3 engines. The part number is 8014LS. If you
are getting the tach signal from the ECU, the resistor in the adapter kit will help pull a
stronger signal for the tachometer. If your engine is a 4 cylinder, please call Tech
Support at Intellitronix, as you may need to send the gauge back to us to be
reconfigured. There is no charge for this additional service.
Ground – Black--This is the main ground for the display system. A wire should be run
from this board to the vehicle engine block for the best ground. Use 18 AWG or larger
wire to ensure sufficient grounding. Proper vehicle grounding is extremely important for
any gauges (or electronics) to operate correctly. The engine block should have heavy
ground cables to the battery, frame, and firewall. Failure to properly ground the engine
block, senders, or digital dash can cause incorrect or erratic operation.
NOTE: We are updating the Circuit Boards here at Intellitronix to make improvements.
Some of the power wires may not be correct in Installation Guides. The most common one
on the dashes is with one power wire it will be Key on Power Pink or Red. If your dash has
Pink and Red the Pink is Key on power and the Red is going to be constant Power.
If you have just Red and No Pink, then the Red wire is Key on Power.
You can always verify the wires by looking at the Board where the wires are attached. The
board is marked by wire position.
Power - Red--Connect the power terminal to accessory +12V power from the fuse panel
or vehicle wiring harness. Using a 5-amp fuse or an inline 5-amp fuse holder This terminal
should have power when the key is on or in accessory position. Use 18 AWG wire to ensure
the system receives a sufficient power feed.
OR
Battery Red--Connect the +12 Volt terminal to constant +12V power from the battery
power source. Using a 5-amp fuse or an inline 5-amp fuse holder Use 18 AWG wire to
Battery Red--Connect the +12 Volt terminal to constant +12V power from the battery.
Use 18 AWG wire to ensure the system receives a sufficient power feed.
Power – Pink--Connect the power terminal to accessory +12V power from the fuse panel
or vehicle wiring harness. Using a 5-amp fuse or an inline 5-amp fuse holder. This terminal
should have power when the key is on or in accessory position. Use 18 AWG wire to ensure
the system receives a sufficient power feed.
 Loading...