4
3
Names and Functions of indicators on Remote Controller
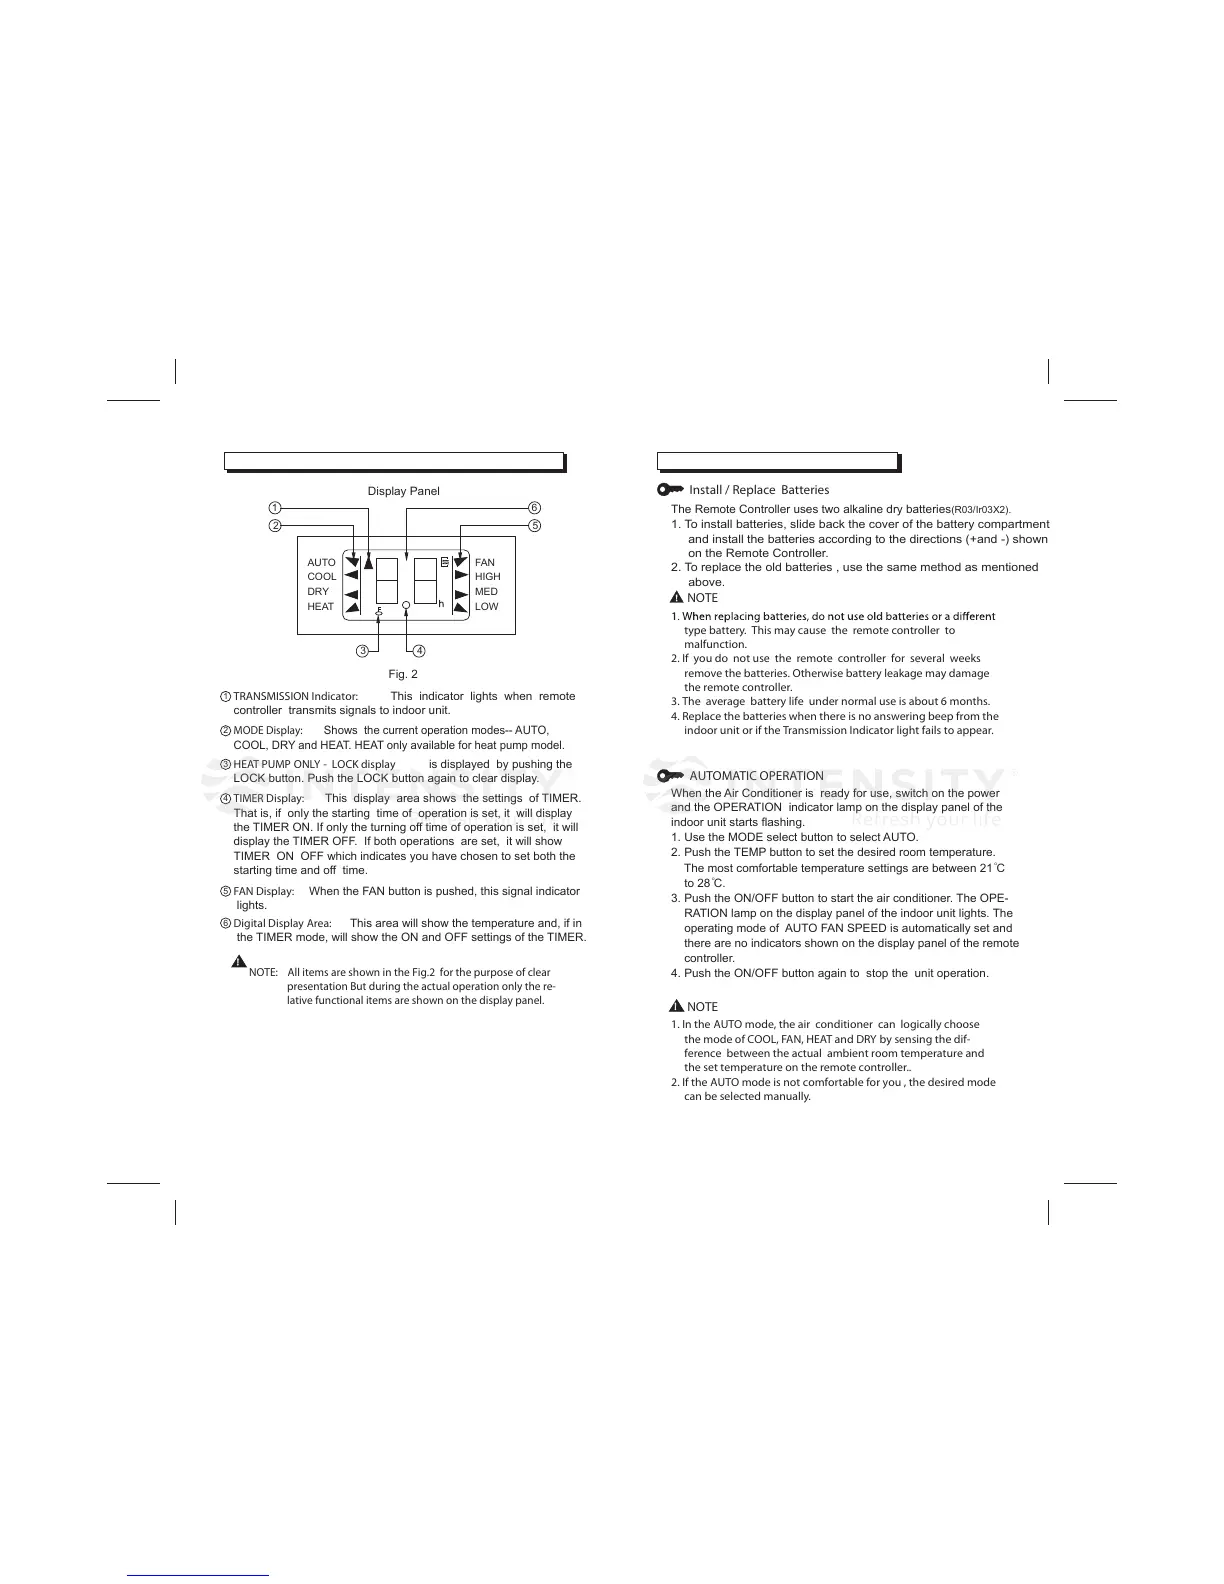
TRANSMISSION Indicator: This indicator lights when remote
controller transmits signals to indoor unit.
MODE Display: Shows the current operation modes-- AUTO,
COOL, DRY and HEAT. HEAT only available for heat pump model.
HEAT PUMP ONLY - LOCK display is displayed by pushing the
LOCK button. Push the LOCK button again to clear display.
TIMER Display: This display area shows the settings of TIMER.
That is, if only the starting time of operation is set, it will display
the TIMER ON. If only the turning off time of operation is set, it will
display the TIMER OFF. If both operations are set, it will show
TIMER ON OFF which indicates you have chosen to set both the
starting time and off time.
FAN Display: When the FAN button is pushed, this signal indicator
lights.
Digital Display Area: This area will show the temperature and, if in
the TIMER mode, will show the ON and OFF settings of the TIMER.
NOTE: All items are shown in the Fig.2 for the purpose of clear
presentation But during the actual operation only the re-
lative functional items are shown on the display panel.
Display Panel
Fig. 2
AUTO
COOL
DRY
HEAT
1
6
2
1
2
3
4
5
6
3 4
5
FAN
HIGH
MED
LOW
Operating the Remote Controller
The Remote Controller uses two alkaline dry batteries
(R03/Ir03X2).
When the Air Conditioner is ready for use, switch on the power
and the OPERATION indicator lamp on the display panel of the
indoor unit starts flashing.
1. Use the MODE select button to select AUTO.
2. Push the TEMP button to set the desired room temperature.
The most comfortable temperature settings are between 21 C
to 28 C.
3. Push the ON/OFF button to start the air conditioner. The OPE-
RATION lamp on the display panel of the indoor unit lights. The
operating mode of AUTO FAN SPEED is automatically set and
there are no indicators shown on the display panel of the remote
controller.
4. Push the ON/OFF button again to stop the unit operation.
。
。
1. To install batteries, slide back the cover of the battery compartment
and install the batteries according to the directions (+and -) shown
on the Remote Controller.
2. To replace the old batteries , use the same method as mentioned
above.
type battery. This may cause the remote controller to
malfunction.
2. If you do not use the remote controller for several weeks
remove the batteries. Otherwise battery leakage may damage
the remote controller.
3. The average battery life under normal use is about 6 months.
4. Replace the batteries when there is no answering beep from the
indoor unit or if the Transmission Indicator light fails to appear.
1. In the AUTO mode, the air conditioner can logically choose
the mode of COOL, FAN, HEAT and DRY by sensing the dif-
ference between the actual ambient room temperature and
the set temperature on the remote controller..
2. If the AUTO mode is not comfortable for you , the desired mode
can be selected manually.
Install / Replace Batteries
AUTOMATIC OPERATION
NOTE
NOTE
!
!