4 / 9© INTEREL 2021 - rev07
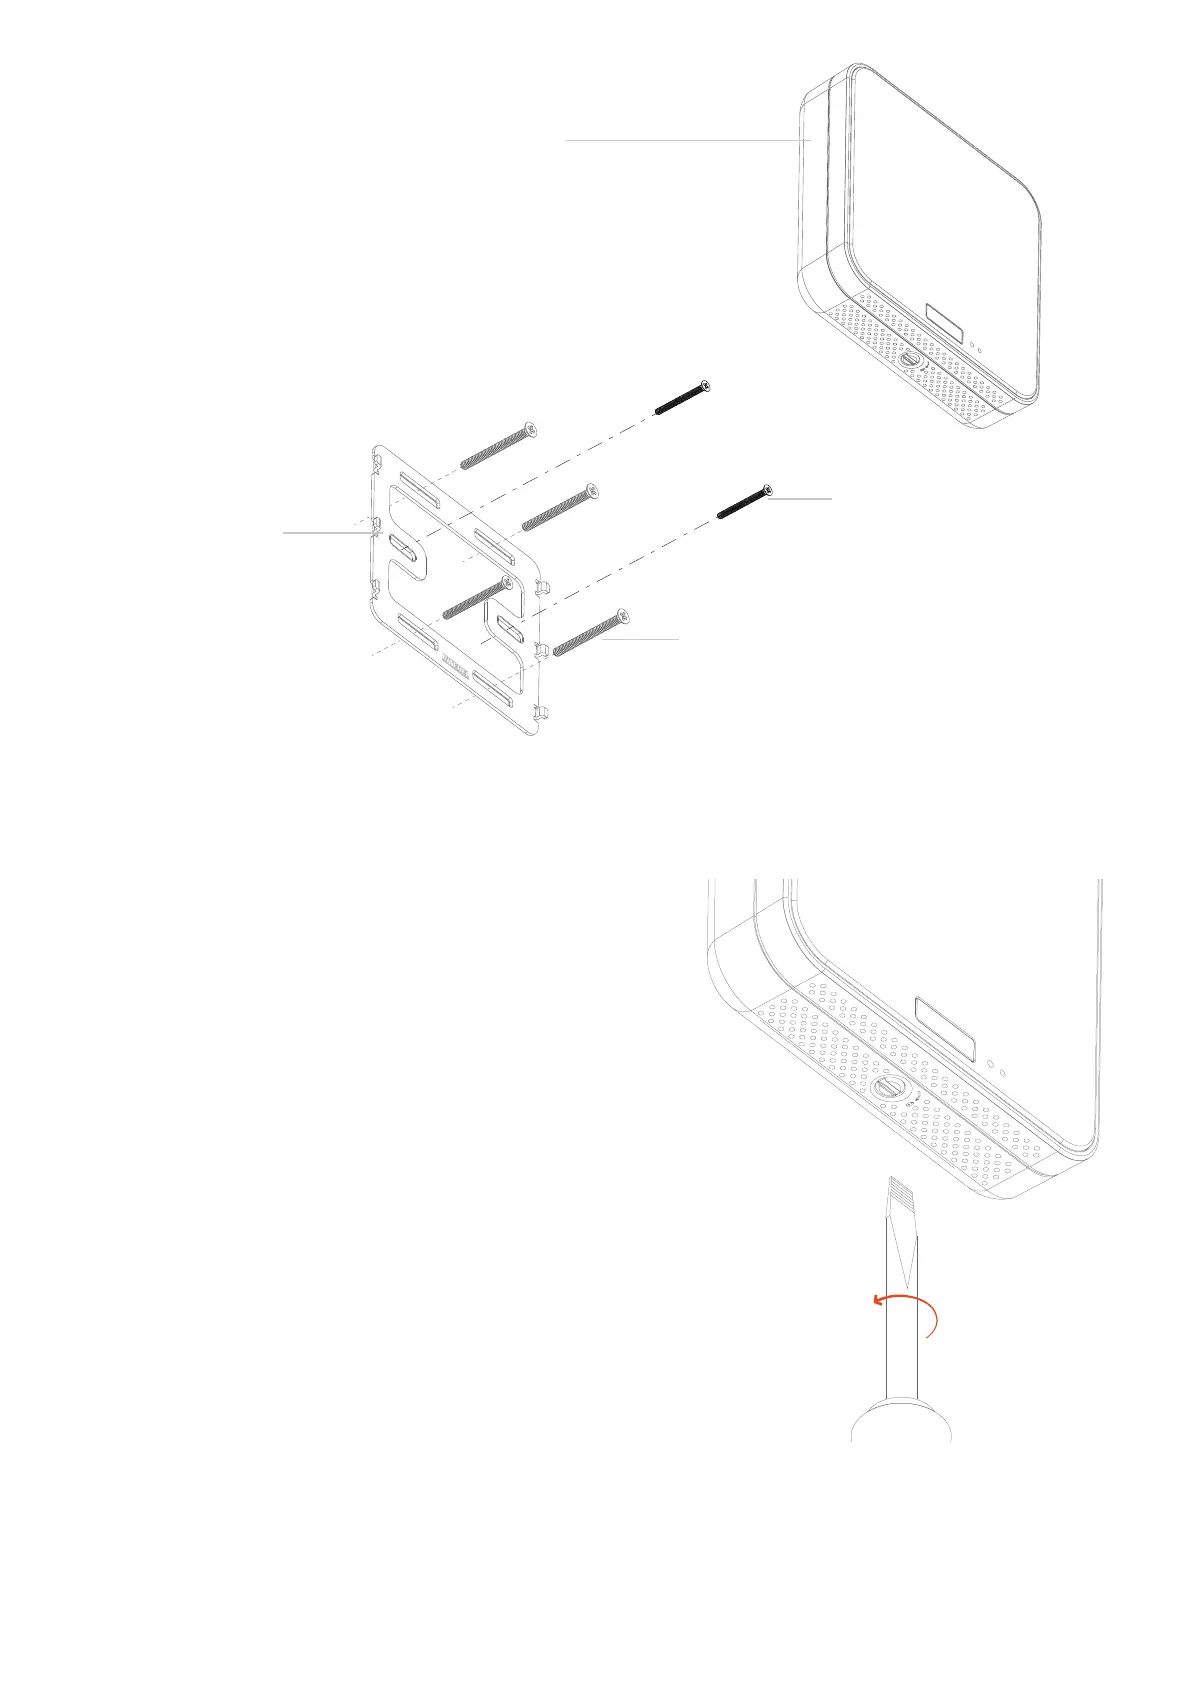
The thermostat slides downwards and locks onto the metal
mounting bracket utilizing the six hooks on the metal brack-
et. Position the thermostat just above the mounting bracket,
press towards the wall and slide it down, securing it to the
bracket. The thermostat will snap into place on the metal
wall bracket and feel securely fashioned if installed properly.
To lock the thermostat to the wall, use the large at head
screwdriver to turn the lock pawl on the bottom side of the
thermostat counterclockwise. Test the closure by gently lift-
ing the thermostat upwards.
Apply power to the EOS Thermostat by closing the applica-
ble supply breaker. Verify that the EOS Thermostat powers up.
The OLED display should show INTEREL and 3 dots.
Pinch the protective lm tab tab on the top right of the ther-
mostat display and pull straight out to slowly peel the lm.
Remove the lm slowly to reduce the risk of tearing it and
leaving residue on the thermostat display.
Do not Overtighten Screws
15-1000
Turn lock pawl
counterclockwise
to securely x it
4.
5.
6.
7.
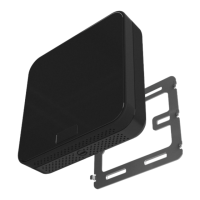
Countersunk Screws (US)
6-32 1.5” Countersunk Machine Screws
Countersunk Screws (EU)
Din 965 A2 Machined Screws
or
EOS Thermostat
Metal Wall Bracket
Stainless Steel 1.5 mm (0.06”)