Interflex Datensysteme GmbH 3/7
Open:
1. Unlock the mortise lock and pull it down and out.
2. Insert the pins of the tool (2) into the housing from the bottom and, by doing so, push open the two
internal catches.
3. Keep the catches unlocked and swing the housing cover upwards.
4. Disconnect the connecting cable and remove the housing cover.
Close:
1. Plug in the connecting cable to the respective board.
2. Tilt the housing cover and hook it onto the upper edge of the back panel of the housing.
3. Push the hinged housing cover down until you can hear the catches provided in the back panel of the
housing lock into place.
4. Secure the housing with the mortise lock.
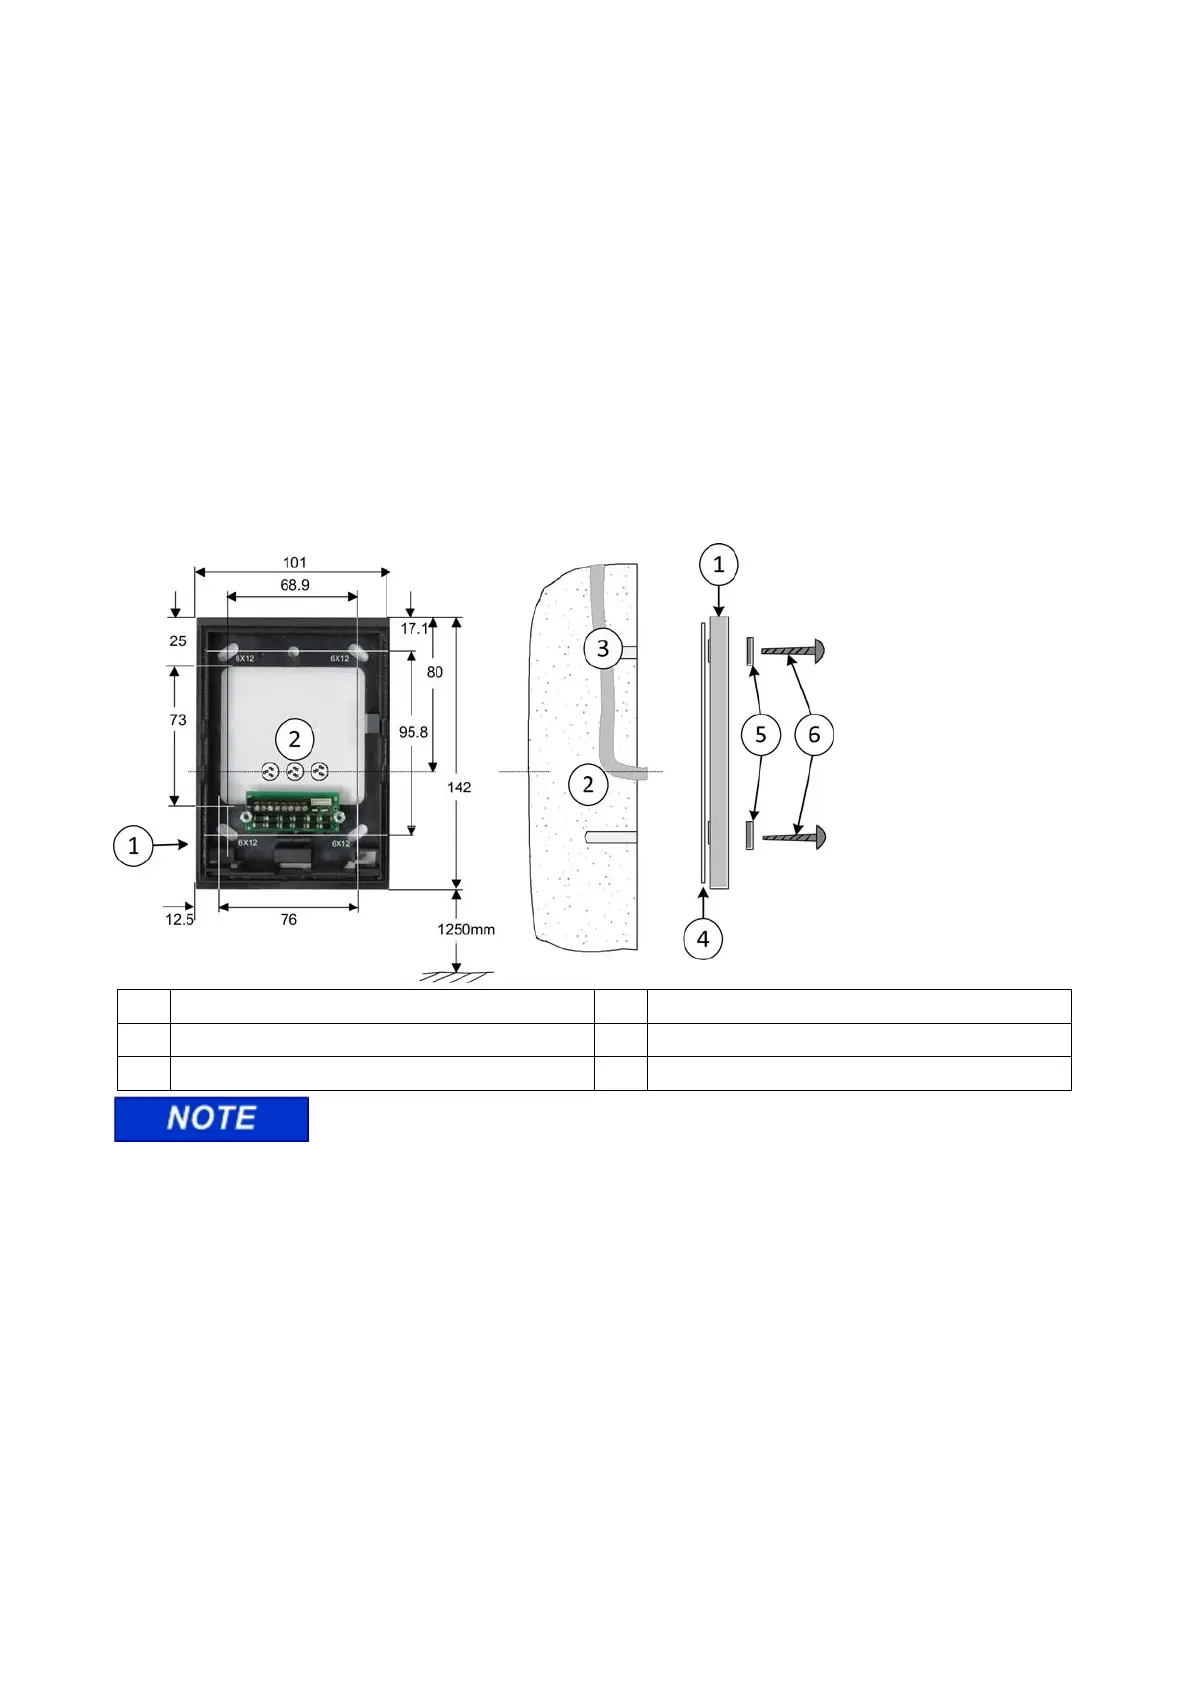
3.4 Mounting
1 Back panel of housing with terminal board 4 Rubber seal
2 Recommended cable feed: Flush-mounted 5 Plain washers
3 Installation cable 6 Fastening screws
The back panel of the housing (1) must not warp when being screwed down.
The IF-812/IF-815 terminal (slave) can be installed in dry or humid environments (IP43). Installation is
performed on flat walls or pillars, e.g. next to doors, using the materials included in delivery. The I/O board is
installed in a secured area, e.g. into an installation box from Hensel or a DIN appliance case.
The sealant (4) used evens out unevenness in the wall and makes a seal to the wall. This sealant allows for
installation in humid rooms.
If the mortise lock (IP54) is sealed, the device can be installed outdoors.
 Loading...