Interklima Dx Cassette Units
II-IO CCV1 R410A / Rotary / Scroll
32
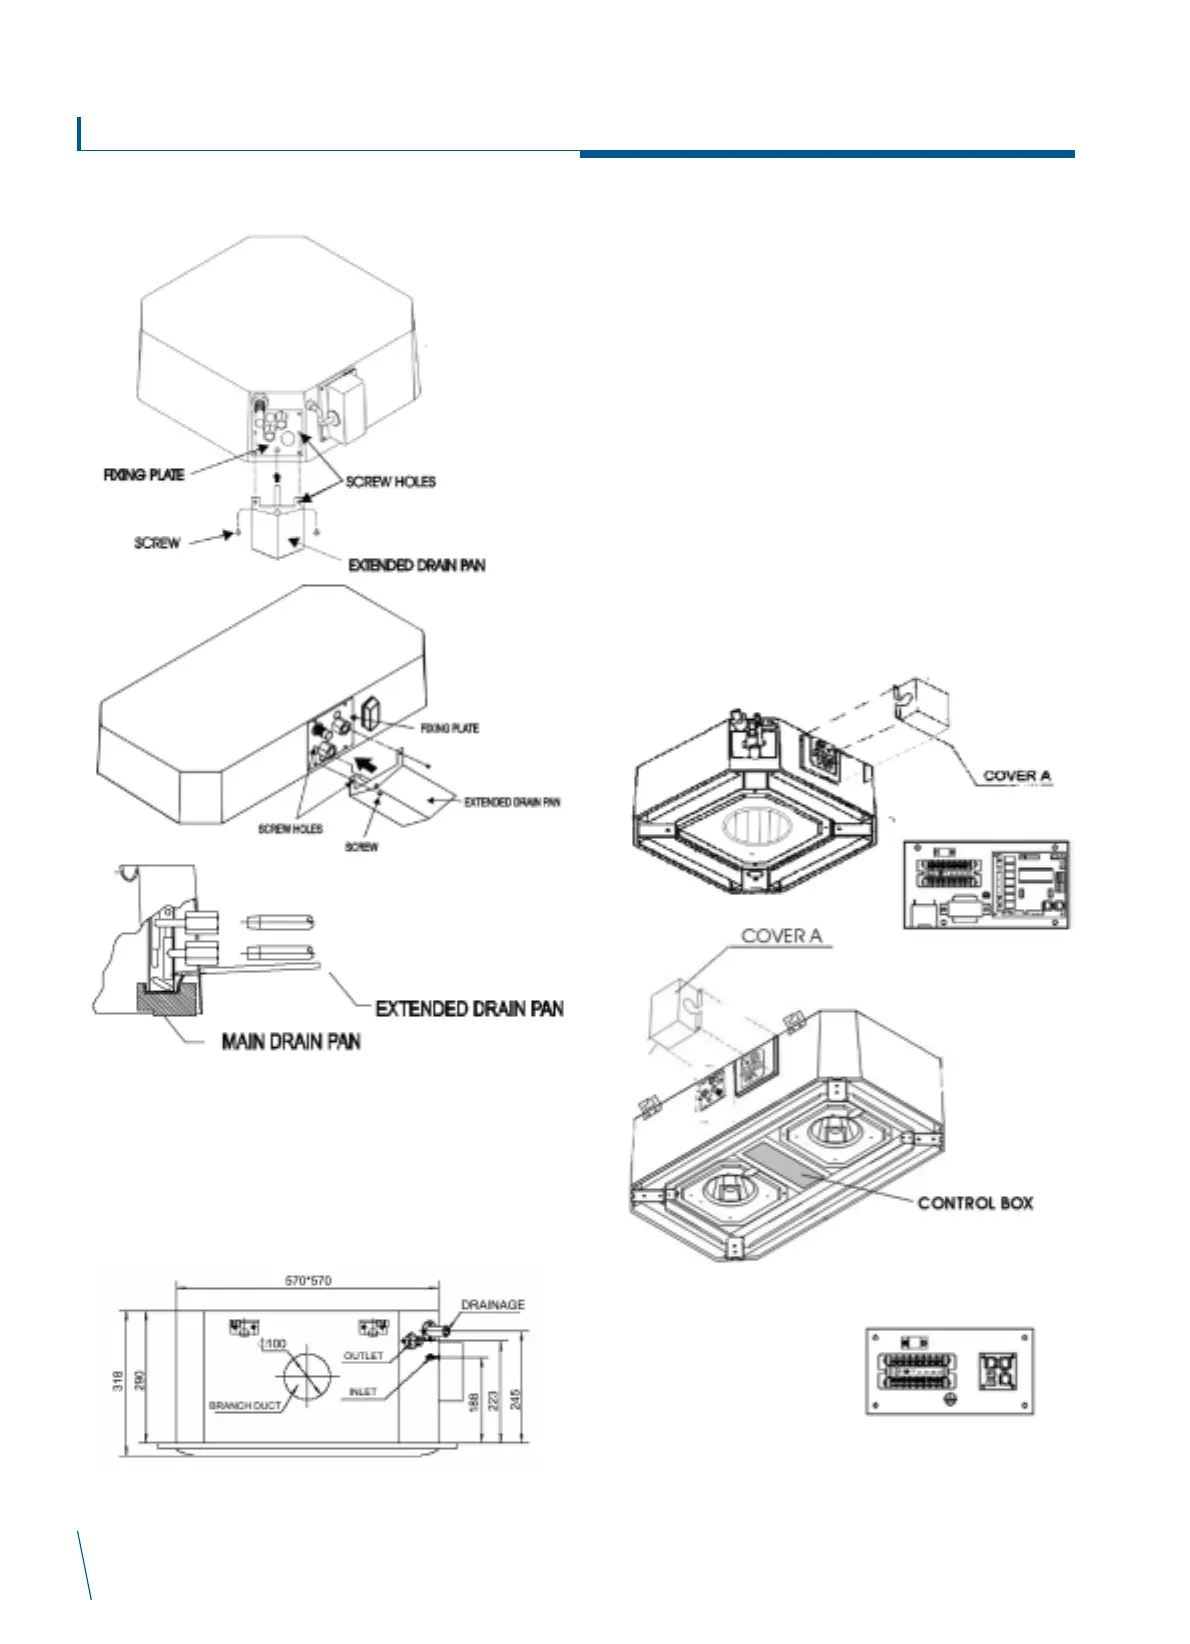
Extended drain pan accessory
Installation procedures
ñ Align the two (2) screw holes in the fixing plate to the two
(2) holes in the external drain pan.
ñ Make sure the drain pan is horizontal.
ñ Tighten the two screws and making sure the external drain
pan is installed flush with the fixing plate.
When the installation is completed, it is necessary to wrap
connecting pipe with insulation to prevent leakage to ceiling tile.
Electrical wiring
ñ Remove cover A and install the connection wires.
ñ After wiring is complete install cover A.
Interconnecting wiring
We recommend that screened cable be used in electrically noisy areas.
1. Always separate low voltage (5VDC) signal wires from power
line (230 VAC) to avoid electro-magnetic disturbance of control
system.
2. Do not install the unit where electromagnetic waves are directly
radiated at the infra red receiver on the unit.
3. Install the unit and components as far away as is practical (at
least 5 meters) from the electromagnetic wave source.
4. Where electromagnetic waves exist use shielded sensor cable.
5. Install a noise filter if any harmful noise exists in the power
supply.
TERMINAL BLOCK
II-25/30/35/40/50CCV1
TERMINAL BLOCK
II-09/12/18/24CCV1
 Loading...