Interklima Dx Cassette Units
II-IO CCV1 R410A / Rotary / Scroll
38
Procedure
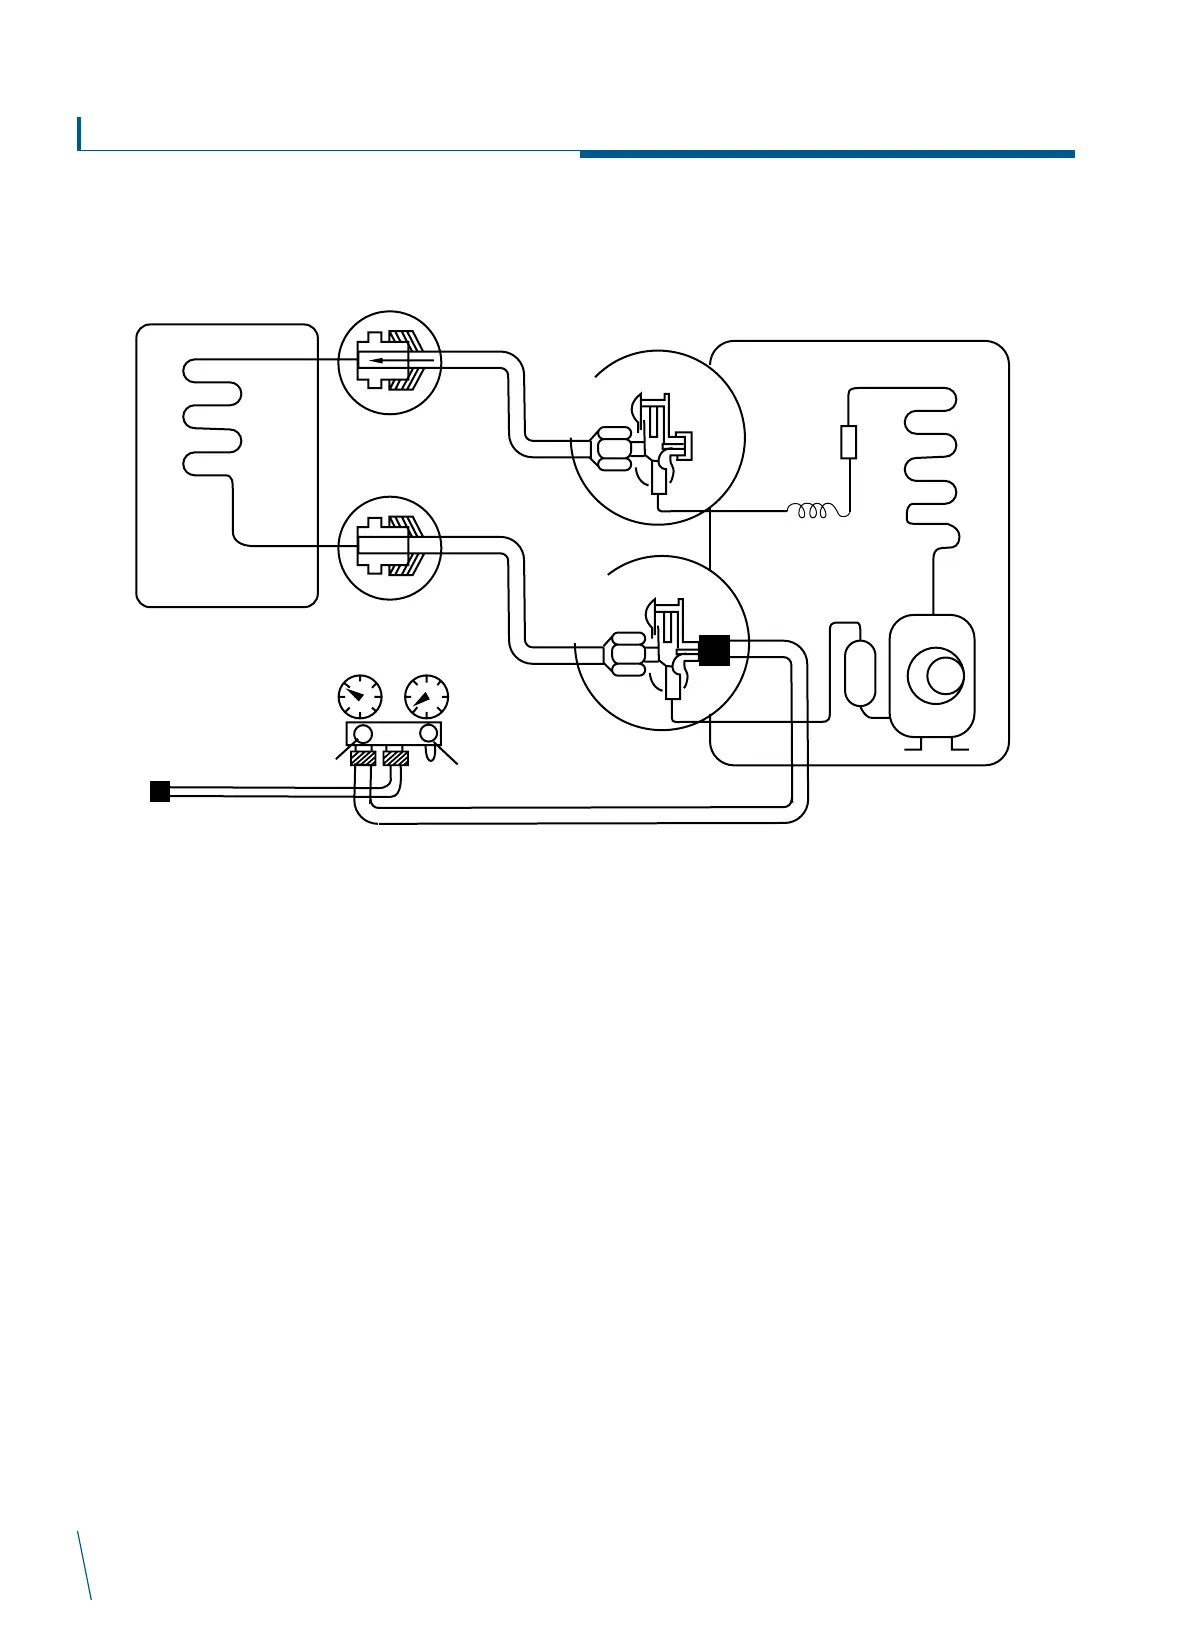
1. Confirm that both the 2-way and 3-way valves are set to the
open position.
- Remove the valve stem caps and confirm that the valve
stems are in the raised position.
- Be sure to use a hexagonal wrench to operate the valve
stems.
2. Operate the unit for 10 to 15 minutes.
3. Stop operation and wait for 3 minutes, then connect the
charge set to the service port of the 3-way valve.
- Connect the charge hose with the push pin to the service
port.
4. Air purging of the charge hose.
- Open the low-pressure valve on the charge set slightly to air
purge from the charge hose.
- Refrigerant must be recovered.
Don’t vent the Refrigerant to the atmosphere.
5. Set the 2-way valve to the closed position.
6. Operate the air conditioner at the cooling cycle and stop it
when the gauge indicates 0.1 Mpa.
7. Immediately set the 3-way valve to the Closed position.
- Do this quickly so that the gauge ends up indicating 0.8 ~
1.1MPa.
8. Disconnect the charge set, and mount the 2-way and 3-way
valves’ stem nuts and the service port nut.
- Use a torque wrench to tighten the service port nut to a
torque of 1.8 kg.m.
- Be sure to check for gas leakage.
1. Evacuation
Pumping down
 Loading...