Machines manufactured by Hydralok, Bristol, UK
Machine enquiries, sales, after sales service :
Interpump Hydraulics (UK) Ltd t/a IMM Hydraulics (UK) : Kidderminster
Tel : (0)121 550 1115 / sales@immhydraulics.co.uk
INSTALLATION
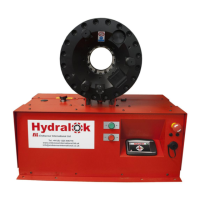
The machine must be bolted to a firm workbench in a horizontal position. If a quick change rack is
supplied, the machine must be bolted to it with the bolts supplied. The machine is top heavy so
please ensure that it is stable and does not pose a danger to the user or to other people.
All electrical installation must be carried out by a qualified electrician. Check that the electrical
installation is compatible with the motor requirements and specification supplied with the swaging
machine such as:
380V / 3 ph or 220V / 3ph supply
230V 1 ph or 110V 1 ph supply
Three Phase Machines:
When operating the machine for the first time check that the motor rotation direction is correct.
(Three phase machines only) If the motor starts but jaws of the swaging head do not begin to close
when the green button is pressed to swage, the phase rotation of the motor will have to be
reversed. To reverse the rotation of the motor change over any two of the phase cables in the
machine’s plug. A competent electrician should carry out the rewiring of the electric plug.
Single Phase Machines:
IMPORTANT: 220/240V Single phase machines require a minimum 16 Amp C type motor rated
MCB / Fuse. It is not recommended to connect the machine to a domestic supply. Install the
machine as close to the socket as possible, without using long extension leads as this increases the
current demand from the machine.
Starting The Machine For The First Time:
After the machine is connected to the power supply, if the Emergency Stop is pressed, rotate it to
disengage. The touchscreen will cycle through the boot process (this may take several minutes)
and wait for the screen to display the user login screen.
Login as User
Login as Administrator
All passcodes for logins are default to “0” To change
the login passcodes for both User and Administrator
see page 17.
SAFETY PRECAUTIONS
Switch off machine when not in use by using the latching emergency stop (E-Stop) button. To
unlatch the stop button, twist the E-Stop button clockwise, then release.
To stop the machine in an emergency, press the RED EMERGENCY STOP BUTTON.
DO NOT START THE MACHINE UNDER LOAD.