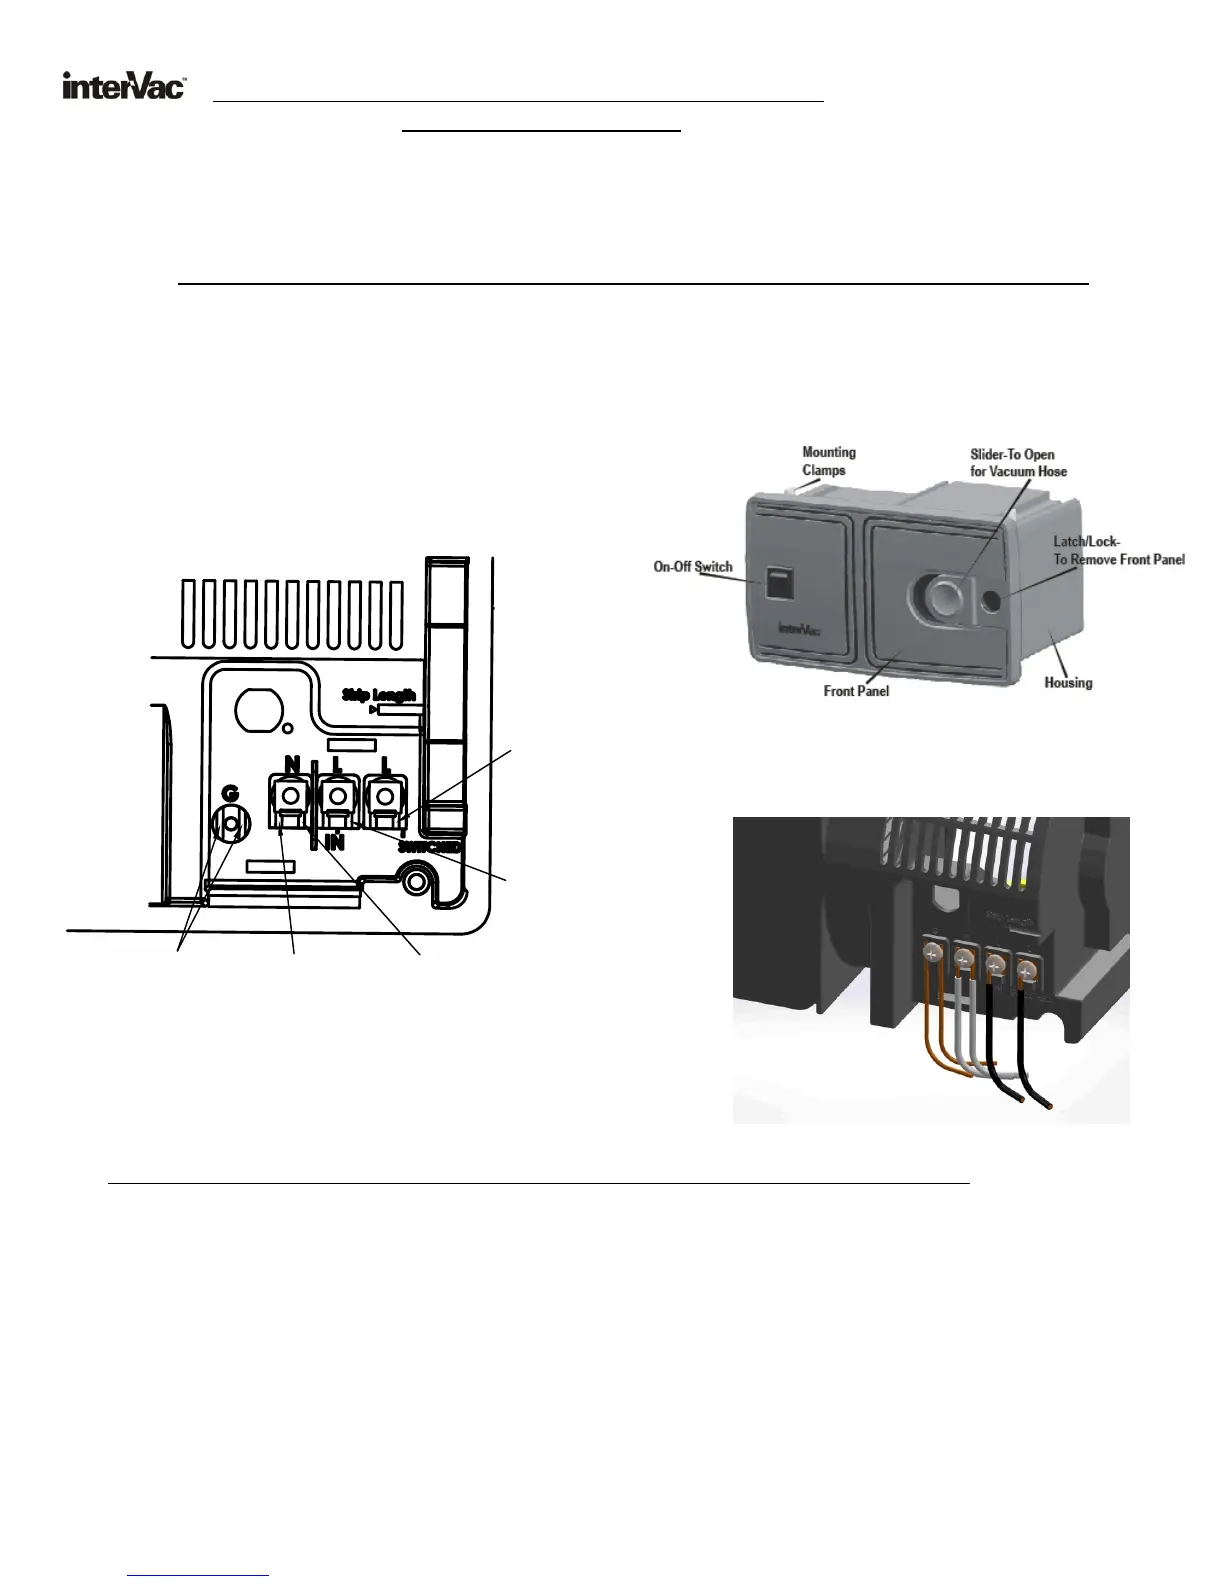
Step 5. Strip all 3 wires by about 5/8”.
Tip: leave a loop in the wires from the vacuum to the wall where the cables are securely attached.
Step 6. From the Microwave (or other appliance) connect the Black wire to “L” (line)(switched),
the White wire into “N” (neutral) and connect the Ground wire under the washer screw head to “G”.
Step 7. From the Circuit Breaker run a new 14 or 12 gage Romex cable to the back of the vacuum.
Step 8. Strip the 3 wires and attach the Black to “L”, the White wire into the other
“N” (neutral) and the GROUND wire to the other “G” connection.
Step 9. Attach the wire cover (supplied) over the connections by guiding the wires through the
opening at the bottom of the cover and screw cover into place.
Step10. On the front side of the vacuum, toggle the switch to “SOURCE”.
Step11. Switch-on the circuit breaker and check if the other appliance is operating.
Step12. Now toggle the switch on the Vacuum to “VAC”.
The other appliance will stop operating and the Central Vacuum is ready for use.
4
Step 4. In the back of the vacuum find the wire connections
CS hardwired version with
Protective Cover removed.
CS6 Hard Wired for Power Management
use 14 gage Romex wire
Same wall installation procedure as on page 4, steps A through D.
The CS6 version was designed for limited amperage availability. If for example you use the microwave oven or your
air conditioner with the vacuum cleaner at the same time your circuit breaker might be overloaded.
AFTER INSTALLING THE FOLLOWING ELECTRICAL CONNECTIONS YOU CAN ONLY RUN ONE APPLIANCE AT A TIME.
The following installation can be made only by a qualified electrician
To prevent overloading the circuit breaker:
Step 1. Turn off the breaker to the area you will install the unit in.
Step 2. Find the power cable connecting the Microwave Oven to the Circuit Breaker.
Step 3. Disconnect the exciting cable at the Microwave Oven.
Reroute the cable to the vacuum cleaner installation.
"L" Black
ire
W
from
Micro
vwa e
or A
/C u t
ni
"
" Black
ireL
W
fro i u
t
m C
rc
i
Break
re
" " Wh te W
,
N
i
ire
t
a
Neu
r
l
from Mic
owa
ve
r
C Unor A/ it
Grou
W res
nd
i
fr
i
u t ea erom C
rc i Br k
r a e
Cand
Mic
ow v
or A
/
"
" White W
,
N
ire
ut
aNe
r l
from Circ
uit B
reaker
 Loading...