(38IO) I638AA AIRBED ENGLISH 4.875” X 7.25” 07/28/2020
38IO
SAVE THESE INSTRUCTIONS
Page 6
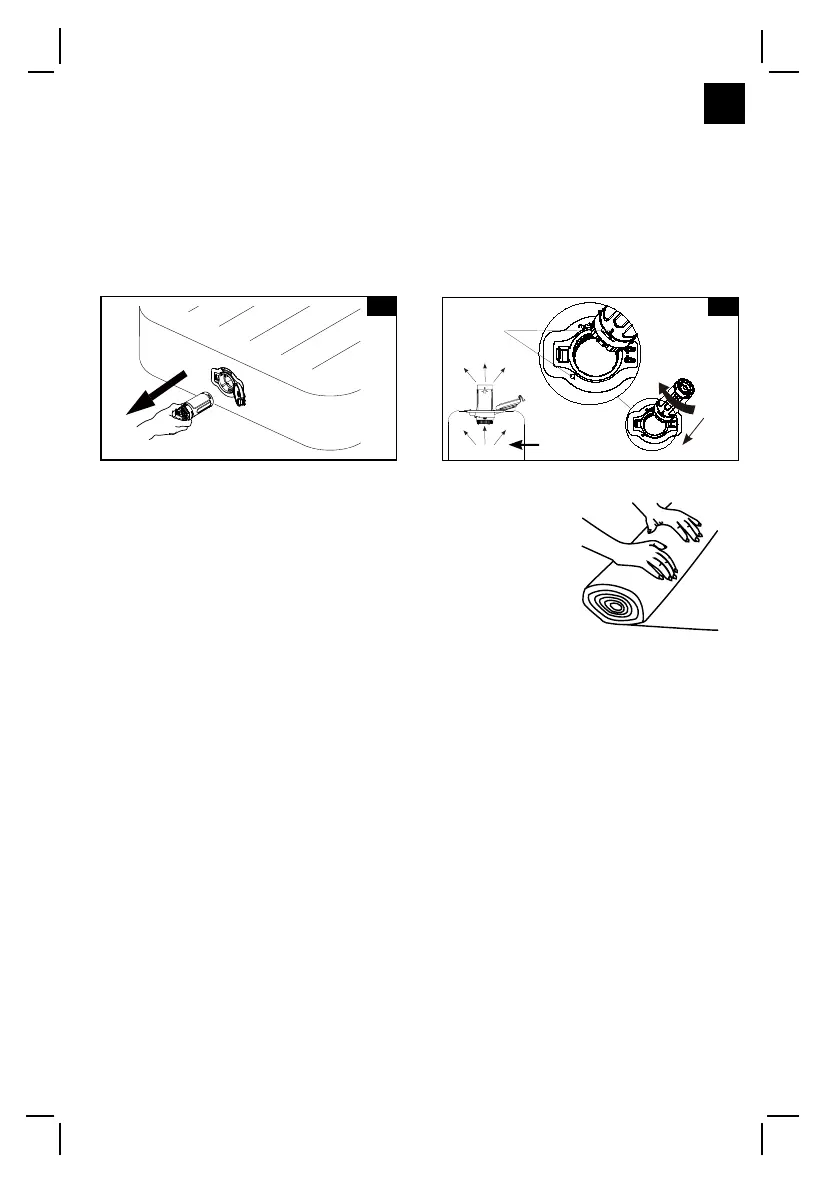
3. With the airbed fully deflated begin rolling the airbed from
the end opposite of the pump towards the end where the
pump is located. See Fig (14).
4. Remove the electric air pump from the airbed and switch
it OFF. Now re-attach the pump in its original fully recessed
position: With the power switch facing away from the airbed,
align the arrow on the pump body with the arrow on the pump
holder frame (1) and reattach the air pump to the airbed.
Turn the air pump clockwise to lock it and close the air pump
cover (3).
FIG (14)
MANUAL DEFLATION
1. Open the air pump cover (3) and remove the electric air pump (2) from the airbed.
See Fig (12).
2. Begin rolling the airbed from the end opposite of the pump towards the end where the
pump is located. See Fig (14).
3. With the power switch facing away from the airbed, align the arrow on the pump body
with the arrow on the pump holder frame (1) and reattach the air pump to the airbed.
Turn the air pump clockwise to lock it and close the air pump cover (3).
POWER DEFLATION
1. Open the air pump cover (3) and remove the electric air pump (2) from the airbed.
The open port will start deflating the airbed naturally. See Fig (12).
2. Switch ON the pump by pressing “I” and reattach it to the airbed in the reverse direction:
With the power switch facing the airbed, align the arrow on the pump rim with the arrow
on the pump holder frame and turn pump clockwise to lock in place. The pump is only
slightly recessed with the pump body sticking out of the airbed for deflation. See Fig (13).
13
Airbed
Alignment
arrow
12
 Loading...