295
A
S AVE THESE INSTRUCTIONS
(295IO) SPA ENGLISH 7.5” X 10.3” PANTONE 295U 08/10/2018
English
Page 20
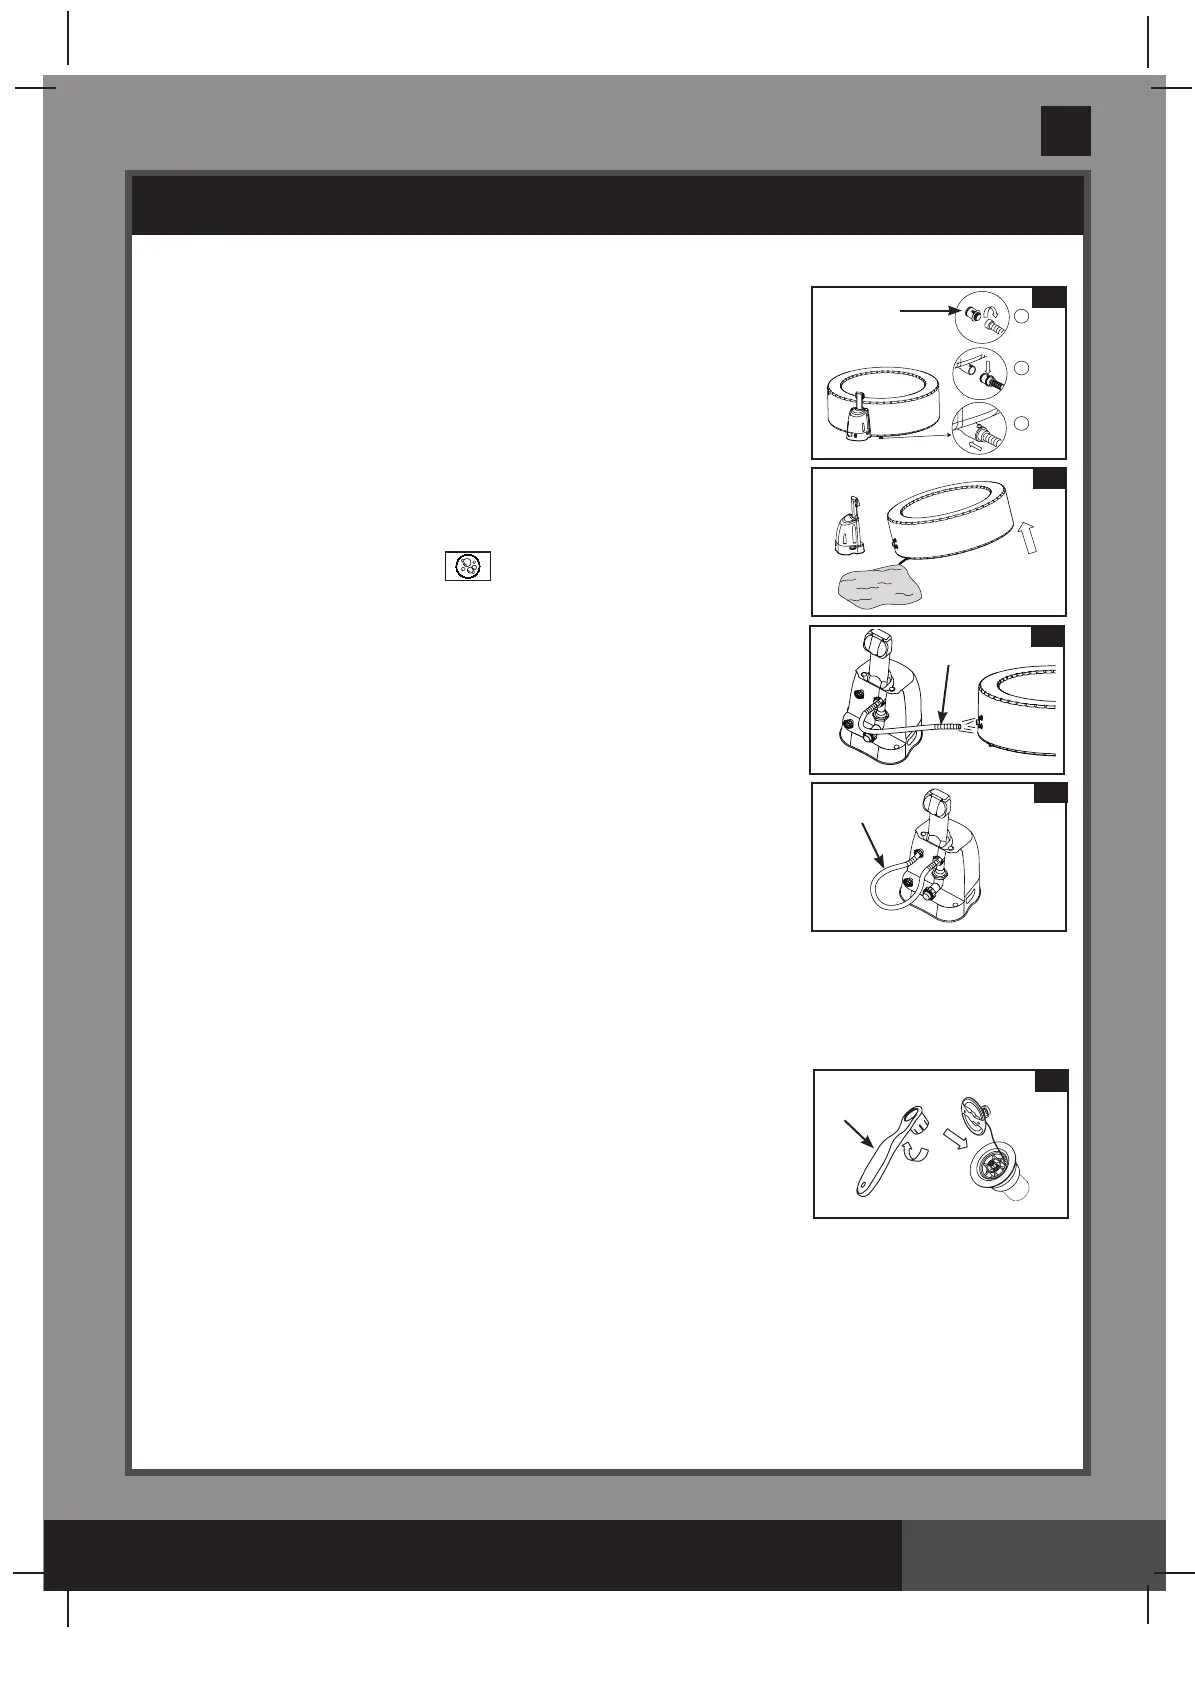
Spa Tub Drainage
1.
Turn off the spa control unit.
2.
Connect the drain valve adaptor to a garden hose and point the other end
of the garden hose to a suitable draining area
(see drawing 14)
.
3.
Remove the drain valve cap from outside of the spa tub and attach the
drain valve adaptor to the drain valve
(see drawing 14)
.
4.
From inside of the spa tub, open the drain valve cap, water will start
owingoutfromthegardenhose.
5.
When the water stops draining, disconnect the spa control unit from
the spa tub wall. Lift the spa tub wall from the side opposite the drain,
leading any remaining water to the drain and emptying the spa completely
(see drawing 15)
.
6.
Attachedtheinationhose
(7)
totheairblowerinationoutletonthe
control unit.
7.
Turnonthespaandpressthebutton,aimtheinationhoseatthe
inlet/outlets on the spa tub and spa control unit to dry out any water in the
piping system
(see drawings 16 & 17)
.
8.
Use a clean towel to wipe up any remaining water and moisture on the
spa tub and spa control unit.
9.
Ensure the spa tub and spa control unit are thoroughly dried.
NOTE:
The enclosed plugs
(15)
can be used to cover the water inlet and
outlet connectors from the inside of the spa tub to prevent water from
owingout.
Spa Tub Cleaning
If dirt is visible in the water or water becomes cloudy and proper water
chemistry does not clear it up, change the water and clean the spa tub.
See “Spa Tub Drainage” section on how to drain the spa.
While empty, remove the cartridge housing from inside of the spa tub wall,
cleanand/orreplacetheltercartridge.Useaspongeandmildsoapsolution
to wipe away any soil or stains on the inside of the spa wall. Rinse thoroughly
beforerellingwithcleanwater.
IMPORTANT:
Do not use steel wool, hard brushes or abrasive cleaners.
Biolm Removal
Seeyourlocalspaprofessionalforbiolmremovalproductsandadvice.
Spa Tub Air Valve Fastening
Check the spa tub air valve for leakage and tightness before use. If air is leaking
from the air valve, use the provided wrench
(22)
to tighten the air valve as follow:
1.
Makesurethespatubisdeated,opentheairvalvecapandinsertthe
wrench
(22)
into the air valve body
(see drawing 18)
.
2.
With one hand, hold the backside of the air valve base from the inside of
the spa tub wall and turn the wrench
(22)
clockwise.
IMPORTANT:
Never adjust the air valve base when the spa is in use or
lledwithwater.Onlyusetheairvalvewrenchiftheairvalveislooseor
there is leakage around air valve base. Do not over tighten the air valve: over tightening can damage the
valve. Just ensure the air valve is snug and not leaking.
Spa Cover
Inspect the spa cover regularly for leaks, premature wear and tear, damage, or signs of deterioration. Never use
a worn or damaged cover: it will not provide the level of protection required to prevent unsupervised access to the
spa by a child.
Clean the cover inside and outside periodically using a sponge and a suitable solution that includes adequate
disinfection (10 mg per liter of free chlorine). Do not use steel wool, hard brushes or abrasive cleaners.
MAINTENANCE
14
1
2
3
11
16
17
7
7
15
18
22
 Loading...