EN-24
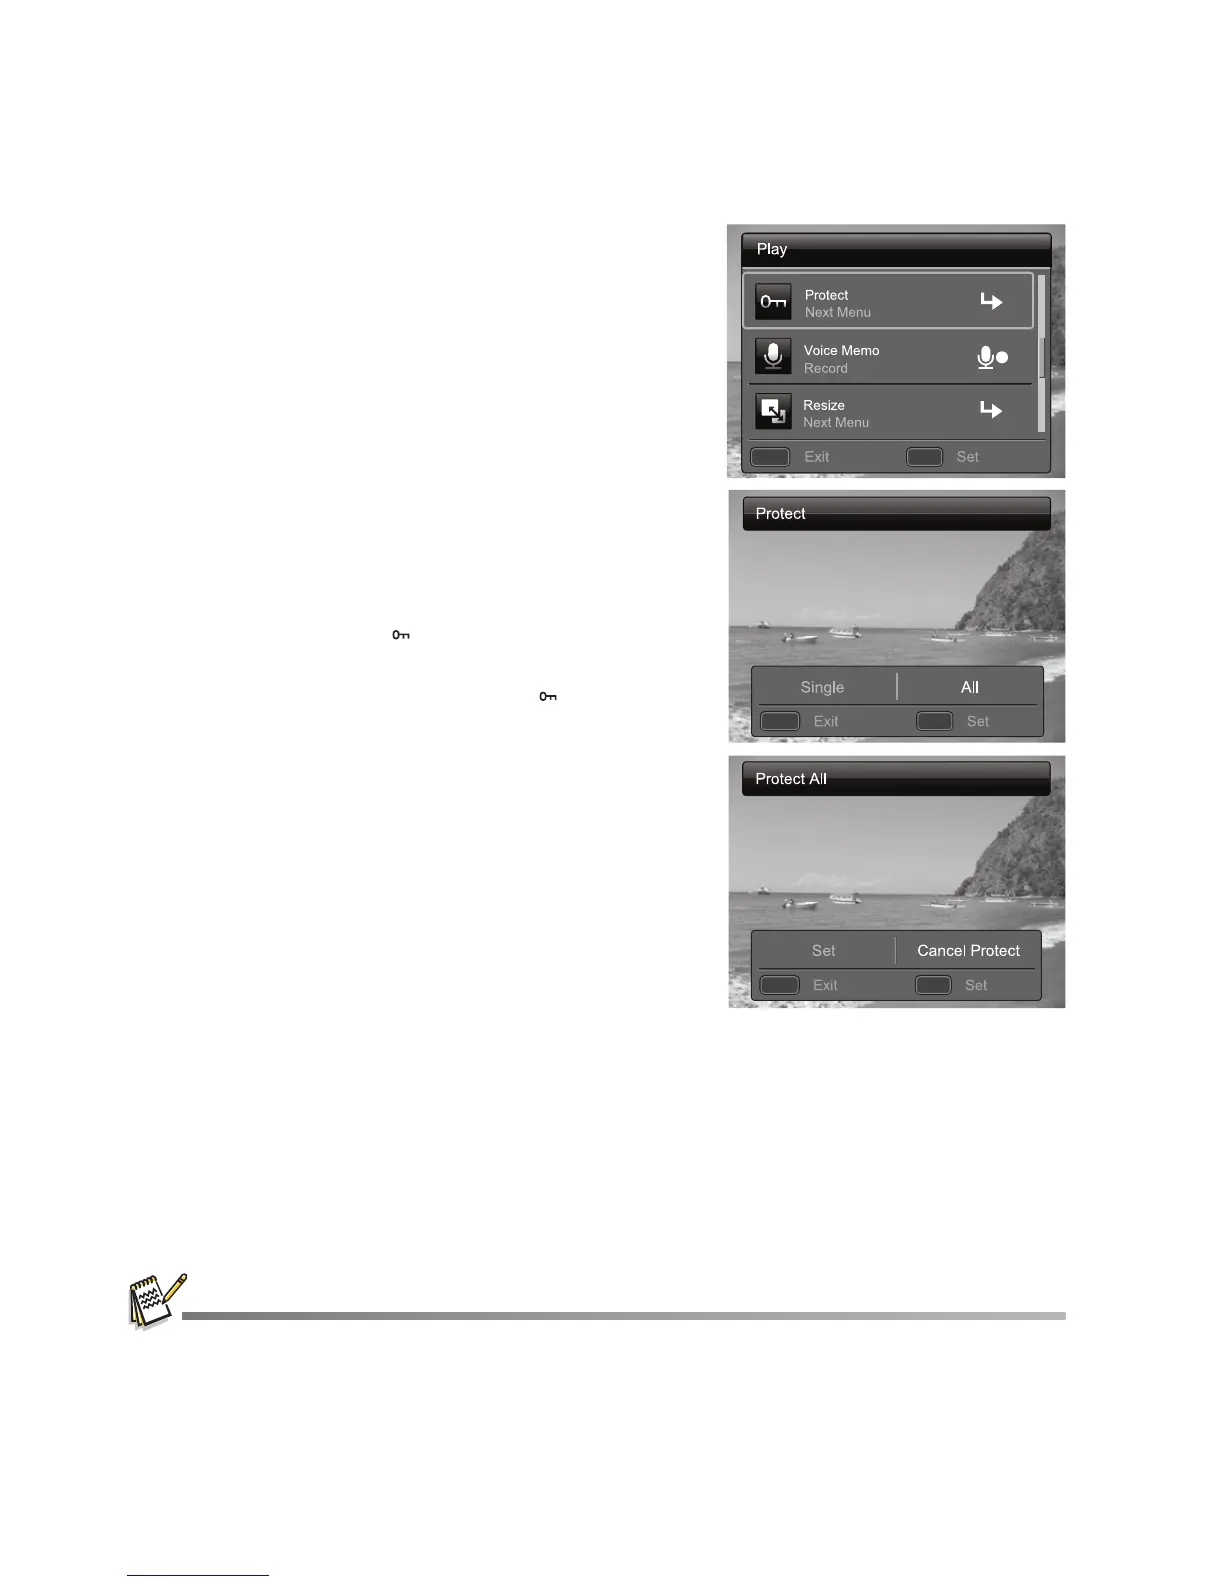
Protecting Images
Set the data to read-only to prevent images from being erased by mistake.
1. Press the 7 button.
The last image appears on the screen.
2. Select the image that you want to protect with the
e / f buttons.
3. Press the MENU button.
4. Select [Protect] with the c / d buttons, and press
the SET button.
5. Select [Single] or [Al ] with the e / f buttons, and
press SET button.
6. Select [Set] with the e / f buttons, and press the
SET button.
Protection is applied to the image and the
camera returns to the playback mode.
The protect icon [ ] is displayed with protected
images.
When [Al ] has been selected, [ ] is displayed
with all the images.
Canceling the Protection
To cancel protection for only one image, display the
image on which you want to remove the image
protection.
1. Press the 7 button.
The last image appears on the screen.
2. Select the image that you want to cancel protection
with the e / f buttons.
3. Press the MENU button.
4. Select [Protect] with the c / d buttons, and press the SET button.
5. Select [Single] or [All] with the e / f buttons, and press the SET button.
6. Select [Cancel Protect] with the e / f buttons, and press the SET button.
The removal of image protection is executed and the camera returns to the
playback mode.
Formatting an SD/SDHC memory card overrides protection, and erases all images regardless of
their protected status.
MENU SET
;;
MENU SET
;;
MENU SET
;;