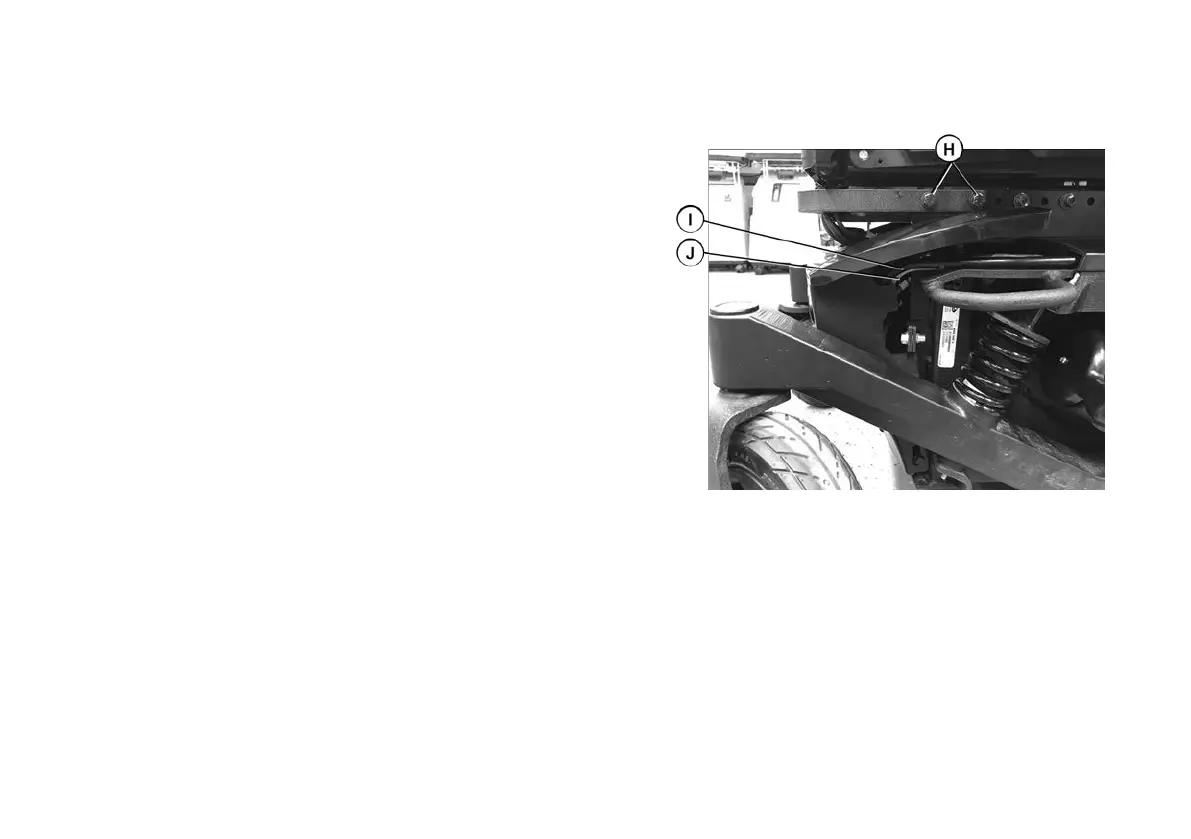
5. If lights are present, disconnect the front lights connector
E and the light power cable connector F from the rear
lighting harness G inside of the rear shroud.
Installing the Rear Shroud Assembly
1. If lights are present, connect the front lights connector E
and the light power cable connector F to the rear lighting
harness G inside of the rear shroud. Ensure they are
connected in the proper location, marked by the labels on
each cable.
2. Install the keyhole C in the bottom of the rear shroud
assembly A onto the pegs D on the battery box B, one
side at a time.
3. Rotate the top of the rear shroud assembly forward under
bumper screws H, if present. Route the cables:
Fig. 10-3 Installing the Rear Shroud Assembly - Routing the
lighting and motor cables
A. Route motor cables I and light cables J through the
top opening in both sides of the rear shroud.
B. Group other cables K and route through the front
right opening in the top shroud.
76 60101916-A
Invacare® AVIVA™ FX





 To Next Page