Page 34
• check that the tap lever (fig. 6, ref. 6) is in the "CLOSED" position;
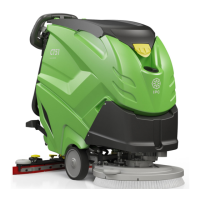
• via the opening at the front, fill the detergent tank (fig. 2, ref. 7) with a suitable
concentration of clean water and low-foam detergent. Leave at least 5 cm between the
surface of the liquid and the opening of the tank;
• mount the most suitable brushes, drive disks for the floor and work to be performed (see
paragraph 3.4);
• make sure the squeegee (fig. 2, ref. 6) is firmly attached and connected to the suction
hose (fig. 7, ref. 4). Make sure the back blade is not worn.
i INFORMATION
If you are using the machine for the first time, we recommend trying it on a large
obstacle-free surface first to acquire the necessary familiarity.
Always empty the dirty water drum before filling the detergent tank again.
For effective cleaning and to extend the working life of the machine, follow a few simple
rules:
• prepare the work area by removing all possible obstacles;
• begin working from the furthermost point to avoid walking on the area you have just
cleaned;
• choose the straightest possible working routes;
• divide large floors into parallel rectangular sections.
If necessary, finish off by passing a mop or rag rapidly over parts inaccessible to the
scrubber drier.
6.7. Working
After setting up the machine, proceed as follows:
• move the tap lever (fig. 6, ref. 6) to the minimum detergent flow position. Unless a safety
solenoid valve is fitted, the detergent solution starts flowing to the brush;
• lower the squeegee by means of the corresponding lever (fig. 6, ref. 8);
• press the brush switch (fig. 6, ref. 3). If the machine is set to also operate using the ECS
system, select the most suitable operating mode (BRUSH-PAD mode with brush/abrasive
disk or "MICROFIBRE" model with microfibre disk) by holding the brush switch down for
at least 5 seconds, the suction motor starts up automatically;
• press the suction button (fig. 6, ref. 2) if you want to disable detergent suction;
• press the brush/drive lever (fig. 6, ref. 7);
• Models with electric drive: to move forwards or backwards, see paragraph 6.3.
• periodically check that the detergent is reaching the brushes and refill when it runs out.
When there is no longer sufficient water in the detergent tank, the level indicator lights up
(fig. 6, ref. 5). Stop and fill the tank;
• during work check the cleaning quality and adjust detergent flow by pressing the button
(fig. 6, ref. 18), LEDs come on to indicate the quantity of liquid delivered (fig. 6, ref. 20)
 Loading...