NOW AVAILABLE FROM AMBER TECHNOLOGY
November 2017
Setting up the iPort xPRESS
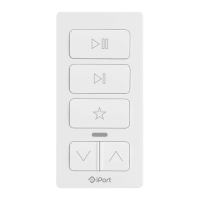
Audio Keypad
• Unbox the keypad & connect to any USB powersource. LED will be Red while charging
& turn Green once charged.
• Download the iPort Connect App from the App Store.
• Open the App to begin configuring the xPRESS keypad. Tap the + button & follow the
instructions.
• This will start the keypad broadcasting an adhoc wi-fi network which you will find &
connect to in “ Settings” under wi-fi.
• The SSID will be called xPRESS + some unique numbers. Select this network & then
return to the iPort Connect App. You are now connected to the keypad & can configure
it.
• Follow the instructions on the screen & put the keypad onto the preferred network ( &
the same network the Sonos gear to be controlled is on ).
• Continue to follow the instructions on the screen & connect the keypad to the Sonos
device you want to control. Each keypad can only control 1 x Sonos device. The keypad
will adopt the name of the Sonos component it is connected to. You can change the
name if you wanted to.
• You are configured.
• In the Sonos App , if you group additional zones to the zone the keypad is bound to the
keypad will control the entire groups volume.
• xPRESS comes with 2 types of wall mounts – peel & stick or Wall Plate adaptor.
You can also attach directly to a fridge or other metal object , the keypad will attract
magnetically & nothing else is required.
• Link to watch the set up: https://vimeo.com/213137546