21. RoonLabs setup
As a RoonLabs certified partner we have pre-generated sd card images for the Raspberry Pi and our
IQaudIO sound cards. To date the following devices are certified:
RASPBERRY PI3 and:
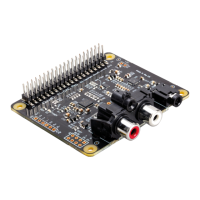
• Pi-DAC+
• Pi-DAC PRO
• Pi-DigiAMP+
• Pi-Digi+
Using one of these boards and the corresponding SD card image will create a Roon RAAT based
end-point from a Raspberry Pi. This is a headless device selectable and controllable from the Roon
Core software, just like any other Roon Labs certified device.
We recommend Ethernet connection for RoonLabs end-points as WiFi can be susceptible to noise
from DECT phones, microwaves etc. potentially causing the break up of audio playback. If you must
use WiFi then this needs to be specially configured - see below.
NOTE: Although this is a RaspberryPi, it is dedicated to Roon Labs integration and as such the
software running on the Pi has been “locked down”, removing the need or ability to log into the Pi
remotely or via connected keyboard.
Roon WiFi setup
As the RoonLabs end-point is headless, WiFi on Raspberry Pi needs to be configured through a text
file on the micro-sd card itself. There are various walk though examples for this - google is your
friend. One such write up is here: https://www.raspberrypi-spy.co.uk/2017/04/manually-setting-up-pi-
wifi-using-wpa_supplicant-conf/
In general configuring WiFi for a headless device follows these simple steps:
1) On a PC or Apple Mac, connect the RaspberryPi sd-card
2) Create a file called wpa_supplicant.conf in the sd-card’s boot partition
3) The contents of this file should be similar to below….
country=uk
update_config=1
ctrl_interface=/var/run/wpa_supplicant
network={
scan_ssid=1
ssid="MyNetworkSSID"
psk="MyNetworkPassword"
}
4) Make sure you use your country code (no quotes) and your WiFi network’s ssid (name) and
psk (password). Both name and password should be surrounded by quotation marks.
5) Save the file back to the sd card
6) Properly eject the sd card within Windows / Mac OS
7) Place the sd card back into the RaspberryPi and boot
8) Check that the Pi has been allocated an IP address from your home network’s router.
 Loading...