PAGE 9IRONKEY BASIC USER GUIDE
INITIALIZING YOUR IRONKEY ON A MAC
If you prefer to use a Mac, you can initialize your IronKey on a Mac OS X computer:
# Step Description
1 Plug the IronKey into your
computer’s USB port.
Your IronKey will run on Mac OS X (10.4+, Intel)
computers. It can also be set up and used on Windows and
Linux. To use the full speed of the IronKey, plug it into a
USB 2.0 port.
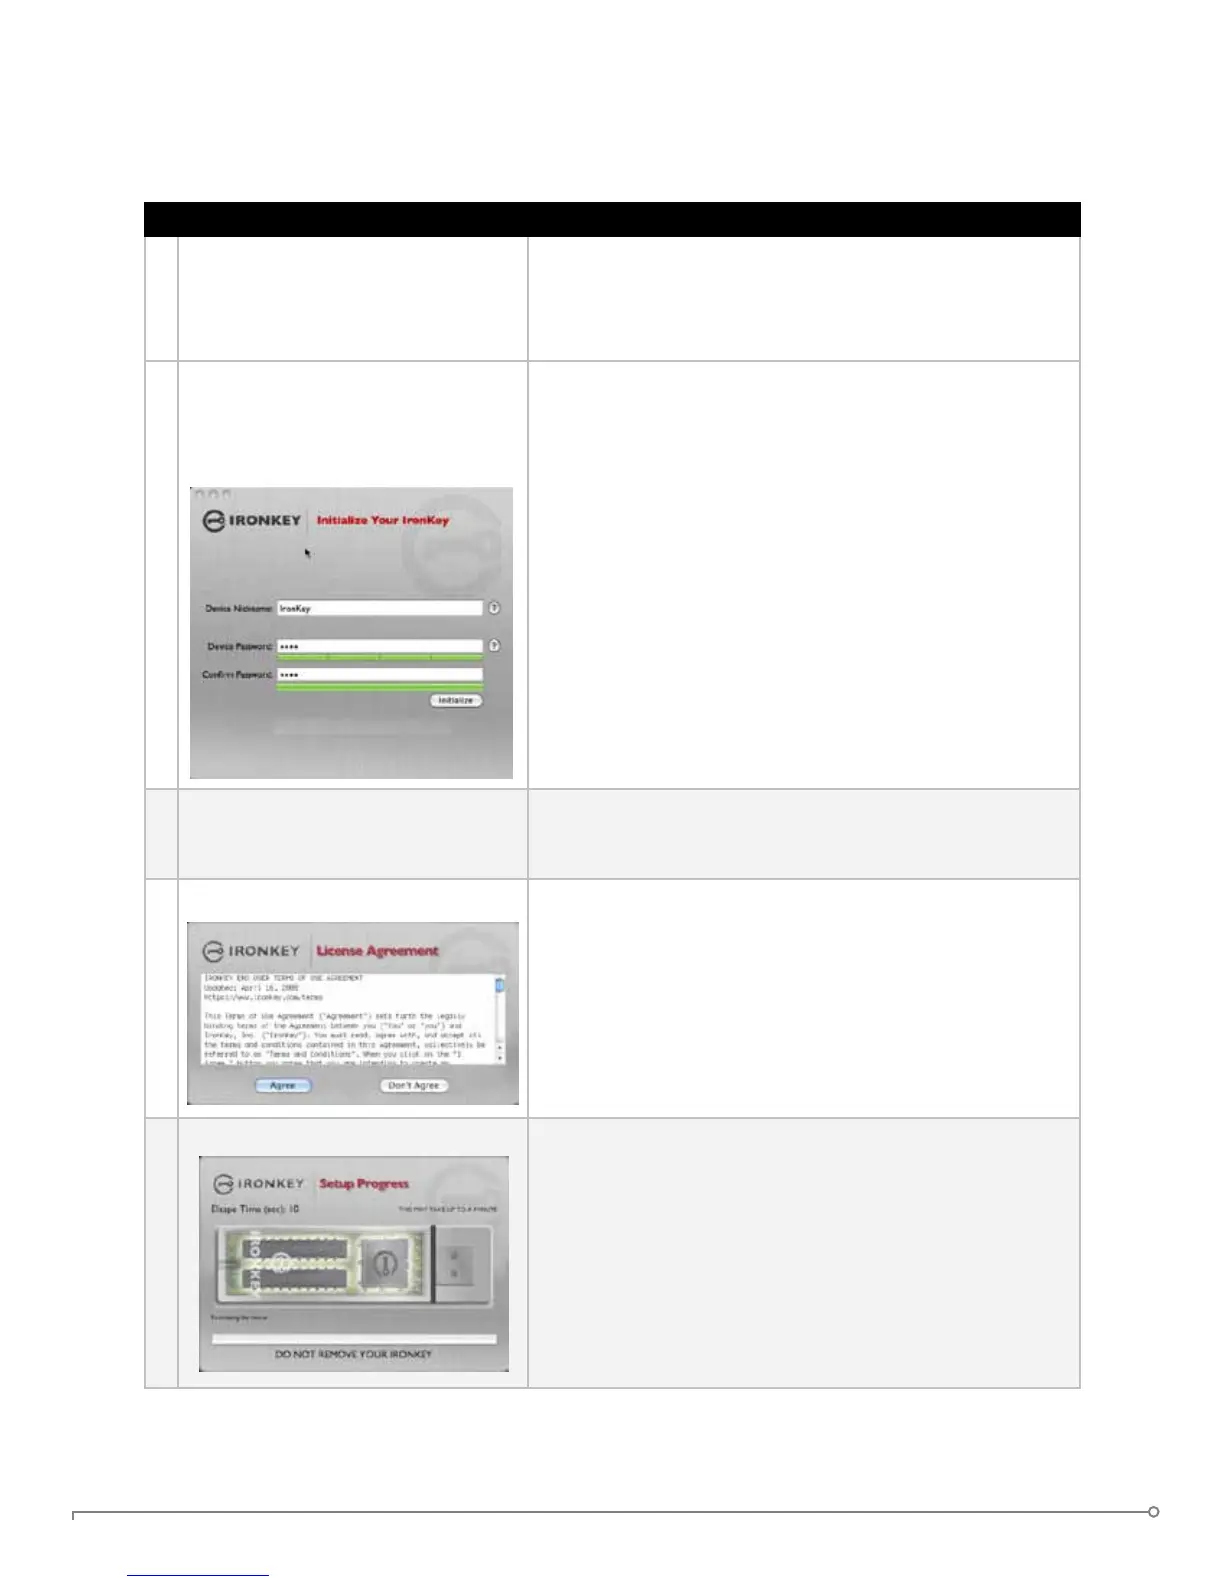
2 Double-click the IronKey drive on
your desktop, and double-click the
“IronKey” le. The “Initialize Your
IronKey” screen appears.
The IronKey has a virtual CD-ROM.
NOTE: You can install the IronKey Auto-Launch Assistant,
which automatically opens the IronKey Unlocker when you
plug in an IronKey. See “Preferences” in IronKey Control
Panel Settings. (Mac only)
3 Create your device password. Your password is case-sensitive and must be 4 or more
characters long. The threat of brute-force password attacks
is removed by IronKey’s self-destruct feature.
4 Agree to the License Agreement. The IronKey’s End-User License Agreement appears.
This can also be found online at:
https://www.ironkey.com/terms
5 The IronKey initializes. During this process, it generates the AES encryption key
and creates the le system for the secure volume.
This process might take a minute.
Your IronKey is now ready to use.