EasyManua.ls Logo

Irrigatia SOL-C12 User Manual

Irrigatia SOL-C12
3 pages
To Next Page IconTo Next Page
Page #1 background imageLoading...
Page #1 background image
Getting Started
The control unit requires 3 x AA rechargeable
batteries (NOT NORMALLY INCLUDED – please
check the box). To insert batteries
remove the lid carefully by removing
5 screws (taking care not to detach
the wire connecting it to the case).
Insert the batteries into the case
ensuring the + is in the correct
position, then replace the lid and screws.
Attaching the control unit
The CONTROL UNIT
should be fixed to a wall
or post facing in a sunny
direction. If your water
barrel is in a shady
position, the control
unit may be sited some
distance from the water barrel. It should be no more
than 2 metres higher than the bottom of the barrel
or more than 20m distant.
Connect to the water barrel
Drill a 5.5mm hole in the lid, or near
the top of the water barrel, above
the water line. Thread some tubing
through the hole and attach the filter
to it. Adjust the tubing so the filter
hangs about 10cm above the bottom
of the barrel. The other end of the
tube should be taken to the control
unit, cut cleanly to length and
attached to the pump inlet – the left
hand connector marked I.
The connections to
the pump should be
straight (to avoid
leakage) and should
not pull the control
unit out of vertical.
5mm of tube needs
pushing into the connector port to ensure a good
connection and avoid potentially serious problems.
You can easily measure, then mark 5mm with a
piece of tape.
Check the PUMP
In a new control unit the batteries may be charged
or flat. If they have charge in them, before
connecting to the irrigation system, using a piece of
tube connected to the outlet (marked O) discharging
back to the water barrel, allow the unit to run until
it stops.
Connect to the irrigation system
The control unit is designed to work with between
6 and 24 drippers. Using less than 6 may cause
damage. As you increase the number of drippers,
less water will be emitted by each one, additionally
there will be less back-pressure in the system so it
will become less tolerant of height differences. With
12 drippers in place height differences of 2m are
normally ok.
Switch on
Turn the knob to 3. Do
not worry if the pump
does not start it should
start itself after 3 hours
in good daylight. Please
note the unit will not run
in the dark. If after 24h
the pump has watered too much, turn in down, or if
too little turn it up. Repeat until you are happy.
If your pots/baskets drain a little after the afternoon
watering on a sunny day, this is about right for
most plants.
Monitoring
The timer on the control unit is zeroed by turning
the unit off and on again. In daylight the pump will
start automatically after a few seconds (if there
is sufficient battery charge) and thereafter at
roughly 3 hour intervals. The duration of pumping is
determined by how much light/sunshine has fallen
on the solar panel and the position of the control
knob since it last ran. Put a dripper in a jug to see
how much each dripper is delivering.
IMPORTANT – the batteries will NOT charge if
the control unit is turned off.
Irrigatia SOL-C12/24 installation and operation
5MM
T
h
e
w
e
a
t
h
e
r
r
e
s
p
o
n
s
i
v
e
S
M
A
R
T
i
r
r
i
g
a
t
i
o
n
c
o
n
t
r
o
l
l
e
r
Solar Automatic
Watering System
Irrigatia SOL-C12/24 installation and operation
Question and Answer IconNeed help?

Do you have a question about the Irrigatia SOL-C12 and is the answer not in the manual?

Irrigatia SOL-C12 Specifications

General IconGeneral
Number of Outlets12
Water Flow RateAdjustable
Watering Capacity12 drippers
Water SourceWater Butt or Container
BatteryRechargeable battery
Maximum Daily DeliveryUp to 12 litres
Watering DurationDependent on sunlight and pump settings
TypeAutomatic Solar-Powered Irrigation System

Summary

Irrigatia SOL-C12/24 Installation and Operation

Getting Started with Batteries

Instructions for inserting 3 x AA rechargeable batteries into the control unit.

Attaching the Control Unit

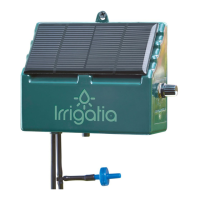
Guidance on positioning the control unit facing a sunny direction, not too high or distant from the water barrel.

Connecting to the Water Barrel

Steps to drill the water barrel lid and attach the filter and tubing to the pump inlet.

Checking the Pump Functionality

Procedure to test the pump's operation using a tube and discharging back to the barrel.

Connecting to the Irrigation System

Information on system capacity (6-24 drippers) and tolerance to height differences.

Operating the Control Unit

Instructions for switching on the unit and adjusting water flow based on plant needs.

Monitoring System Performance

How to check pump intervals, duration, and dripper output for fine-tuning.

Pump Priming Procedure

Ensuring the pump primes correctly by managing air in the inlet line.

Control Unit Status Indicators

Explanation of LED signals for pump running, charge rate, low water, and night mode.

Maintenance and Battery Care

Advice on storing the unit in winter and replacing batteries every 1-2 years.

Laying Irrigation Tubes

Guidance on tube layout, dripper height, and capacity for different plant setups.

Installing Anti-Siphon Device

Steps to install an air release device to prevent siphoning when the source is higher than drippers.

Optional Hose Kit Installations

How to install optional seep-hose or micro-porous hose kits for wider watering coverage.

Water Level Sensor Installation

Instructions for attaching a sensor to detect low water levels and stop the pump.

Troubleshooting Pump Priming

Methods using a syringe to resolve pump issues like stuck valves or failure to prime.

System Capacity and Examples

SOL-C12 Capacity

Maximum capacity examples for the SOL-C12 model, such as 12x drippers or 12m hose.

SOL-C24 Capacity

Maximum capacity examples for the SOL-C24 model, such as 24x drippers or 24m hose.

Further Information

Details on where to find more information about Irrigatia products online.

Related product manuals