7-
CAUTION!
Never unscrew the screws of the rotating gobo as the ball bearing
will otherwise be opened!
3. Lamp
WARNING
Because of its high internal pressure, there might be a risk that the Discharge lamp
would explode during operation. The lamp emits intense UV radiation which is harmful
to the eyes and skin. The high luminance of the arc can cause severe damage to the
retina if looks directly at the lamp.
MSD 250W/ NSD 250/2 W
1. Always switch off the main supply and never
handle the lamp or luminaire when it is hot.
2. Do not touch the bulb with bare hands. If this
happens, clean the lamp with denatured
alcohol and wipe it with a lint free cloth
before installation.
3. The lamp generates UV radiation. Never
operate the lamp without appropriate shielding.
4. When burning, the lamp operates at high
pressure and there is a slight risk of arc tube rupture. The risk increases with age,
temperature and improper handling of the lamp. Do not use the lamp any longer than its
specified life.
5. Make sure the lamp is located in the center of the reflector for the best spot.
In case of replacement of the lamp or maintenance, do not open the
fixture within 15 minutes until the unit cools down after switching off.
20-
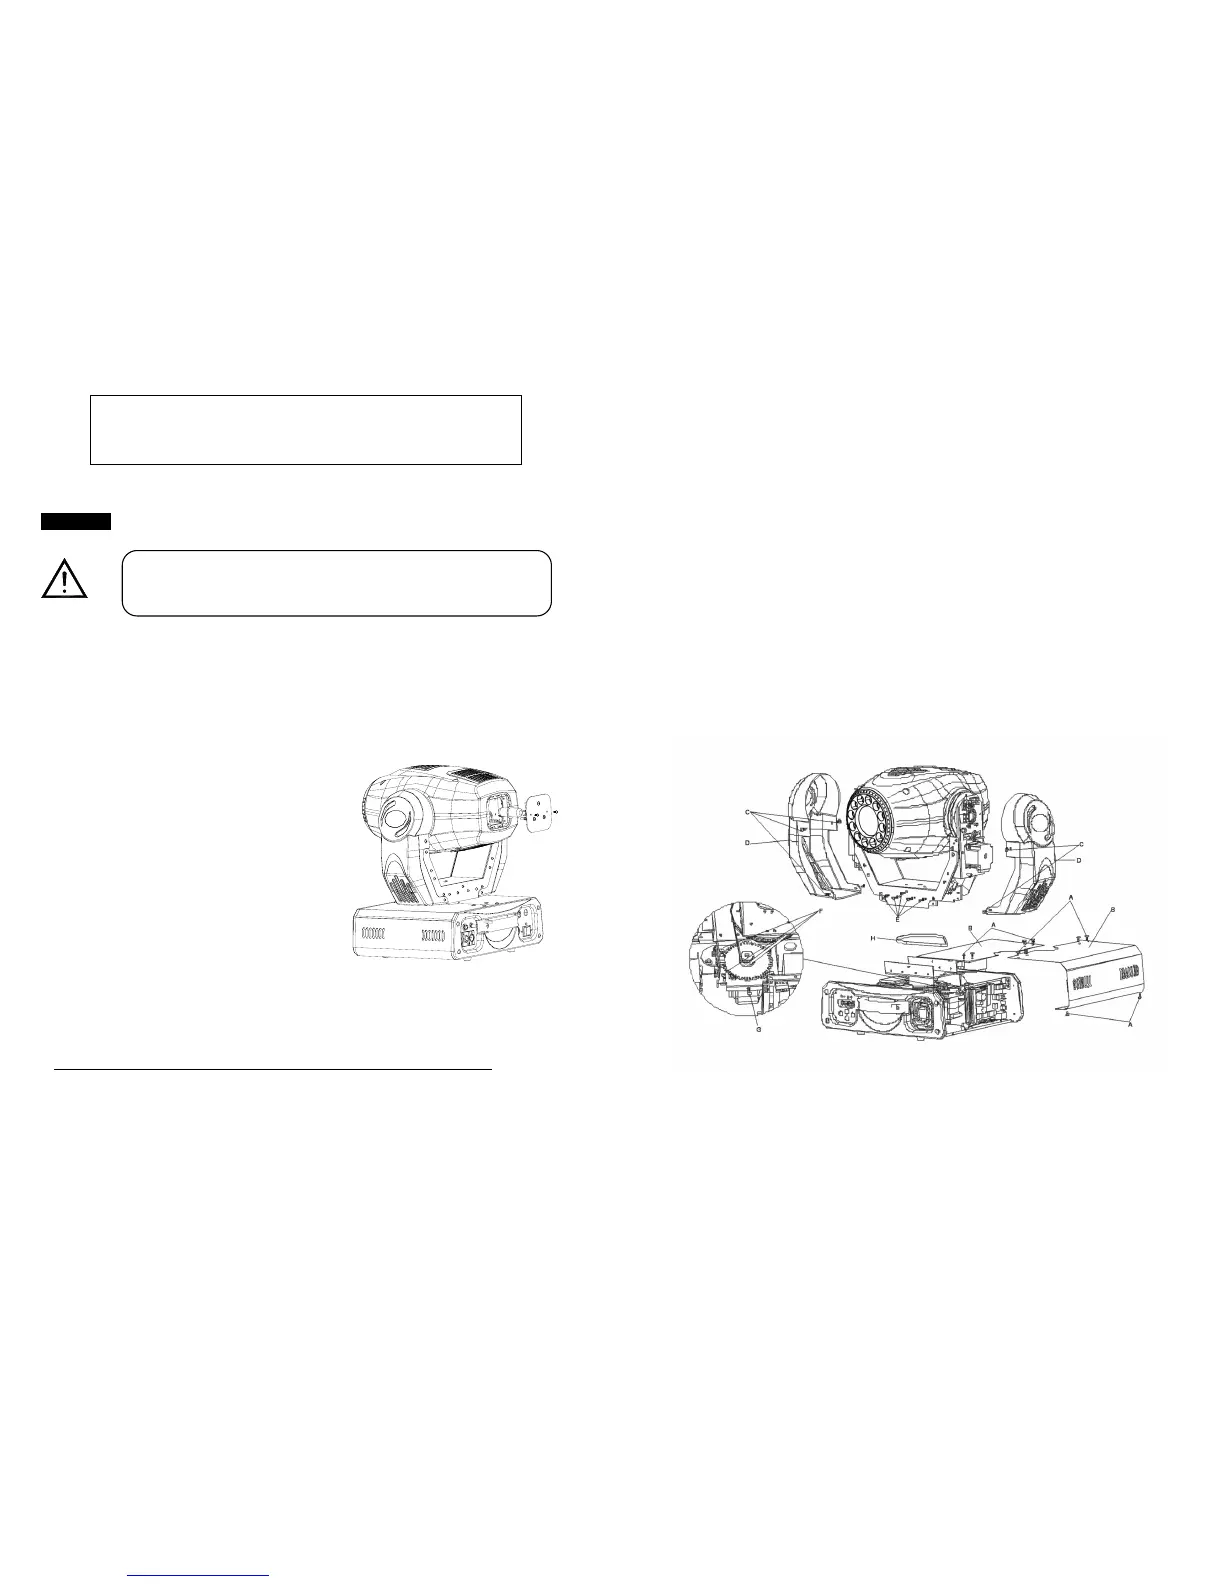
G. If The pan belt is broken
1. Turn off the main power.
2. Unscrew all the screws (A) and open the base-housing cover (B).
3. Unscrew all the screws (C) and open the arm cover (D).
4. Unplug all the connect wires that from the arm to the bottom.
5. Unscrew the screws (E) and remove the fixture head.
6. Loose the screws (F), then loose the screws (G).
7. Change a new belt (H) , put the belt around the axis gear and motor gear.
8. Screwed the screws (G), install the new belt and adjust the belt tension properly. Note: do
not fix belt too tight as it is easy to rupture.
9. Plug all the connect wires back that form the bottom to the arm.
10. Reverse the procedures from point 5 to point 2.