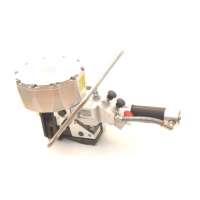
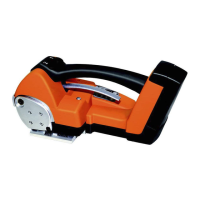
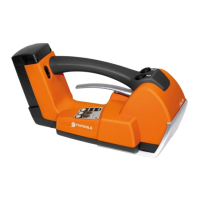
This document describes the ITATOOLS ITA42, a pneumatic steel strapping tool designed for sealing joints.
Function Description
The ITA42 is a pneumatic tool used for strapping packages with steel strap. Its primary function is to tension, cut, and seal steel strapping around a package using a seal joint. The process involves manually wrapping the strap around the package, inserting it into the tool, tensioning the strap to the desired force, cutting it, and then sealing the joint.
Important Technical Specifications
Dimensions:
- Length: 430 mm (16.9")
- Width: 260 mm (10.2")
- Height: 310 mm (12.2")
- Weight: 10.3 kgs (22.6 lbs)
Feed Required:
- Pressure range: 5.5-7 bar (78-99 psi)
- Air consumption: 12 L/s (25 cuft/min)
Performances:
- Max. Tension force: 15000 N at 6 bar (87 psi)
- Tensioning speed: 6 mt/m
- Sealing type: Seal double notch (double crimp seal)
- Joint strength: 75% of plastic strap strength (this seems to be a typo in the manual, as the tool is for steel strap, it should likely refer to steel strap strength)
Noise and Vibration:
- Level sound emission (Type A): 79 dB (A)
- Vibrations at handle: <2.5 ms²
Strap Compatibility (ITA42 models):
- ITA42-19mm - 9000N:
- Strap strength: R 850N/mm² to R 1100N/mm²
- Thickness: 0.6mm (0.024") to 1mm (0.039") or 0.63mm (0.025") to 0.8mm (0.031")
- ITA42-25mm - 15000N:
- Strap strength: R 850N/mm² to R 1100N/mm²
- Thickness: 0.6mm (0.024") to 1mm (0.039") or 0.63mm (0.025") to 0.8mm (0.031")
- ITA42-32mm - 15000N:
- Strap strength: R 850N/mm² to R 1100N/mm²
- Thickness: 0.6mm (0.024") to 1mm (0.039") or 0.63mm (0.025") to 0.8mm (0.031")
Usage Features
Operation Process:
- Strap Preparation: Manually wrap the steel strap around the package. Insert the strap into the seal, then loop it around the package and re-insert the strap bottom pass a second time into the seal, bending it (Pic.C1).
- Tool Opening and Loading: Connect the air supply to the tool; it will automatically open. Load the already prepared and aligned strap into the tool (Pic.C2).
- Tensioning: Press button 1 to close the tool and initiate tensioning. Hold until the desired tension is reached or the motor stalls (Pic.C3). The maximum strap tension can be adjusted by turning a screw on the pneumatic motor (Pic.A). Turning clockwise reduces force, while counter-clockwise increases it.
- Sealing and Cutting: Once tensioning is complete, press button 2 to close the seal, cut the strap, and open the tool (Pic.C4).
- Tool Removal: After the sealing and cutting cycle, remove the tool from the package (Pic.C5).
- Joint Inspection: Verify that the seal joint is correctly made and shows marked indentations (Pic.C6). This step is crucial for ensuring the efficiency of the closure.
- Emergency Stop: The tensioning process can be interrupted at any time by pressing the STOP button.
Adjustments:
- Tension Adjustment: The maximum strap tension is adjustable via a screw on the pneumatic motor (Pic.A).
- Feedwheel Gap Adjustment: The height of the feedwheel can be adjusted to change the pressure of its teeth on the strap. This involves unscrewing a locking screw (Pic.B1), then turning a regulation screw to achieve a gap of 0.1-0.2mm between the feedwheel and the counter-roller. Clockwise rotation decreases the height, while counter-clockwise increases it (Pic.B2). The locking screw must be tightened after adjustment.
Safety Instructions:
- Only trained personnel should operate the tool.
- Wear eye, face, and hand safety protectors during operation.
- Do not place fingers or body parts between the strap and package.
- Always use a proper safety strap cutter.
- Maintain a safe distance from the strap during cutting, holding the upper strap portion to ensure the lower part snaps away from the operator.
- Use edge protectors for sharp corners on packages.
- Never use bottled air or other gas sources; use clean, dry, and lightly lubricated compressed air within specified pressure limits.
- Disconnect air supply before any adjustments, repairs, or cleaning.
Maintenance Features
General Maintenance:
- Daily Checks: Inspect the tool daily for worn or damaged parts. Replace them promptly with original spare parts using qualified personnel.
- No Modifications: Never modify any part of the tool.
- Cleanliness: Keep the working area tidy and use the tool in stable and safe conditions.
- Air Supply: Ensure the air supply system includes a dryer unit and a filter-regulator-lubricator unit (Itatools code S100001) close to the tool. Regularly check the oil level in the lubricator (recommended oil type Synfilm32, Itatools code S200005).
- Air Connection: Connect the tool to the air line with a 1/4" quick connector and a minimum 8mm (3/8") internal diameter pipe, not exceeding 10m in length for flexible pipes between the regulator group and the tool. Ensure continuous air flow without pressure drops.
Troubleshooting:
- Insufficient Strap Tension:
- Check air pressure (min. 5.5 bar).
- Inspect the filter/lubricator group for damage or dirt.
- Check for a dirty or faulty pneumatic motor (contact service).
- Verify the motor power adjustment screw.
- Feedwheel Slides and Mills on Strap:
- Check if the feedwheel is dirty or damaged.
- Adjust the gap between the feedwheel and the pressure button (around 0.2mm).
- Strap Breaks or Seal Crushes/Deforms During Tensioning:
- Adjust motor power (excessive tension).
- Check if seal support points on the foot are damaged or worn.
- Verify strap and seal characteristics are appropriate for the tool and application.
- Tensioned Strap Bends Sideways:
- Adjust motor tension (excessive tension).
- Verify strap characteristics are appropriate for the tool.
- Air Leaks:
- Replace piston gaskets in the cylinder (contact service).
- Replace damaged valve gaskets or valve shafts (contact service).
- Incorrect Strap Cutting:
- Check air pressure (min. 5.5 bar).
- Verify strap characteristics are appropriate for the tool.
- Inspect for worn or damaged parts in the sealing group (perform maintenance, contact service).
- Slow Sealing/Cutting Phase with Air Leak:
- Probable wear of piston seals or internal air connection to the cylinder (contact service). Restore seals.
- Operation Buttons Locked / Difficulty Opening Tool:
- Probable deterioration or breakage of seals or valves (contact service). Restore seals.
Spare Parts:
The manual includes detailed exploded views and a comprehensive list of spare parts with their descriptions and quantities, indicating wearing parts and parts recommended to be stocked.
Warranty:
The tool comes with a 12-month warranty from the shipping date. The warranty covers defects due to poor manufacturing or faulty materials. It is void if the tool has been misused, improperly handled, modified, repaired with non-original parts, or if the serial number is missing. Wearing parts are excluded from the warranty.